Friday 28 September 2018

SparkleNSprinkle - Sunflower Cheer

Hello crafty friends!


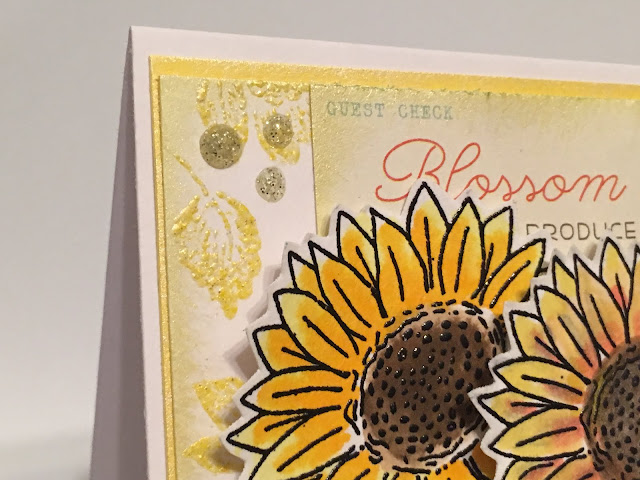
I have one more SparkleNSprinkle card to share with you this month - a bonus card!  I couldn't resist making a 4th reveal card featuring this adorable set - Sunflower Cheer!  It's a quick make - and so sunny!!! 

Here is my SNS Supply List:

Brocade Backgrounds Stamp Set 398

I stamped the Sunflower images with Versamark Ink onto Neenah cardstock, embossed with Black Detail Embossing Powder and used the Nuvo Marker Pens to color one of the flowers and Nuvo Aqua Flow Pens to color the other! I love how different the effects are. I fussy cut the images out and set aside to work on the rest of the card.


I stamped with background using Brocade Backgrounds Stamp Set. I used Versamark Ink and embossed with Firefly Embossing Powder. SOO pretty!  I edged the paper and all my pieces with Lemon Sorbet Embellishment Mousse. The "Hello" sentiment was stamped with Versamark Ink and heat embossed with Nautical Embossing Powder. Nuvo Sunkissed CopperGilding Flakes were added to my patterned paper using the Nuvo Medium Glue Pen. I randomly scribbled on the glue and let it dry. Ones the glue was dried and "tacky", I gently added on the Gilding Flakes.  I sprinkled on a bit of Super Thick White Embossing Powder to random spots and heat set from underneath.

The layers were attached with 1/4" Tear-ific Tape. Of course I had to use the Gold Coast Glitter drops in the corners :)


More photos of the final card:


I hope this sunflower card gave you some cheer today!  See you again next time!

 photo MHKDesigns_FreshByJess_Signature.png

Thursday 27 September 2018

Creative Knockouts Challenge #265

Hello crafty friends!

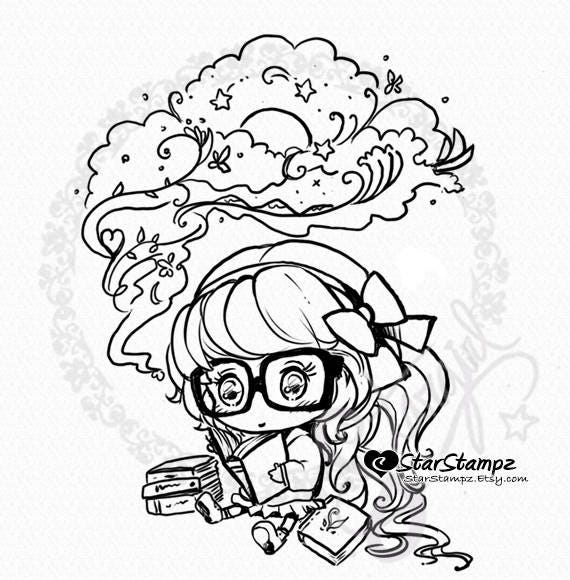
It's time for a new challenge over at Creative Knockouts Challenge #265!  Our theme this week is Anything Goes and our sponsor is Star Stampz.  I chose to work with a stamp set called "Journey Through A Book".  Too cute!

image 0


Here is what I created:


I hope to see you at the challenge! :)

Until next time,

Jess

Wednesday 26 September 2018

Cheapo Dies - September


Hello crafty people!


I'm so excited to pop on to share with you my first post for Cheapo Dies!

When you get a new package of craft supplies, do you ever have super hard decision on what to use first?  That's what happened to me when I got my dies! I decided to use the Spooky Cat Cameo Die!


Cheapo Dies - Spooky Cat Cameo

 Here is what I created for you:


I just love this die - you could use it for Halloween OR just for someone who loves cats!!! Perfect!

 If you're not familiar with Cheapo Dies, you are missing out!!!
Here's a listing of their store, blog & FB links to help you get familiar:


Thanks to all of you for stopping by today.  Can't wait to see you again soon!

Jess


 photo MHKDesigns_FreshByJess_Signature.png


Tuesday 25 September 2018

Atlantic Hearts Sketch Challenge #283

Hello crafty friends!

It's time for another great sketch from Atlantic Hearts Sketch Challenge #283!

Here it is:


The sketch was created by Michelle Stewart and digitized by Brandi Robinson


Here is what I created:


I dug into my hoarded stash of October Afternoon "Witch Hazel" line of goodies to make this fun card!


I hope you will come and play along with us!

See you next time!

Jess

 photo MHKDesigns_FreshByJess_Signature.png

Splitcoast Stampers Sketch Challenge #716

Hello friends!

It's time for this week's Splitcoast Stampers Card Sketch !  This is my last post for my 6 month guest designer term! I'm so grateful for the opportunity I had to work with these fun sketches!

Each week, there is a brand new sketch out to play along with - interpret it however you would like and play along. 

This week's sketch was designed by:  Alison Cope Israels


Here is what I created:


I hope you enjoy this card and will head on over to Splitcoast to play along! :)  You can pick up this super fun collection from Photo Play over at www.ninabrook.com (while supplies last - so HURRY!).

Have a great day!

Jess

 photo MHKDesigns_FreshByJess_Signature.png

Monday 24 September 2018

Cute N Craft Challenge #10 - Fall/Halloween

Hello friends!

I've joined the team over at Cute & Crafty Challenge!  I'm jumping in this week for Challenge #10!  It is a new Challenge blog and I hope you will play along! We are sponsored by My Besties this week and the winner will win 3 digi images!

I worked with this ADORABLE digi called: Lil Rosie

Here is what I created:


I printed off the digi and then watercolored her. A few fall accents were added for some interest and dimension.

I hope you will play along! :)

See ya soon!

 photo MHKDesigns_FreshByJess_Signature.png


Saturday 22 September 2018

Rinea Scrapbook Layout

Hello friends!


I have one more project for Rinea to share with you this month. Our partnership with Rita Barakat continues - and you will see I used that sweet little Fairy stamp again. I also had one of her stencils to play with! Now, I have to admit that stencils are completely out of my comfort zone, so I tried by best!!!  This is an 8x8 page.


For this project I used pieces from the Misfits Variety Pack (Crafters Pack 6x12).   I used the Glossy Sapphire Blue and the stencil! I took a pencil and traced the pattern through HARD enough to raise it up, then use sandpaper to rough it up. I actually re-applied the stencil and used some Nuvo Glitter Accents and a palette knife to apply the glitter through the stencil over top of the the distress stenciled image! Are you still with me? Basically, I stenciled it twice :) I layered it onto a piece of Starstruck Silver Foiled Paper and cut in half.


You can see where I adhered the one half of this stencil portion - on the right hand side of my page!  What did I do with the other half? Simple - die cut little flowers!  You can see those scattered across the center of the page. I used the Emerald Starstruck Foiled Paper to mat my 4x4 photos.

See in the background? I actually used the Rita Barakat Fairy Girl stamp again - this time as a mask and stamp!  To do that - I simply laid the stamp with the actual rubber part upwards (think opposite of regular stamping) and sprayed with a glimmer spray a few times. Now I created a masked area under the stamp - and inked up my stamp at the same time!  While it was still wet, I quickly turned over the stamp and stamped with inked up stamp!  I thought it turned out super cute!


A few more Glitter Accents were used with my flower trail. All the flowers were built and adhered with Glue Dots (perfect for fussy work!).

There you have it - a cute summer time page!

The supplies I used for this page:
- Blue, Green & White Cardstock
- Glue Dots
- adhesive tape
- patterned paper of choice
- glimmer spray (mine was Heidi Swapp)
- Nuvo Crystal Drops - White
- Nuvo Glitter Accents - Fresh Snowfall

I hope you will make time this fall to scrap your summer memories. 

See you soon!


 photo MHKDesigns_FreshByJess_Signature.png

Friday 21 September 2018

SparkleNSprinkle - Spring Chickens

Happy Friday!


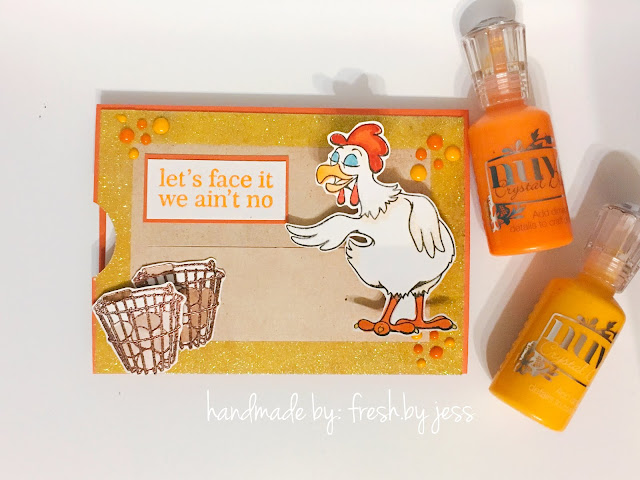
It's time for another fabulous SparkleNSprinkle release - this one is called "Spring Chickens".  It is just full of fun sentiments perfect for making funny cards!  This is another fun slider card too :)  You will remember the instructions from my previous post HERE.

Here is my complete SNS Supply List:


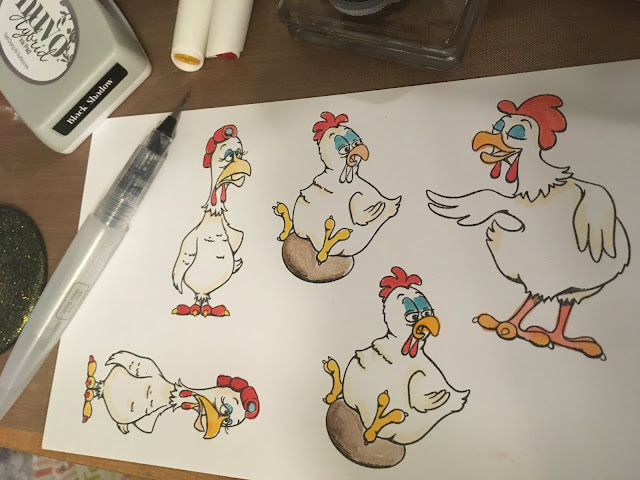
Ok!  So I started by stamped my Spring Chickens onto white Neenah Cardstock and then colored them using my Nuvo Marker Pens. I added a bit of texture to the body using the Snow White Flocking, which I adhered with the Nuvo Medium Glue Pen. Then I fussy cut out all the cute chickens!


I set those aside and built my slider card.

The sentiment was stamped with Versamark Ink and embossed with Tangy Tangerine Embossing Powder. I used a bit of orange cardstock as a mat and adhered the layers with 1/4" Tear-ific Tape. I felt the card needed something else - so I grabbed an older set called "Farm Fresh Cows" and stamped the egg baskets with Versamark Ink, heat embossing with Coffee Embossing Powder. I colored the eggs with my Nuvo Aqua Flow pens and again, fussy cut them out.


Around the border of the front of the card, I used 1/2" Tear-ific Tape and Butterscotch Glitter. The slider card was assembled and adhered with 1/4" Tear-ific Tape.


For the sentiment inside the card, I stamped with Versamark and embossed with Tangy Tangerine. Finally, Nuvo Crystal Drops in Ripened Pumpkin and English Mustard were added for a finishing touch (I love doing this!).


I can see myself using this stamp set for many cards! :)  See you next time!

 photo MHKDesigns_FreshByJess_Signature.png

Wednesday 19 September 2018

Feathered Wall Art

Hello friends!


I'm excited to share my final Southern Ridge Trading Company Design Team Project. It has been truly an honor to design for this amazing Canadian Company!  I've been blessed to be a member of the team, and I will truly miss it - BUT, I will keep on using these amazing chipboard pieces in my art and I can't wait to see what the next group of talented designers showcases!!

I used the following Southern Ridge Trading Company products on this project:

Tribal Feather Mix


So, I wanted to really think outside the box this time - do something NOT even PAPERCRAFT!  GASP!!!  I call it  "Feathered Wall Art" because it's truly not a dreamcatcher. PLUS, it's a fabulous project to use up all those bits and pieces of scrap ribbon and trims we all have kicking around the craft space!!  This is a really simple project.  Let's get crafting!

First, I covered an 8" Brass Dreamcatcher ring with a burlap ribbon. I used some Tear-ific Tape to keep it nice and adhered.


Next, I decorated my feathers!  I used my Nuvo Embellishment Mousses in Fresh Copper, Aquamarine, Toasted Almond and Coastal Surf. I just used a sponge to color both sides. I added a bit of Nuvo Glimmer Paste in Moonstone to one of the feathers as well, using a palette knife to apply.  I tried to use a stencil, but it really didn't leave an effect, so I didn't really include that in my instructions.


The ribbon trims were all tied onto the bottom of the dreamcatcher ring.  I used some embroidery floss to tie my feathers on and accented with some copper leaves, beads and wire.


Here are the supplies I used:

Tribal Feather Mix Chipboard
- Nuvo Embellishment Mousse Toasted Almond, Fresh Copper, Aquamarine, Coastal Surf
- Nuvo Glimmer Paste in Moonstone
- palette knife
- sponge
- ribbon trim
- burlap trim
- sequin trim
- Tear-ific Tape
- 8" DreamCatcher ring
- embroidery floss
- miscellaneous wire trims


Thanks for stopping by!  See you again really soon with some more handmade inspiration!!


Jess


 photo MHKDesigns_FreshByJess_Signature.png

Scrapy Land Challenge #98

Hello friends!


Welcome to Scrapy Land {Challenge #}!  I'm very excited to share my project with you.


This was a super fun card to make!  I started by making a cool background - you can see how I did it on my YouTube Channel HERE.  Next, I took some Tonic Studios Satin Black Cardstock and die cut it using Memory Box Pennington Rose Blossoms die and the "Congrats" was from Tonic Studios - but you could use the following dies:

Dee's Distinctively Dies - Congrats

Dee's Distinctivley Dies - Congrats

Memory Box Dies - Pennington Rose (simply cut off the stem)
Memory Box Dies - Pennington Rose

I adhered my die cut images using my mini Xyron machine.


Building the backgrounds :)


Die cut flowers all ready on the Xyron tape!


Basic black matted background to make the colors POP!

The theme is always ANYTHING GOES using any brand of die that Scrapy Land sells.  In addition, we have TWO WINNERS for each challenge.  One will be a random winner and the other is chosen by the Design Team.  Each winner will receive a generous $10 gift certificate to Scrapy Land.

Scrapy Land carries over 55 brands of dies, so chances are you have a few of the brands in your stash!  You can see all the brands carried under the Products category.

Please link back to this Scrapy Land Challenge and include the link to this challenge on your blog post.  It would also be extremely helpful if you would list the brands of dies used in your project.  (Sometimes we can't tell if an item is a die cut or chipboard.)

We can't wait to see what you create!  It can be any style you like from CAS to mixed media and everything in between.    Just be sure there's a die cut from a brand that Scrapy Land sells!


Good luck!

 photo MHKDesigns_FreshByJess_Signature.png