Saturday 31 March 2018

Papercraft Business Challenge #5

Welcome to our April 2018 Papercraft Business Challenge!


Our theme is Anything Goes (w/option: Birthday - for an extra entry to win the prize).
I'm sure you have something related to this season in your stash!

Here is what I created:


I was in a "work from my stash" mode - so this card is just a mish mash of supplies!  Sometimes you just need to go with the flow - and well, I really love how this turned out! I'm really digging the coral/green/foliage theme.  

I hope you will come and join us for this super fun new challenge!  Did you know that Papercraft Business also offers a FREE Blog Purpose Course?  It's perfect if you are just starting our or if you simply want to improve your Blog's purpose!

SIGN UP FOR THE FREE 5 DAY EMAIL CHALLENGE!

See you all next time!

Jess

Wednesday 28 March 2018

Creative Knockouts Challenge #239

Hello crafty friends!

It's time for a new challenge over at Creative Knockouts Challenge #239!  Our theme this week is "Outside Fun" and our sponsor is "The Paper Shelter".  I chose to work with this adorable stamp set called "Bath Time".

http://www.thepapershelter.com/index.php?main_page=

Bath Time! - Digital Stamp


Here is what I created:


I printed off the DIGI image (soooo pretty) and added bits of glitter, flocking and Crystal Drop bubbles!!  So much fun!!!


I hope to see you at the challenge! :)

Until next time,

Jess

Monday 26 March 2018

Atlantic Hearts Sketch Challenge #257

Hello friends!


It's time for another great sketch from Atlantic Hearts Sketch Challenge! Here it is:


Here is what I created:


I hope you will come and play along with us!

See you next time!

Jess

Friday 23 March 2018

Vintage Truck

Hello friends!


I'm here today to share my final March New Reveal card for SparkleNSprinkle!

Supply List:


Misc. Supplies:
Green Bakers Twine
White Cardstock
Brown Plaid Patterned Paper

Alright!  Let's get crafty!

First up, you can refer to my previous blog post, found HERE as to how I watercolored/created the truck image. :) 

In a nutshell:
1. Stamp image with Versamark Ink and heat emboss with Nautical Embossing Powder
2. Watercolor with the Nuvo Aqua Flow Watercolor Pens :)
3. Use Sea Breeze & Grey Mist Jewel Drops to create the windows of the truck (I painted them on)
4. Use Silver Lining Crystal Drops to create the "chrome" effects of the truck


To make my background, I first cut my card base out using the Tonic Studios Die called Sunray Venus Layering Basics Die Set.  I also cut out a piece of brown plaid patterned cardstock and sticker paper, using one of the nesting small shapes. To the exposed adhesive, I added some Gecko Glitter (soooo pretty!!!). I also added some hints of sparkle using Marine Blue Glitter to the flowers around the truck. I used the Nuvo Medium Glue Pen to adhere the glitter. 


For my sentiment, I cut out a small frame using the same die set (such versatility - everyone should stock up on all these essential dies!). I stamped the sentiment using Versamark Ink and embossed with Forest Green Embossing Powder. A matted background of sticker paper was added using Marine Blue Glitter.


Final step!  Let's adhere everything together and embellish!  Your 1/2" Tear-ific Tape will hold everything perfectly in place.  I did throw a couple pieces of the 1/4" on there too! LOL  I tied a few rounds of green bakers twine to add some other interest.


Finally, I added Glitter Drops in Sunlit Meadow to frame the final image. I just felt it needed a little more sparkle, you know? :D


I hope you enjoyed this card tutorial!  Make sure you head over to the SNS Blog to leave a comment AND leave a comment here to be eligible to win our monthly prize!!!

I have a little announcement to make here too - I am now the Design Team Coordinator for the SparkleNSprinkle Design Team!  Just wanted to share with you all!!!

See you in April for our next big reveal!! :)


Wednesday 21 March 2018

Scrapy Land Challenge #86

Hello friends!


Welcome to Scrapy Land {Challenge #86}!  I'm very excited to share my project with you.


I used the following dies to create this card:


 Neat & Tangled - Succulent Cover Plate

Memory Box - Dies - Plush Narrow Succulent

Memory Box - Plush Narrow Succulent


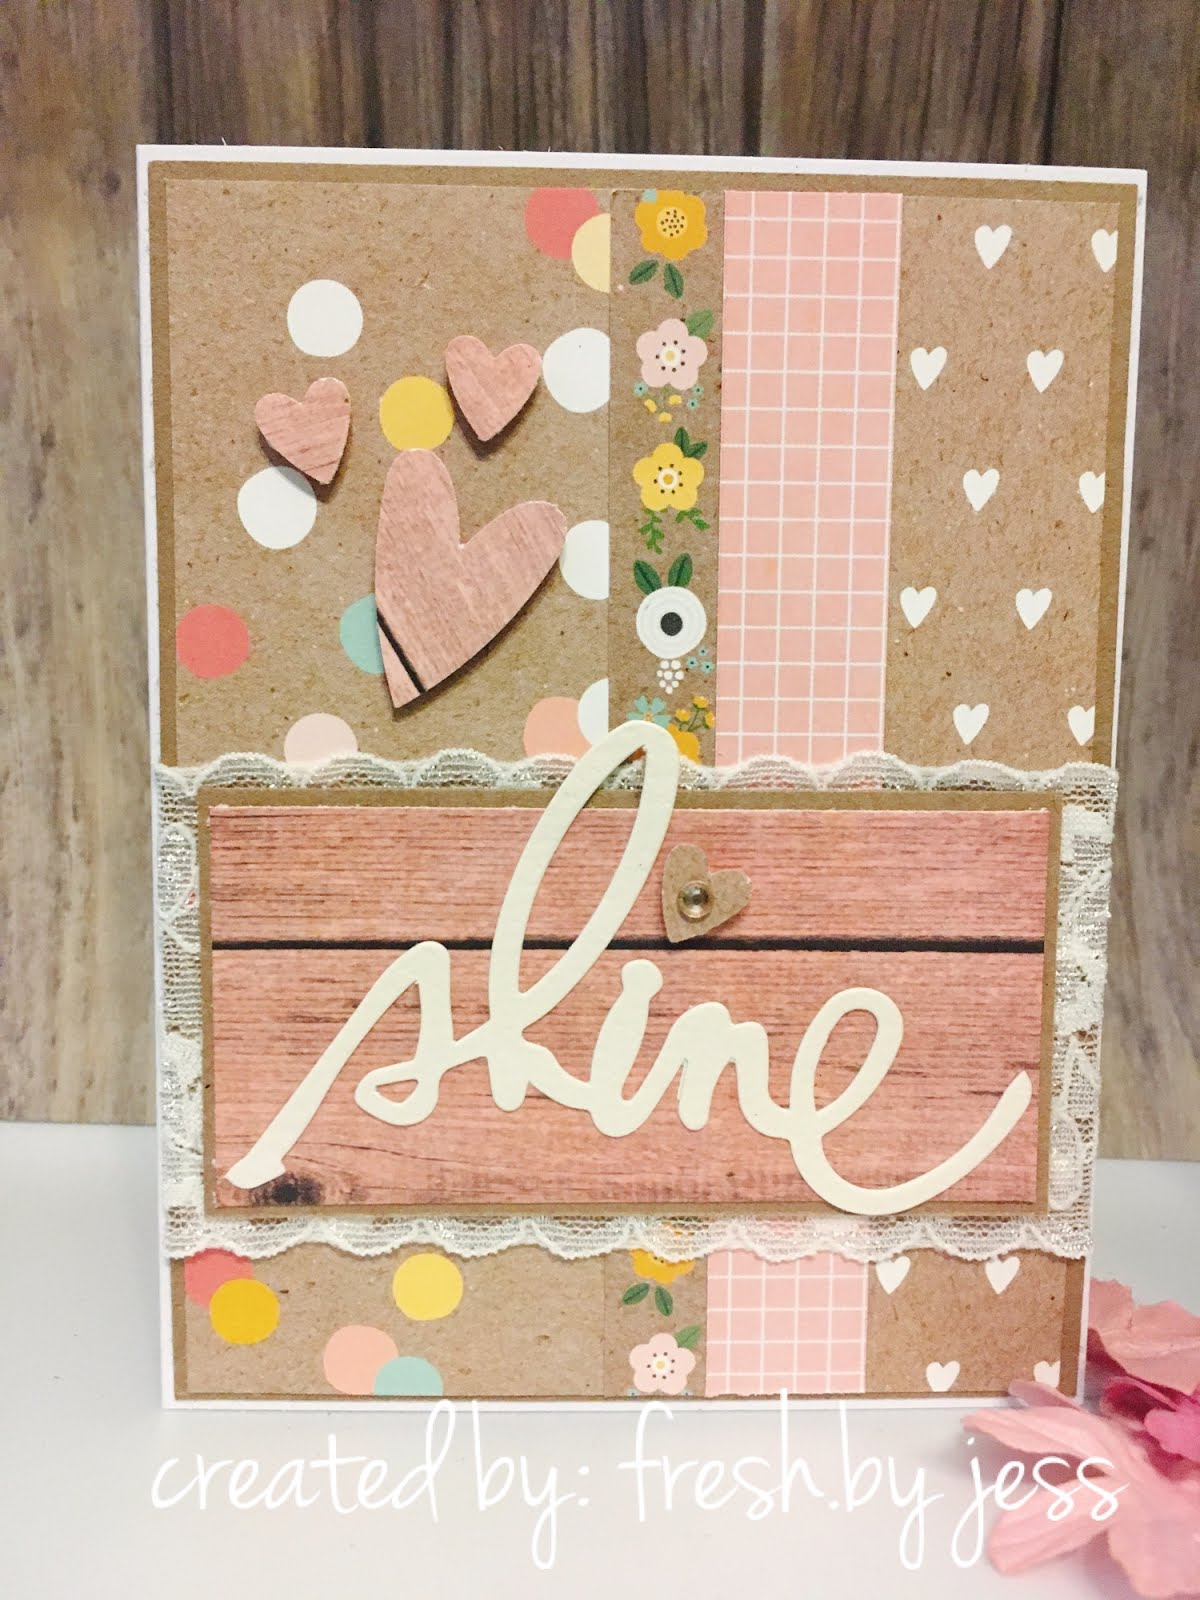
I used the Neat & Tangled Succulent Cover Plate to die cut a piece of Tonic Studios Brushed Mirror Cardstock and adhered it to a piece of silver glitter paper. SOOO pretty (and so hard to photograph! LOL)

Using the Memory Box Plush Narrow Succulent Die I cut some white felt then molded the pieces into what resembled a calla lily (I think so anyways!).  Side note - I have a soft spot for Calla Lilies as they were my wedding flowers. :)  I did use a hot glue gun to mold the shape.  The leaves came from the same Elizabeth Craft Designs Lilac 2 Die that I used last week. You can find a similar die HERE. I used it to cut out some green felt. :)  I can see this becoming a staple leaf die in my stash!

The rest of the card was fairly simple - a bit of lace, black cardstock, pink cardstock and adhesive! :)

A little about the challenge:

The theme is always ANYTHING GOES using any brand of die that Scrapy Land sells.  In addition, we have TWO WINNERS for each challenge.  One will be a random winner and the other is chosen by the Design Team.  Each winner will receive a generous $10 gift certificate to Scrapy Land.

Scrapy Land carries over 55 brands of dies, so chances are you have a few of the brands in your stash!  You can see all the brands carried under the Products category.

Please link back to this Scrapy Land Challenge and include the link to this challenge on your blog post.  It would also be extremely helpful if you would list the brands of dies used in your project.  (Sometimes we can't tell if an item is a die cut or chipboard.)

We can't wait to see what you create!  It can be any style you like from CAS to mixed media and everything in between.    Just be sure there's a die cut from a brand that Scrapy Land sells!

Good luck!

See you soon,

Jess

Tuesday 20 March 2018

Stamprints Design Team!

Hello crafty friends!


I'm excited to announce that I joined the team at Stamprints! :)  She has such cute digital stamps!

Here is my first card featuring the  "Araucariastamp set.  This is what I created:


I printed out the digi twice, watercolored them separately, then fussy cut the inner layer of petals!  So pretty! :)  I added some Nuvo Drops to emulate water droplets and a glittered butterfly - because you can't beat glitter!

I hope you enjoy this card!

See you next time!

Jess

Monday 19 March 2018

Stick It Down - March

Hello friends!

Welcome to our March Challenge with Stick It Down!  As a member of the card team, I was excited to create with this month's sketch!  


Here is what I created:


I hope you will play along with us this month!  Good luck!

See you next time!
Jess

Friday 16 March 2018

SparkleNSprinkle - I Love Old Trucks

Hello friends!


I will share that this card looks very complicated, but I promise, it came together quite quickly.  Lots of Distress Ink was used as well :)  

First step, let's create the truck!  I stamped the truck image using Versamark Ink and embossed with Nautical Embossing Powder. I wanted to give more color and depth than just basic black. Next, I grabbed my sets of Nuvo Aqua Flow Pens and watercolored the image. I also "watercolored" the windows of the truck using the Grey Mist Crystal Drops!  Did you know that you can do that? Try it! :) I always use an acrylic block as my paint palette - not sure why, but it work awesome and cleans up perfectly.


Once the truck was finished coloring, I added shiny chrome details using the Silver Lining Crystal Drops. I love how precise you can get the lines!


Once everything was dry, I added Distress Ink in Antique Linen and Gathered Twigs to really age the paper. I did add a few hints of the Creamsicle Glitter to the flowers. 


Next came the real fun - cracked glass technique!  Simply cover your entire paper with Versamark Ink, then sprinkle on your Clear Detail Embossing Powder. Heat set and repeat the process 3 or 4 times. Place your paper in the freezer for about 5 minutes, then immediately "crack" the paper when you take it out!  I just wanted a subtle glass image, so I used the regular Clear Detail. If you wanted a more cracked glass look, simply try the Super Thick Clear Embossing Powder!  I did rub a bit more Distress Ink into the cracks to make them more pronounced. 


The rest of card came together quite quickly. I distressed some patterned paper with the Distress Ink and stamped the sentiment with Versamark Ink, embossing with the Forest Green Embossing Powder. I added a strip of the Patchwork Parchment Craft Perfect Paper and a 1/2" Tear-ific Tape Glitter Strip using the Mocha Glitter. I cut out some of the little "x" shapes of the paper and adhered it as an embellishment. Crystal Drops in Dark Walnut were added as a finishing touch!  I distressed the sentiment a bit too!  All the layers were attached with the 1/2" Tear-ific Tape (of course!). 


Make sure you head over the the SNS blog and leave a comment there as well to be entered for the prize!


Have a great day!


Jess


Thursday 15 March 2018

Ninabrook Cards - March 2018

Hello friends!


Welcome to my very FIRST post as a Dynamite Design Team Member at ninabrook.com! :)  I'm sooo excited to join their team and share my creations!

My first shipment of products contained some pretty GORGEOUS things - so I couldn't just stop at one card...I made a collection!  I was blessed to work with the Spring Fling Paper And Embellishment Bundle. Seriously - the Pebbles papers in this collection are simply stunning!  I also found some super cute Pleather Bows and a few die cut words in my collection. How fun!


  Vellum quotes

Dimensional stickers   Image 1

Alrighty....now that you got to see what I was able to play with, onto what I created! I really wanted these products to SHINE by themselves, so I challenged myself to create without adding much else! I did add some Kraft Cardstock, and of course Card Bases & Envelopes.


I did add some lace, gold shimmer trim and gold sequins to a few of the cards, but other than that - I really let the products shine for themselves! :)  I hope you enjoy these cards - I had a blast making them!  It's amazing how creative we can be when we let the products guide us! :)


If you have any questions at all on how I created these cards, please ask away! I love to help!


Enjoy the day - and pick up some cute Ninabrook products while you're at it!


See ya soon!


Jess