Showing posts with label Embossing Powder. Show all posts

Sunday, 2 August 2020

Heat Embossing with Rinea Foiled Paper

Hello friends!


I'm so excited to show you today how to Heat Emboss with your Rinea Foiled Paper!

I'm using our BRAND NEW color - Merlot/Gold Glossy - to show you this exciting technique!  Check out the video below:


Thanks for stopping by!  

Remember, you can save 10% on your Rinea order when you shop HERE. Thanks so much for stopping by today. I hope you are inspired to use your Rinea Foiled Paper to create something fun.

Jess

Thursday, 24 October 2019

Creative Knockouts Challenge #321

Hello crafty friends!

It's time for a new challenge over at Creative Knockouts Challenge!!

Our theme this week is "Embossing Delights" and our sponsor is the always FABULOUS Fabrika Fantasy!   I chose to work with a stamp set called "Betta Fish Crowntail".  My daughters just picked out some Betta fish of their own so it was perfect timing :) Check out the stamp:


Here is what I created:


I did use the pre-colored digi version - but I superimposed it over the uncolored version with the bubbles!  I used a Versamark Pen to add my embossing powder to the bubbles and some to the fish itself.  I also used a dry embossing folder for the background. SO you can add Embossing with digis!!! :)  The sentiment was also heat embossed.


I hope to see you at the challenge! Good luck!

Until next time,

Jess

Monday, 13 May 2019

Joy Clair Blog Hop - Everyday Occasions

Hello crafty friends!


Joy Clair New Release month continues!!! 

Welcome to our blog hop!  You should have made it here from  Karen's blog.  

 I'm always looking for masculine stamps...and this Tools Background stamp PERFECTLY fits the bill!  I just love it!  I love background stamps too - one sold stamp and it creates a great background.


I used a basic Bazzill purple cardstock background for this card.  The tools were heat embossed.

Your next stop along the way is Ceal and you can find her blog HERE.

Don't forget to leave comments along the way!  We love to read then and you could win some awesome prizes too!

Thanks for stopping by!

Here is the full hop list:

Jessica Kaiser - you are here!

See you tomorrow for part 2 of our hop.

Jess

Thursday, 31 January 2019

Creative Knockouts Challenge #283

Hello!

Wow! It's the end of January already! How did that happen? I can't believe February is just around the corner. Time flies when you are having fun, right?

Today's post is for Creative Knockouts Challenge #283. You will have so much fun at our Challenge Blog!  There is always a fun thing and even more fabulous sponsors.  Our theme this week is "Flower Power"  and our Prize sponsor is Di's Digis .  

https://www.disdigistamps.com/

We were free to work with whatever stamps we wanted, so I grabbed a brand new release from Joy Clair Stamps called "Martha's Flowers". It's a beautiful & large stamp set that you will definitely want to add to your collection. 

Here is what I created:


I did some embossing with the main flower image using a pearl white embossing powder, then did some random ink smooshing to create the card panel. Some Super Thick Embossing Powder was sprinkled on to add some texture. 

I hope to see you at the challenge! :)

Until next time,

Jess

Sunday, 13 January 2019

Rose Heart with SparkleNSprinkle

Hello crafty friends!
It's time for a January New Release from SparkleNSprinkle!  I am featuring the Rose Heart Rubber Stamp Set!  It's a gorgeous stamp that you can layer with and do two-step stamping.  It's a really versatile set, and perfect for making those special Valentine's Cards! 

First, as always, my SNS Supply List:
-------> To create my background, I did random stamping on a piece of kraft cardstock using the heart stamps and Black Shadow Ink. I really wanted a random pattern.  For one of the hearts, I stamped the second layer with Versamark Ink and heat embossed with Copper Embossing Powder. The panel was cut to a 3.75x5 inch piece. This gave a nice focal point.
 
On a separate piece of cardstock I did the multi-layer stamping with light pink, dark pink and the Black Shadow Ink, then fussy cut out the heart. 
 
Now, I decided to have a bit of fun with my Embossing Powders!  I created my own "custom blend" using Rosa, Lana Pink and finely crushed up Sunkissed Copper Gilding Flakes!! I always have a few empty jars on hand so I can put my "custom creations" in them.  You can also purchase them HERE if you want to grab some for yourself!  I applied strips of 1/2" Tear-ific Tape around the outside edge of my cardbase, then removed the protective backing and sprinkled on my custom blended embossing powder. I made sure to heat set well. Then I added my kraft panel (with Tear-ific Tape of course!), popped up my fussy cut heart and stamped a sentiment using Versamark Ink. I heat embossed the sentiment with Rosa Embossing Powder and adhered it with foam squares. 
 
Embellishments were some simple gold/white twine from my stash along with some of the HAI Supply Flower Cup Sequins (which were adhered with Nuvo Deluxe Adhesive). 
Want to save 10% on your next SNS Purchase? Use code JessDT10 at checkout!  
See you next week!
Jess

Friday, 28 December 2018

What's Mew?

Hi there!

I have a super sweet handmade card to share with you today for SparkleNSprinkle!  First up, here is my complete SNS Supply List.

Supply List

Let's get crafting!

Step 1 - Stamp & Color Your Focal Images

I stamped the kitty onto a piece of white cardstock and colored with the Nuvo Watercolor Pencils. I wanted to add a little texture to the kitty, so I added some Dark Chocolate Flocking to his tail using the Medium Nuvo Glue Pen.
  

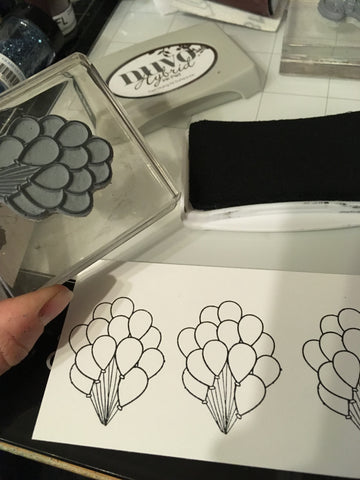
To make my balloons - I actually "doctored up" my rubber stamp by cutting the balloons from the kitty! This way, I can use them together OR separately! I stamped the balloons 3 times, then colored with my Aqua Flow Pens. Once it was all dry, I fussy cut out the kitty and the balloons. 

Step 2 - Create the Background

For the background, I die cut some of the Hailstorm Craft Perfect Paper using a layered die set. I wanted some sparkle around it, so I used the next size up to die cut a piece of sticker paper, then sprinkled on the Priceless Peacock Glitter, burnishing well with my finger tool.  I adhered the layers together using 1/4" Tear-ific Tape. 

Step 3 - Assemble & Embellish

I chose a fun, retro patterned paper for my background, then added my layers. I stamped my sentiment with Versamark ink and embossed with Madagascar Green Embossing Powder, To some of the balloons I added some of the Morning Dew Crystal Drops to make them shiny and add some unexpected texture.

Some of the Caramel Cream Crystal Drops were added to embellish. I tied a bit gold string from the balloons to the kitty! 
I hope you enjoyed this fun kitty card - I can't wait to share with you all the SNS goodness in 2019!
Jess

Friday, 7 December 2018

Big Birthday Wish

Hello crafty friends!


I have a brand new SparkleNSprinkle December reveal card for you today! I decided to mash an old favorite with the new release - that fave is the Dahlia Rubber Stamp Set. I love the big, bold flowers with the beautiful scripted words in the new release "A Big Birthday Wish". I can see a whole bunch of handmade cards being created with this set.  The card I created for you today is a standard A2 (4.25"x5.5") card. 


Supply List:

Big Birthday Wish Rubber Stamp Set #931

Black Detail Embossing Powder EP171

Dahlia Rubber Stamp Set #500

Nuvo Aqua Flow Pens - Assorted Sets

Super Thick White Embossing Powder EP355

Versamark Ink VM001

Nuvo Crystal Drops - Copper Penny 654N

1/4" Tear-ific Tape SAT01

Bronze Rose Embossing Powder 335

I also used black and white cardstock from my stash.

Step 1 - Create the Background

The background was created using the same "ink smooshing" techniques in a few of my past posts, such as this one HERE.  Once I was happy with the colors, I trimmed down the cardstock to size and sprinkled on some Extra Thick White Embossing powder for texture (heat set from the under side). I used black cardstock to mat the background. 


Step 2 - Sentiment

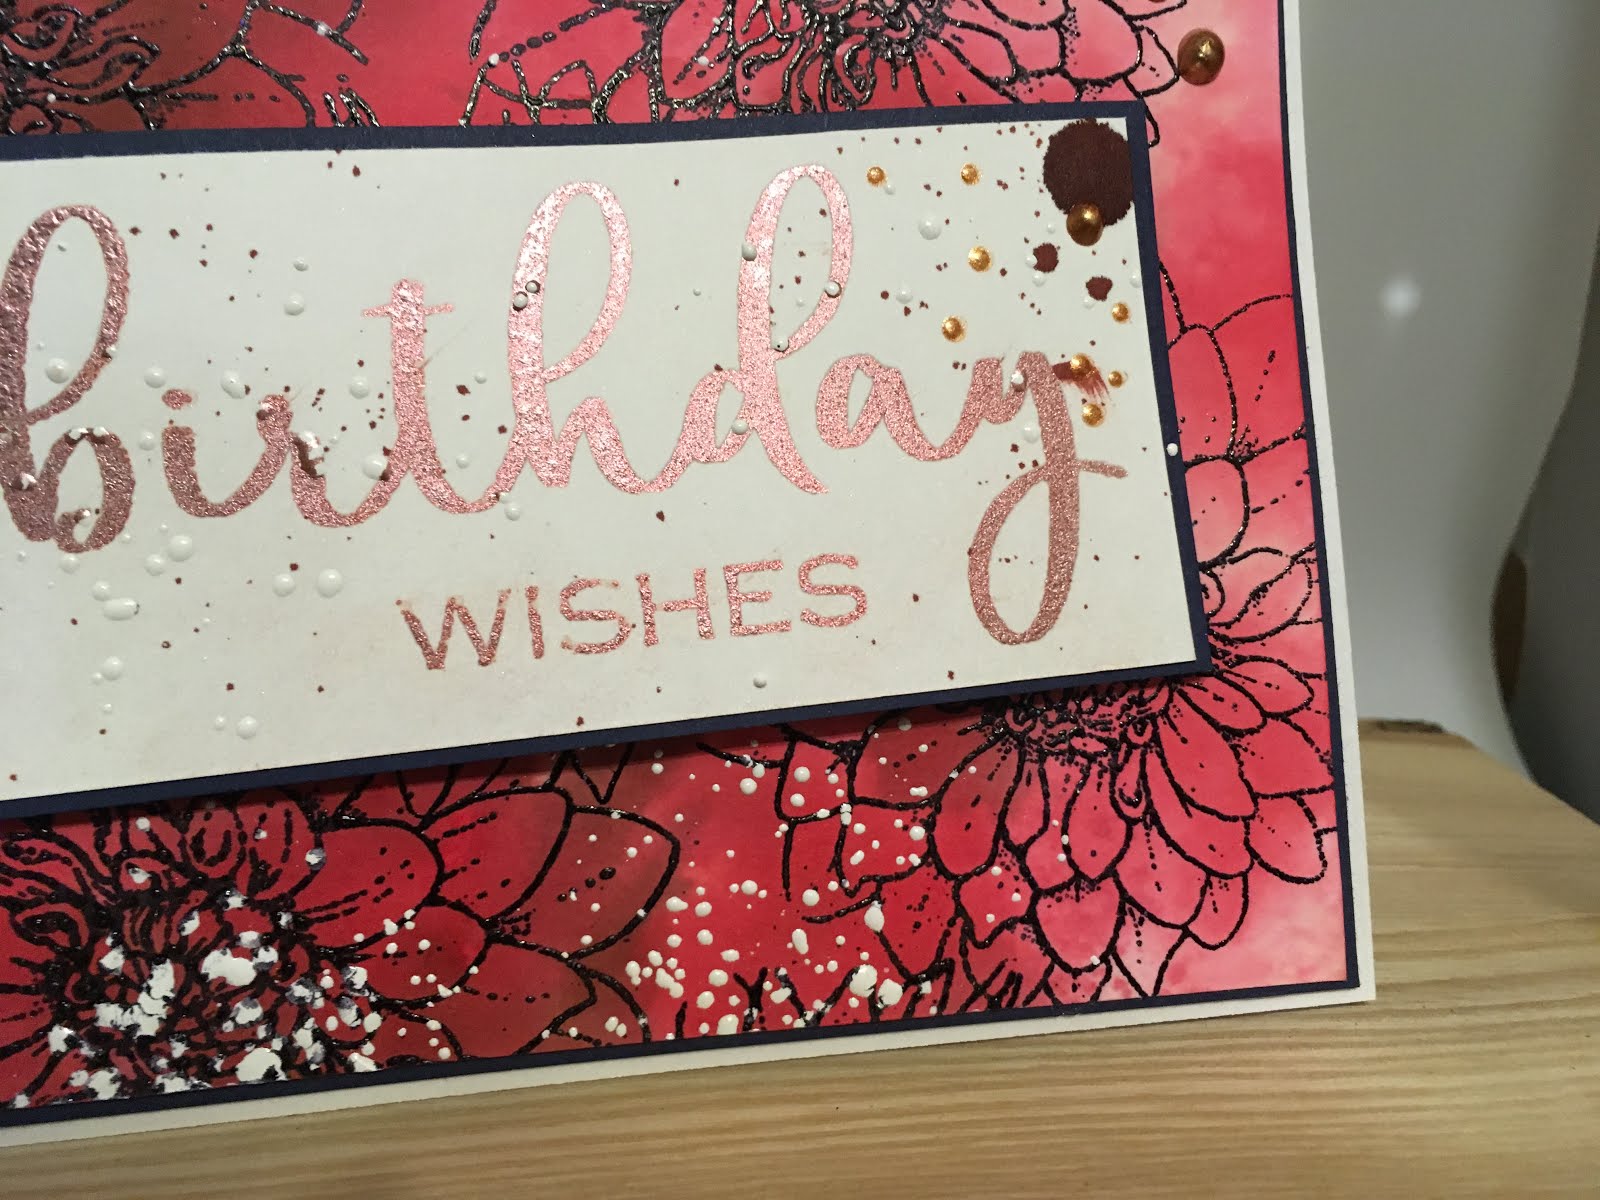
I used Versamark Ink to stamp the sentiment onto a piece of white cardstock and embossed with Bronze Rose Embossing Powder. I love the shimmer to this power - so pretty! It's a cosmic powder, so you can simply wipe any "halo" it leaves off with a swiffer cloth (or something similar). I used the same random sprinkling technique with the Super Thick White Embossing powder on this piece as well.  The sentiment as adhered to a piece of black cardstock with 1/4" Tear-ific Tape. 

I wanted to tie in the sentiment to the background a little bit, so I let a large drop of ink from the Aqua Flow Pen drip into the corner. I think this gave the handmade card an almost "gothic" feel!


 Step 3 - Put it Together and Embellish!

I adhered the sentiment to the card with the 1/4" Tear-ific Tape and added a few drops of Copper Penny Crystal Drops to embellish. I can never be without Crystal Drops on a card these days. I love them!
  

Such a bold card - I really loved how the background stood out on this handmade card. I'm so glad you stopped by today!  I really enjoy reading your comments - so feel free to say hello!  See you really soon.

Jess

Friday, 23 November 2018

SparkleNSprinkle - Koi Pond Beauty #2

Hello friends!


For my final SparkleNSprinkle November Release, I made a card using BOTH the new release stamps of "A Big Thanks" and the "Koi Pond Beauty". This follows a similar technique as my first card. 

Here is my SNS Supply List:

Step 1 - Create Your Background


You can follow the "smooshing" technique I did HERE. I also did the same technique for the floral portion. The Nuvo Aqua Flow Pens are going to become your best friend for this technique!


Step 2 - Stamp and Color Your Images


Once again I stamped using the Nuvo Hybrid Ink in Black Shadow.  I like to play surgeon with my stamps sometimes and cut them apart into two pieces. For the flower, you can see that I cut the "water" portion off. I can still use them together or separately - easy peasy!  I used the sentiment from "A Big Thanks". I inked it up with Versamark Ink and heat embossed with Madagascar Green Embossing Powder.

Around the edges of the background, I used the second flower to stamp in Versamark Ink and heat set with Clear Detail embossing powder. It added a little extra dimension to the background.


Step 3 - Build Your Scene!


I arranged the Koi,flowers and sentiment onto the card front. For the background, I added a border of 1/2"Tear-ific Tape and added Baby Blue Embossing Powder (heat setting). A few spashes of the Aqua Flow were sprinkled onto the card. 

Step 4 - Sentiment and Finishing Touches

I added "bubbles", using the Nuvo Crystal Drops in Morning Dew.  I also added some drops of Aquatic Mist Glitter Drops.  I added Luau Green Glitter to the flower as well. Everything needs a little sparkle ;)


I hope you enjoyed this card - and thanks for joining us for our November reveal month!

See you again soon!

 photo MHKDesigns_FreshByJess_Signature.png

Friday, 16 November 2018

SparkleNSprinkle - A Big Thanks

Hello crafty friends!


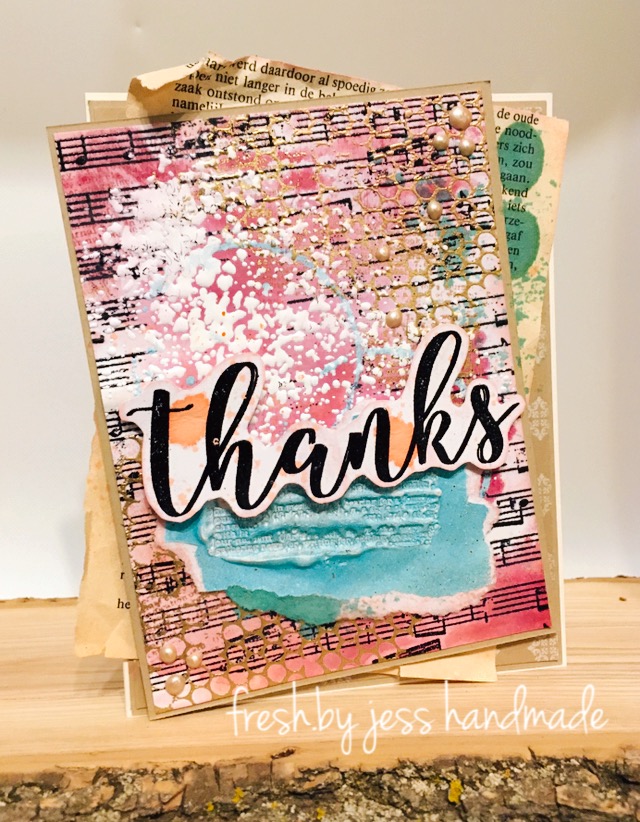
I really stepped out of my comfort zone on this card and did more of a mixed media feel! This is my second card for SparkleNSprinkle November Reveal!!  There are a lot of layers on this card along with tons of embossing powder and a couple extra stamp sets!  SOOO...let's get inky!

First up, here is my SNS Supply List:


Let's get crafting!


Step 1 - Layers of Embossing Powder and Creating the Background

So to start with, I stamped the Music Background stamp with Versamark Ink and heat embossed with Black Detail. I wanted it to be distressed, so I purposely didn't ink it evenly. 


 I continued on with my theme of "Ink Smooshing" and created the backgournd colors using Nuvo Aqua Flow Pens, my Tonic Glass Mat and some water spritzes! I just love all the different backgrounds you can create with this technique!


Step 2 - Add More Embossing Powder and STAMP 

The next few steps I used were fairly random (haha). I used the Journal Mixed Media stamp and Versamark Ink to add some random ink spots. I added both Gold Detail and Beach Cruiser Embossing Powders and heat set.


I just kept adding layers until it looked how I wanted!  I also grabbed the Nuvo Hybrid Diamond Inks and did direct to paper inking along with stamping randomly over the background.  Some Super Thick White Embossing Powder was sprinkled on and heat set from under the panel.  


I wanted a little something special, so I took a piece of white cardstock, inked up with Versamark Ink, sprinkled on Beach Cruiser Embossing Powder and heat set. I repeated this process in the same spot until I had about 4 layers of embossing powder. Working quickly, I used my Journal Mixed Media Stamp (which was inked up with Versamark) and stamped into the warm embossing powder, creating this really cool wax seal effect!  I distress it a bit and added it to my background.


Phew! That was a lot of background steps! (haha).

Step 3 - Sentiment and Put It Together

I stamped the sentiment with Versamark Ink and heat set with Black Detail Embossing Powder. I dripped a bit of Aqua Flow Ink onto it to distress, then fussy cut it out. I adhered it to my background with some Foam Squares.  I used a piece of patterned paper from the Kaisercraft Memory Lane Paperpack and added it to my card base background.


I had a piece of vintage German book paper in my stash, so I distressed it with the Hybrid Inks and Nuvo Aqua Flow Pens, then adhered to the card base with Tear-ific Tape. (oh how I took a ton of photos for this card! LOL)


All the layers were adhered with Tear-ific Tape and I added some Caramel Cream Crystal Drops to finish the card.


I had a ton of fun playing with Embossing Powders on this card - and stamps!!  Now go and have fun creating!

See you soon!

 photo MHKDesigns_FreshByJess_Signature.png