Friday 20 December 2019

Merry ChristMOOSE with Joy Clair

Hello friends!


I hope you have all your Christmas shopping and creating finished (or at least in full swing!). I know I'm a last minute shopper/prepper - so I'm still going strong! haha  

If you are like me and still need some inspiration to create those cards, I have one more cute card idea using the Merry ChristMOOSE stamp set from Joy Clair!  Take a peek at how CUTE this set is:


I started by stamping the moose onto a piece of white Neenah cardstock and coloring with my Nuvo Maker pens. He's just so darn cute!  Then I cut out the image leaving a bit of a white border. 


I had some Kaisercraft paper in my stash that was PERFECT with the pine trees, but still whimsical feeling along with some woodgrain paper, so I used that as my background.


Look how happy this guy is! LOVE it!  I used some really cool twines I had in my stash (thank you Dollar Tree!) and added the "Merry ChristMOOSE" sentiment, stamped in red.

Finally, I haven't played with Nuvo Crystal Drops in a while, so I added a few of those just to add a little sparkle. Every Christmas card needs some sparkle!!


Thanks for stopping by today!  I wish you a very MERRY CHRISTMAS with a happy, healthy and CREATIVE New Year!

xoxo

Jess

Monday 16 December 2019

Rinea Christmas Cracker

Hello crafty friends!
 

I have a cute new project to share with you for Rinea Foiled Paper!

I am showing you how to use your Cricut and Rinea Foiled Paper together to create a fun and easy Christmas Cracker!  For this project, you will need Ruby/Gold Glossy and Silver/Gold Glossy foiled papers, along with a light stick Cricut Mat, Cricut Design Studio and some glue! It's fun, simple and easy. You can fill them with whatever treats you want.  Here is my video to show you how:


I also sewed up these adorable cutlery pockets!


P.S: The cut file I used on Circut Design Studio, is called "Christmas Cracker" #M979E2.  Have fun creating them!  See ya soon!


Jess

Saturday 14 December 2019

Custom Family Christmas Cards with The Hedgehog Hollow

Hello friends!


I'm so excited to be back one more time with a quick video tutorial for The Hedgehog Hollow!  As soon as I saw the stamps I KNEW what kind of card I wanted to make - something clean, simple and QUICK for those last minute holiday cards!  How adorable is this Christmas card?  You are going to love making them - and I will show you how with my newest YouTube Video!

You will need your November Subscription Box, some scissors, black & red ink and a glue pen - that's about it!

Let's get crafting:


Here is one more close up photo of my card:


Thanks for stopping by today! I hope you will go out and create your own adorable "Custom Family" cards for the holiday season!

Thanks once again to The Hedgehog Hollow for inviting me to join the team this month. I had a lot of fun and I hope to do it again soon.

Have a great day!
xoxo

Jess

Tuesday 10 December 2019

Fall Family Football with Joy Clair

Hello friends!


I have a brand new card to share with you for Joy Clair stamps today!  Now, I've been making Christmas cards like crazy lately, so I took a little break away from sparkle and tinsel to create a super cute Football themed card!  

It is the end of our CFL Football season here in Canada now, and for anyone who follows the NFL - it's just getting amped up! So a football card seemed totally appropriate. I used the "Fall Family Football" stamp set to create this card. I love this set - it's a perfect fall/masculine/sporting themed set!  Great sentiments for all occasions - and you can modify it to apply to most sports too!


I stamped the football, helmet and sentiment stamps onto some white cardstock and colored with my Nuvo Markers, then cut them out.  I had some really adorable football themed paper from Echo Park in my stash, so I used the football field to make a backround and randomly stamped the goal posts, score play and some sentiments randomly on it to add some interest.


I really like how this card turned out!  It can be so hard to make a simple, yet interesting "masculine" or sports card with little embellishment. I mean, everyone likes SPARKLE, but not everyone wants to receive a football card decked out with rhinestones, right? hehe

Of course I had to make the helmet green in honor of my home province's beloved football team, the Saskatchewan Roughriders!  Go RIDERS!!! I'm sure you've been to a sporting event and have seen someone wearing a rider jersey. If not, I challenge you to look around next time - there is ALWAYS one!  It's a great game to play.

Thanks for stopping by today! I hope that you enjoyed my stories and this card. Be sure to grab your fave JOY CLAIR stamps today!  I promise, you will have so much fun using them!

See you again really soon!  Hugs!!

Jess

Sunday 8 December 2019

Snowman Selfies with The Hedgehog Hollow

Hello friends!


Guess what? I'm so excited to announce that I am a Guest Designer for The Hedgehog Hollow this month! They have such adorable things and I had a lot of fun playing with the November Subscription Box. The stamps were super adorable and I know I will use them time and time again.  

For my first creation, I wanted to created a cute "Polaroid Camera" scene using the Christmas characters. I chose the reindeer and the snowman - they wanted to make a selfie together! So that's what we did! 

I had a cute polaroid style die in my stash that worked perfect! I cut out some white cardstock and used the stencil from the subscription box to add dimension to the outside of the frame. I set it aside to dry and started on my cute images.


I stamped them onto a piece of white cardstock that was die cut from the center of my polaroid die. I wanted them "peeking" in, so I slightly offset them.  I used my Nuvo Marker Pens to color them images, and added a touch of the Sparkle Dust to Rudolph's Nose!  When I looked through the cute patterned papers that were included in the kit, this black and white polka dot paper stood out to me for the background because it kind of looked like a snow storm!  Of course, I had to grab my White & Ivory Seashell to make some texture dots on the "snowflakes" and the frame.


I had so much fun creating this adorable scene card! I hope you liked it too!

If you want to see more of what was included in my box, you can check out my unboxing video:


Thanks for watching and stopping by today!  I hope you enjoyed my card. I will have a video tutorial for you next week, so stay tuned!

Until then,
xoxo

Jess


Wednesday 4 December 2019

Creative Knockouts Challenge #347

Hello crafty friends!

It's time for a new challenge over at Creative Knockouts Challenge!!

Our theme this week is "Snow Much Fun" and our sponsor is Kelly- Independent CTMH consultant!  Our theme is Christmas Delight!


Here is what I created:


I had a lot of fun with these rustic prints!


I hope to see you at the challenge! Good luck!

Until next time,

Jess

Tuesday 3 December 2019

Atlantic Hearts Sketch Challenge #345

Hello crafty friends!

It's time for another inspiring sketch from Atlantic Hearts Sketch Challenge!

Here it is:


The sketch was created by Michelle Stewart and digitized by Brandi Robinson


Here is what I created:


I hope you will come and play along with us!

See you next time!

Jess

Monday 2 December 2019

Christmas Door Card with Rinea

Hello crafty friends!
I have a fun new card to share with you for Rinea.
I can't believe it's December? I wanted to give you another holiday card idea and I think I came up with a good one! The idea of a door with a wreath has been around for years, but I put my own spin on it. I purposely didn't add a sentiment and just chose a random house number. I'll list the supplies I used at the end of this post, so you can make it too!
To start, you are going to cut 2 pieces of Mocha/Gold Glossy foiled paper. You want one to be 4X5.25 and the other to be 3.5x4.75 (approx). I did this for my door layers. You are also going to want to cut some light brown cardstock as bases for these pieces. I roughly give between 1/4 and 1/8 of an inch border (depending on how much you want to show).
I ran each piece of foiled paper through my Big Shot with the wood grain embossing folder. To create the distressed look here, I made sure my "sandwich" was on it's thickest setting. I trimmed the smaller piece into 4 door "panels", and adhered all the pieces to the cardstock backgrounds. Using the  Emerald/Gold GlossyRuby/Ruby Starstruck Foiled papers, I die cut 2 wreaths. As you can see, I cut out the bow from the Ruby to add to my wreath. 

Brads (YES!) were used as the door knob and hinges (I know I have actual hinges in my stash - but do you THINK I could still find them?? haha). I wrapped some twine around the wreath to "hang" on my door - and used a couple glue dots to secure it. Finally, as the last accent, I added a "door number" using some hodgepodge hardware. I wrote the number on white cardstock and fitted it behind, then adhered with brads.  I glued the entire cardfront onto my card base and voila!  I LOVE how it turned out!
See you again soon.
Jess
Supplies:

Woodgrain Embossing Folder
Light Brown & White Cardstock
Wreath Die
Brads & twine
Adhesive & Glue Dots
Optional: Hardware silver piece and black pen along with white cardstock


Thursday 21 November 2019

Creative Knockouts Challenge #325

Hello crafty friends!

It's time for a new challenge over at Creative Knockouts Challenge!!

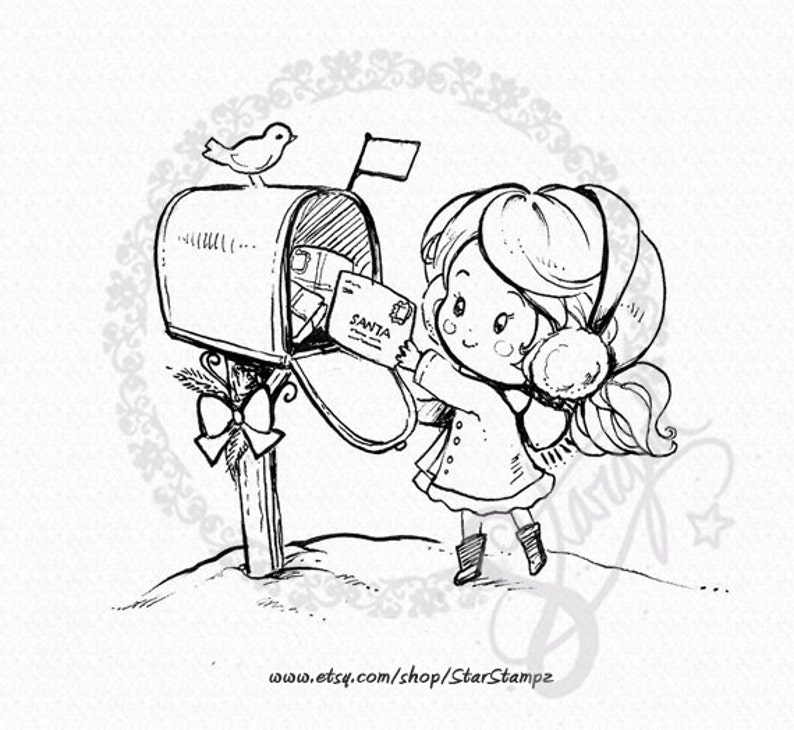
Our theme this week is "Snow Much Fun" and our sponsor is Star Stampz.  I used a stamp set called Santa's Letter. How cute is this?
Santa's Letter   DIGITAL STAMP Instant Download image 0


Here is what I created:


I printed the adorable digi onto photo paper and water colored it! Super quick and easy!


I hope to see you at the challenge! Good luck!

Until next time,

Jess

Wednesday 20 November 2019

Pink Christmas Fun with Joy Clair & Imagine

Hello friends!

 I'm continuing with my "pink Christmas" trend for our Joy Clair collab with Imagine Crafts! For this card I'm using the "Merry Christmoose" Stamp Set. I focused on the tree image for this particular card. It's just so pretty!

IMG_4857

I used the Mboss Embossing Powder in Rose Gold once again to emboss the tree and I used Sheer Shimmer in Dauber Top Sparkle and Spritzer in Frost, Gold and Rose Gold along with Fireworks Spray in Angel Pink! I love how easy the products were to layer and not completely end up with a mess! They dry quickly too!  It's hard to photograph all the shimmer - but this card is really sparkly and pretty! The Frost Sheer Shimmer really looked pretty on the tree.


Thanks for stopping by today! 

See you soon!

Jess

Saturday 16 November 2019

Rinea Letterpressed Christmas Card

Hello Rinea Friends!

We are making a beautiful and elegant Christmas Card today using Rinea foiled paper!
I used an older product in my stash to create this card - a letterpress pad for my Big Shot!  So it's not an embossing folder, it's literally the image pressed into the foiled!  Once I had made my impression, I cut the Emerald/Gold Glossy Foiled Paper down to the size I wanted and added a mat of Ruby/Glossy Foiled Paper!  
 

I used a green cardstock base and added a layer of glitter paper for some extra sparkle. The layers were all glued together.  I really wanted to keep the elegant and simple feel of this card, but it needed SOMETHING. AHA! I grabbed some of the cones that were leftover from my previous project (find that HERE) and created a BOW from the Silver Starstruck Cones!  I used some Ruby Starstruck to wrap the center of the bow and hot glued it down.
 
Here is the full supply list:
Jolly Foiled Variety Pack - I used the Emerald/Gold Glossy, Ruby/Gold Glossy, Silver Starstruck and Ruby Starstruck
Glitter Paper
Green Cardstock
Papertrimmer
Adhesive of Choice
Letterpress plate
Big Shot Machine and appropriate plates

Voila! That's all there is to it!
I hope you enjoy my Letterpressed Christmas card! See you again next time!


Jess

Sunday 10 November 2019

Vintage Christmas with Joy Clair & Imagine

Hello friends!

I am really into the holiday spirit early this year - which also means I started in on my Christmas cards. I'm so excited about our Joy Clair partnership with Imagine Crafts this month - and the products I received go PERFECTLY with the vintage feel I wanted to go for! I was working with Prima's Santa Baby Papers!

Check out my card I created using the Vintage Christmas Ornaments stamp set. I think this is now becoming my FAVE set for Christmas!

November 2019

I used the Mboss Embossing Powder in Rose Gold to do the embossing of the deer head. I love how it turned out!!! It matched my "Santa Baby" papers perfectly! I also used Sheer Shimmer in Dauber Top Sparkle and Spritzer in Gold and Rose Gold.  I just love how subtle these give sparkle to cards - perfect for Christmas!


Thanks for stopping by today! I hope I gave you some ideas on getting your holiday cards started. Joy Clair Stamps are perfect for every occasion.
See you soon!

Jess

Thursday 7 November 2019

Creative Knockouts #323

Hello crafty friends!

It's time for a new challenge over at Creative Knockouts Challenge!!

Our theme this week is "Border Time" and our sponsor is Di's Digi Stamps.  We were free to create with our own stamps for this challenge, so I decided keep working on my stash of sympathy cards - which unfortunately I go through too quickly.

Here is what I created:


I hope to see you at the challenge! Good luck!

Until next time,

Jess

Saturday 2 November 2019

Rinea Holiday Ornament

Hello crafty friends!


I have a brand new project to share with you today for Rinea!  As you can see, we are making this beautiful holiday ornament today!  Or you could use it was a bow for a present! Or...you could make it bigger and turn it into a wreath or wall decor!  The ideas are endless.  First up, here are the supplies you will need:
Jolly Foiled  Paper Variety Pack  - I used the Starstruck in Ruby, Silver and Emerald along with the Gloss in Silver/Gold and Ruby/Gold for this project.
Hot Glue Gun
Paper Trimmer
1 3/4" Punch (or die if you prefer)

Here is my video tutorial to show you how to make it:

Check out the blue version I created too using the Frosted Variety Pack:

Thanks for tuning in!  See you again next time!


Jess

Friday 1 November 2019

Fall/Winter Coffee Lovers Blog Hop

Hello friends!


I'm so excited to be joining the Fall/Winter Coffee Lovers Blog hop with Joy Clair Stamps!

Joy Clair is giving a way two stamp sets of your selection to one random winner that left your original comment on Joy Clair blog post and the 9 designers participating on this hop. In your comment you need to mention the name of the stamp set that designer used as main image to qualify to the prize. This will be open since November 1st until November 8th. Winner will be announced on November 30 here in Joy Clair Blog.

Tonight I will be posting the image to promote the sales. All the store will be 25%, during the week of blog hop.

I created a cute card using the Coffee Lovers Stamp Set! It's perfect for this hop!  Don't forget to check out all the other fun Coffee Themed Stamps that Joy Clair has to offer.

Here is my card:


I kept it fun and simple. Not all cards need to be over complicated - especially when you make them first thing in the morning BEFORE you've had your first cup of coffee ;).

Thanks for stopping by! I know you will be inspired by all the coffee themed creations today!

See you again soon!

Jess

Thursday 24 October 2019

Creative Knockouts Challenge #321

Hello crafty friends!

It's time for a new challenge over at Creative Knockouts Challenge!!

Our theme this week is "Embossing Delights" and our sponsor is the always FABULOUS Fabrika Fantasy!   I chose to work with a stamp set called "Betta Fish Crowntail".  My daughters just picked out some Betta fish of their own so it was perfect timing :) Check out the stamp:


Here is what I created:


I did use the pre-colored digi version - but I superimposed it over the uncolored version with the bubbles!  I used a Versamark Pen to add my embossing powder to the bubbles and some to the fish itself.  I also used a dry embossing folder for the background. SO you can add Embossing with digis!!! :)  The sentiment was also heat embossed.


I hope to see you at the challenge! Good luck!

Until next time,

Jess