Showing posts with label Masculine Cards. Show all posts

Monday, 16 March 2020

Happy Birthday Dude with Rinea

Hello crafty friends!


I have a fun new card to share with you today using Rinea products - this one is more on the masculine side! We are still working with our Creative Embellishment products, and I'm using some Brick Pieces Chipboard & 80's Slang Words on this card.


Supply List:


Sandpaper

Cardstock

Stamps

Thick Embossing Powder

Versamark Ink

This card will come together quickly for you!  I promise :)

Start with a piece of Ebony Starstruck Foiled Paper that is appox 4" by 5.25" as your background. Adhere the Brick Chipboard to the background in the location you want. I sprinkled some super thick embossing powder on the pieces and heat set for some extra dimension.


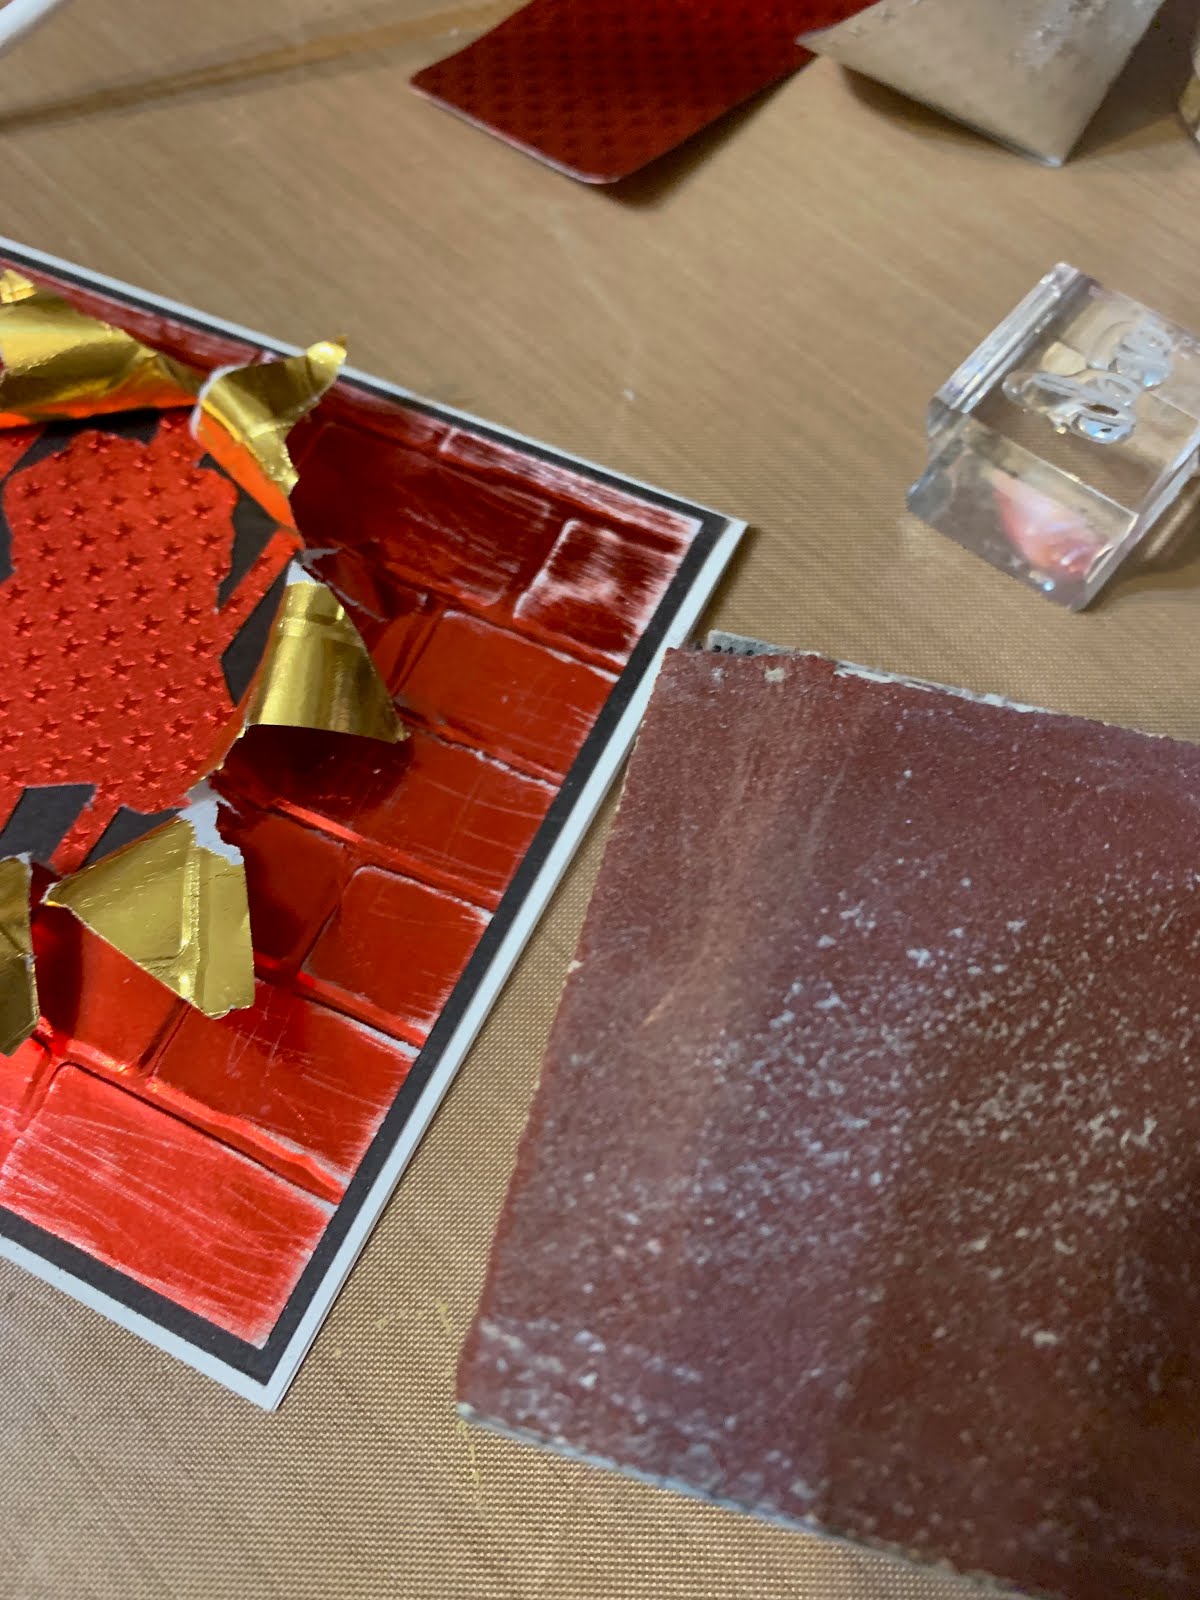
My Ruby/Gold Glossy piece came next. It's cut approx 1/4" smaller than the Ebony Starstruck. I carefully noted the position where the chipboard elements were added and made a slit in the Foiled Paper before adhering around the edges. Once it was adhered, I simply started tearing, sanding and distressing the Foiled Paper until the chipboard was exposed and I had the desired effect.


Next up was the DUDE Chipboard! I covered the piece with Versamark Ink and sprinkled on my Super Thick Embossing Powder - then heat set! Pretty quick and simple technique here.


I stamped the Happy Birthday sentiment onto the Mocha/Gold Glossy Foiled Paper using Ghost Ink, let it dry for a few seconds, then wiped off the ink. Voila! Sentiment exposed perfectly. (If you want to learn more about the Ghost Ink, please check out my post HERE).


Finally, I glued down the DUDE, adhered my sentient with foam squares and mounted the entire panel onto my cardbase.


Thanks for stopping by! I had a ton of fun making this card - and I know you will too!

Remember, you can save 10% on your Rinea order when you shop HERE.

See you soon!

xoxo
Jess

Tuesday, 10 December 2019

Fall Family Football with Joy Clair

Hello friends!


I have a brand new card to share with you for Joy Clair stamps today!  Now, I've been making Christmas cards like crazy lately, so I took a little break away from sparkle and tinsel to create a super cute Football themed card!  

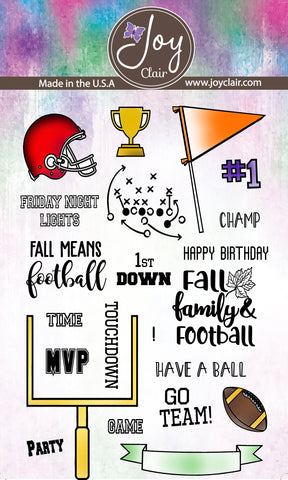
It is the end of our CFL Football season here in Canada now, and for anyone who follows the NFL - it's just getting amped up! So a football card seemed totally appropriate. I used the "Fall Family Football" stamp set to create this card. I love this set - it's a perfect fall/masculine/sporting themed set!  Great sentiments for all occasions - and you can modify it to apply to most sports too!


I stamped the football, helmet and sentiment stamps onto some white cardstock and colored with my Nuvo Markers, then cut them out.  I had some really adorable football themed paper from Echo Park in my stash, so I used the football field to make a backround and randomly stamped the goal posts, score play and some sentiments randomly on it to add some interest.


I really like how this card turned out!  It can be so hard to make a simple, yet interesting "masculine" or sports card with little embellishment. I mean, everyone likes SPARKLE, but not everyone wants to receive a football card decked out with rhinestones, right? hehe

Of course I had to make the helmet green in honor of my home province's beloved football team, the Saskatchewan Roughriders!  Go RIDERS!!! I'm sure you've been to a sporting event and have seen someone wearing a rider jersey. If not, I challenge you to look around next time - there is ALWAYS one!  It's a great game to play.

Thanks for stopping by today! I hope that you enjoyed my stories and this card. Be sure to grab your fave JOY CLAIR stamps today!  I promise, you will have so much fun using them!

See you again really soon!  Hugs!!

Jess

Sunday, 16 June 2019

Happy Father's Day with Rinea

Hello crafty friends!


Happy Father's Day to all the "Dad's & Dad Figures" out there! We appreciate everything you do each and every day.  What a better time to share with you a fun Father's Day card featuring Rinea!


Project Supply List:


Embossing Folder (brick style)

Cricut "superhero" cut

Nuvo Adhesive Pen - Large

Dark Brown Cardstock

White Card Base

Scissors

Tag punch

Sand Paper, Rubbing Alcohol

Twine

Foam Square

Stamps - dad, My Hero, Happy Father's Day, etc


Let's make Dad a handmade card today!


First, take a piece of 4"x5.25" Ruby/Gold Glossy Rinea foil and run it through your brick style embossing folder.  Turn it over so the gold side is showing and locate the center (approximately). I scored an "x" in the middle and cut out from there, creating my "explosion" opening. You are going to want your super hero to poke through!  You don't have to open it up completely now - you can customize it once it overlays our superhero!  I used sandpaper to lightly sand the bricks - it gave them a nice aged look. Once you are done that, you can set it aside for now.


Using a Criuct (or other electronic cutter/die cutting machine), cut your "superhero" image. I used a "super"dad image - but you could definitely use any superhero image you wanted to - a symbol, etc. I used the Ruby/Ruby Starstruck to cut this part out. I just roughly sized it so it would fit in my opening. 


TIP:  When using a Cricut mat, use one that is not overly tacky as you don't want to rip the layers of foiled paper apart!

Using a smaller tag punch, cut a tag from your Mocha/Gold Glossy foiled paper. Then, stamp your sentiment with Ghost Ink. I used some letters to spell out "Dad' and added a "My Hero" sentiment as well. Once it is dry, gently rub with Rubbing Alcohol and a cloth to remove the "color" part of the foil!  Isn't that cool? I wanted it to look sort of rustic, so I didn't remove all the color.


Final step is assembly!  Attach your superhero die cut to the dark brown background using the liquid glue pen, then attach your brick Foiled Paper overtop using the same glue. At this point you could tear your opening larger to accommodate your superhero size. Use a dimensional foam square to pop your tag sentiment up and tie a small piece of twine to the tag. Attach the entire panel to you card base and voila!


A perfectly super card for your "Superhero" :)


Thanks for stopping by!  See you again soon!


Jessica

Wednesday, 15 May 2019

Retro Fun with Rinea

Hello crafty friends!


I have 2 handmade cards to share with you today for Rinea!  

For this first card, I started by pulling the Glossy Copper/Gold Foiled Paper from the Metallics Foiled Paper Pack.  The background and chevrons (hand cut by me!) were both made with this color. 
I stamped the car image onto a piece of Glossy Mocha/Gold Foiled Paper using Ghost Ink, then used alcohol and a towel to gently remove the color, leaving the silver underneath!  I love the Ghost Ink Technique! If you would like more information on the Ghost Ink technique, you can check it out HERE.
The sentiment was stamped with Staz-On Ink onto the Glossy Silver/Gold Foiled Paper and matted with Turquoise Starstruck. So pretty!!  To finish, I added a few Gold Glitter Drops for dimension.

Here is a second card I created using the same Ghost Ink technique:

The only part I did differently with this card was I stamped the image with Versamark Ink onto a piece of patterned paper and fussy cut out before adhering to the card. You can see the stars that I stamped with Ghost Ink peeking out in the background!
Thanks for stopping by!  I hope you are inspired to be creative today!
Jess

Monday, 13 May 2019

Joy Clair Blog Hop - Everyday Occasions

Hello crafty friends!


Joy Clair New Release month continues!!! 

Welcome to our blog hop!  You should have made it here from  Karen's blog.  

 I'm always looking for masculine stamps...and this Tools Background stamp PERFECTLY fits the bill!  I just love it!  I love background stamps too - one sold stamp and it creates a great background.


I used a basic Bazzill purple cardstock background for this card.  The tools were heat embossed.

Your next stop along the way is Ceal and you can find her blog HERE.

Don't forget to leave comments along the way!  We love to read then and you could win some awesome prizes too!

Thanks for stopping by!

Here is the full hop list:

Jessica Kaiser - you are here!

See you tomorrow for part 2 of our hop.

Jess

Sunday, 20 January 2019

One Wild Ride with SparkleNSprinkle

Hi Crafty Friends!
It's time for another SparkleNSprinkle January Release. Today I'm using "One Wild Ride" add we are making a masculine card. Ready?

Here is the supply list:
SNS Supply List:

I really wanted to have a distressed, masculine feeling....and I think I accomplished it.... so lets see what you think!

I started by stamping my motorcycle with Versamark Ink and embossed with Black Detail Embossing Powder.  I colored it with Aqua Flow Pens. Then I went to town with Super Thick Embossing Powders!  I randomly sprinkled on Fleur de Lis & Blackened Bronze Embossing Powders and heat set from  the underside until it melted. Seaspray Green Embellishment Mousse was rubbed on the edges of the panel for more aging of the paper. I used an edge distresser and gave the edges a good distress. 

I used an embossing folder on a piece of craft metal for the back panel and then I used some sand paper to distress the top.

 
I accented the card with Silver Lining Crystal Drops.  I think that is all a masculine card needs for embellishment, don't you?

Have a great week!
Jess

Wednesday, 9 January 2019

Kitty Bee Designs - January Spotlight


Hello friends!

I have a brand new card to share with you today for Kitty Bee Designs! 

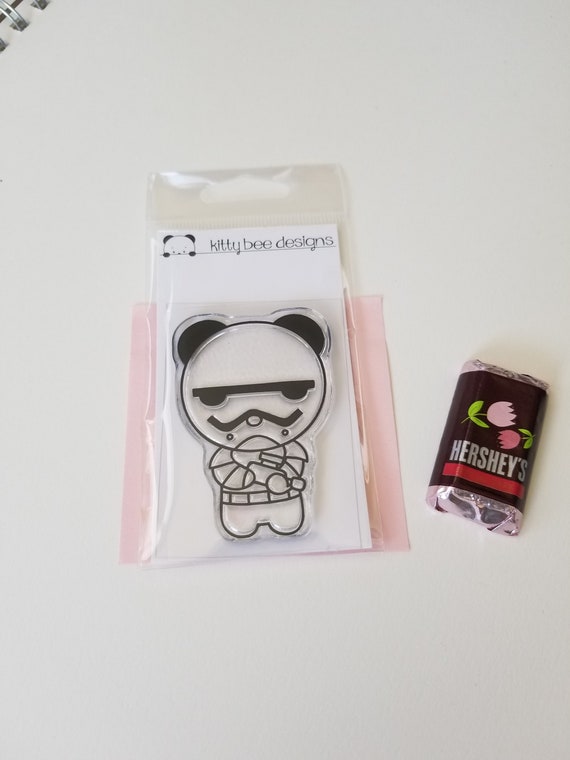
It features the Kitty Bee Designs Storm Trooper Panda Clear Stamp!
Perfect for that Star Wars fan in your life!

image 0

Here is what I created:

Simple black, white and grey on this card was all it needed!  Random stamped background with a fussy cut focal image. Perfectly masculine card!


See you next time!
Jess

Thursday, 9 August 2018

SparkleNSprinkle - The Old Tractor

Hello crafty friends!


We started a brand new Stamp Reveal over at SparkleNSprinkle - and we have 3 beautiful stamps to choose from!  They are:  The Old Tractor, Feathered Friends and Sketched Pear.  Today I'm going to share a card featuring "The Old Tractor".  This is a perfect masculine stamp set, and you can even pick up the companion Farm Silhouettes & Sayings Digi Stamp with tons more farm sentiments!!!

Here is my SNS Supply List:

This is a really simple card (not all cards have to be complicated!!!). I started by stamping the main tractor image with a black ink and coloring with my Nuvo Marker Pens. 


Once I colored my image, I trimmed it down to size and added a bit of shading around the edges.


The sentiment was stamped with Versamark Ink and heat embossed with Irish Spring Embossing Powder. I went for a layered look on this card - so lots of 1/4" and 1/2" Tear-ific Tape was used to adhere all the layers. I find when making masculine cards you don't need a lot of "extra". 

I figured the tractor needed a bit of "bling", so I used my Quicky Glue Pen to add the Silver Dreams Glitter to the wheels of the tractor. I love this glue pen - it is precise and it dries pretty quickly too.


I did a bit of ink distressing on all the paper edges (I haven't done that in a long time!). Finally, I used the Nuvo Crystal Drops in Dark Walnut to accent the corners of the card.


I hope you enjoyed this quick make card! :)  You definitely want to add this stamp set to your collection - and if you want to take 10% off your order, you can use my special discount code "JessDT10" when you checkout at the SparkleNSprinkle store!!

See you really soon!!!


 photo MHKDesigns_FreshByJess_Signature.png