Showing posts with label Tonic Dies. Show all posts

Monday, 22 October 2018

Trick or Treat with Rinea

Hello crafty friends!


Of course I had to make a cute card for my second Rinea Project  of the month! I just love this cute little Fox Die from Tonic Studios, so I couldn't help but do a paper piecing card for this project!
For this project, I once again used  the Haunted Variety Pack.   The Starstruck Marigold/Gold Foiled Paper was the perfect tone for the fox!  I die cut white cardstock for some of the accents and also some  Glossy Ebony Black/Gold  Foiled Paper. The sentiment was also cut form the   Glossy Ebony Black/Gold .  All the pieces were glued together with Nuvo Deluxe adhesive. It's so much fun to create these piece creatures!


For the grass, I used the Emerald/Gold Glossy Foiled Paper. I simply cut a 4" strip and used scissors to randomly cut the grass stalks! Super easy!.


The background was a white cardstock that was embossed with a leaves embossing folder.  I also added a gold foiled paper oval in the background (I just used a scrap piece - and used the lovely GOLD side of the foiled paper!). 

I used a Tonic Studios Trick or Treat die cut from Glossy Ebony Black/Gold foiled paper for my sentiment. I was playing with some paper quilling techniques this month, so I decided to use a tiny quilled circle on her bow to decorate!  Isn't it cute?  Have fun making your own cute build-a-bear style cards! :)


Supply List:
Haunted Variety Pack
- White Cardstock
- Tonic Dies (Frankie Fox, Trick or Treat, Mixed Edge Ovals)
- Nuvo Deluxe Adhesive
- Scissors
- Quilling tool
- paper trimmer 

See you next time!


Jess
 photo MHKDesigns_FreshByJess_Signature.png

Wednesday, 15 August 2018

Scrapy Land Challenge #96

Hello friends!


Welcome to Scrapy Land {Challenge #96}!  I'm very excited to share my project with you.


I used the Tonic Studios Wreath to make my card, but you can also use the Impression Obsession Spring Wreath Die.


I also used the Neat & Tangled Succulent Cover Plate Die.


I used Sticker Paper and did a "Kiss Cut" technique where I didn't cut all the way through using the Succulent Cover Plate. I peeled back the adhesive backing from the sticker paper and used 2 shades of glitter to create the background. I cut out the wreath twice and layered them together with some foam tape. A little bit of bling and a little bit of twine finished off the look.


The theme is always ANYTHING GOES using any brand of die that Scrapy Land sells.  In addition, we have TWO WINNERS for each challenge.  One will be a random winner and the other is chosen by the Design Team.  Each winner will receive a generous $10 gift certificate to Scrapy Land.

Scrapy Land carries over 55 brands of dies, so chances are you have a few of the brands in your stash!  You can see all the brands carried under the Products category.

Please link back to this Scrapy Land Challenge and include the link to this challenge on your blog post.  It would also be extremely helpful if you would list the brands of dies used in your project.  (Sometimes we can't tell if an item is a die cut or chipboard.)

We can't wait to see what you create!  It can be any style you like from CAS to mixed media and everything in between.    Just be sure there's a die cut from a brand that Scrapy Land sells!

 photo MHKDesigns_FreshByJess_Signature.png

Friday, 23 March 2018

Vintage Truck

Hello friends!


I'm here today to share my final March New Reveal card for SparkleNSprinkle!

Supply List:


Misc. Supplies:
Green Bakers Twine
White Cardstock
Brown Plaid Patterned Paper

Alright!  Let's get crafty!

First up, you can refer to my previous blog post, found HERE as to how I watercolored/created the truck image. :) 

In a nutshell:
1. Stamp image with Versamark Ink and heat emboss with Nautical Embossing Powder
2. Watercolor with the Nuvo Aqua Flow Watercolor Pens :)
3. Use Sea Breeze & Grey Mist Jewel Drops to create the windows of the truck (I painted them on)
4. Use Silver Lining Crystal Drops to create the "chrome" effects of the truck


To make my background, I first cut my card base out using the Tonic Studios Die called Sunray Venus Layering Basics Die Set.  I also cut out a piece of brown plaid patterned cardstock and sticker paper, using one of the nesting small shapes. To the exposed adhesive, I added some Gecko Glitter (soooo pretty!!!). I also added some hints of sparkle using Marine Blue Glitter to the flowers around the truck. I used the Nuvo Medium Glue Pen to adhere the glitter. 


For my sentiment, I cut out a small frame using the same die set (such versatility - everyone should stock up on all these essential dies!). I stamped the sentiment using Versamark Ink and embossed with Forest Green Embossing Powder. A matted background of sticker paper was added using Marine Blue Glitter.


Final step!  Let's adhere everything together and embellish!  Your 1/2" Tear-ific Tape will hold everything perfectly in place.  I did throw a couple pieces of the 1/4" on there too! LOL  I tied a few rounds of green bakers twine to add some other interest.


Finally, I added Glitter Drops in Sunlit Meadow to frame the final image. I just felt it needed a little more sparkle, you know? :D


I hope you enjoyed this card tutorial!  Make sure you head over to the SNS Blog to leave a comment AND leave a comment here to be eligible to win our monthly prize!!!

I have a little announcement to make here too - I am now the Design Team Coordinator for the SparkleNSprinkle Design Team!  Just wanted to share with you all!!!

See you in April for our next big reveal!! :)


Friday, 2 February 2018

SparkleNSprinkle - Foxy Missing you

Hello friends!


I have another sweet SparkleNSprinkle Card to share with you today, once again featuring the "Hello Foxy" Stamp Set!  Remember how I used foxes last time? Well, I used another little guy to create this card.

SNS Supply List

Mirror Cardstock - Chrome Silver 9452e
Aqua Flow 2-Pack Water Brush 889n
Checkers Super Thick Embossing Powder EP466
Nuvo Crystal Drops - Ivory Seashell 675N
Tonic Dies - Mixed Edge Ovals 1456e
Tonic Studios Idyllics Die & Embossing Folder Set - Filigree Affections 1516e

Let's get crafting!

I started by watercoloring my stamped image. I stamped the fox with Versamark Ink and heat embossed with Black Detail Embossing Powder. I used the Nuvo Aqua Flow Pens to water color. I love to create my own palette using my clear blocks! I simply color a little bit of the pen onto the block and then use an regular Aqua Flow Water Brush to paint and blend!  I find I get better control and blending of colors this way.


Once my fox was all painted, I added Twinkling Clouds Flocking using Nuvo Deluxe Adhesive to make his white "fur". :)


(here you can see the sparkle on his fur better!)


Let's get talking about that background!  I just fell in love with the English Lace Craft Perfect Paper - it's just sooo pretty! I wanted to show it off , so I just cut a background piece of it and left it pretty much plain!

Next, I decided I wanted to create a sort of "brick wall" for the foxy to be sitting in front of, all forlorn. I used a piece of metallic silver paper I had in my stash, but the Nuvo Chrome Silver Mirror Cardstock would have been perfect for this! I cut a piece and ran it through my Big Shot using a "brick pattern" embossing folder.


Next, I inked the entire surface with Versamark Ink and sprinkled on Checkers Super Thick Embossing Powder (don't mind the old label with the wrong name in the pic ;). I heat set it from beneath while holding it with tweezers. You want to heat set the super thick powders from the bottom to avoid them flying all over the place!  Isn't it pretty?


Next up, I created the oval behind the little fox. I used the same mirror foil paper and die cut one out using the Tonic Studios Mixed Edge Oval Die Set. I also ran it through the Big Shot using the Filigree Affections Embossing Folder.


I adhered it to the background using Tear-ific Tape! :)  All assembly of layers used the always amazing Tear-ific Tape - it's just the BEST!!!

Finally, I stamped my sentiment on a piece of white cardstock and embossed with Copper Peddler Embossing Powder. I really am digging the copper this month!!


This is a standard A2 sized card - so assembly was a snap!  All the layers were adhered with 1/4" Tear-ific Tape. I tied a bit of string around the sentiment and added a metal bow paper clip for some extra wow factor. Finally, Nuvo Crystal Drops in Ivory Seashell were delicately applied to the lace background, corners and "brick" wall.


I sure enjoyed sharing my tutorial with you today and I hope you learned something. I'll be back again soon with more SNS goodness to share!

See you soon!
Jess


Wednesday, 31 January 2018

Papercraft Business Challenge - February 2018

Welcome to our February Papercraft Business Challenge!


Our theme isAnything Goes (w/option: Valentine's Day/Love - for an extra entry to win the prize).
I'm sure you have something related to this season in your stash!

I pulled out an old Stampin' Up! set called "Love Bandit" to create these fun cards!  I'm also still working on using up my stash of supplies (which could take about 25 years! haha).

Here is what I created:


Isn't it cute how you get to fill in the blank? Love it!


I watercolored this sweet little squirrel!!!


I hope you will come and join us for this super fun new challenge!  Did you know that Papercraft Business also offers a FREE Blog Purpose Course?  It's perfect if you are just starting our or if you simply want to improve your Blog's purpose!

SIGN UP FOR THE FREE 5 DAY EMAIL CHALLENGE!

See you all next time!

Jess

Friday, 12 January 2018

SparkleNSprinkle - Ocean Fairy

Hello friends!


I have a special card tutorial to share with you for SparkleNSprinkle!  This card features a stamp set/die combo from Tonic Studios.

Supply List:

Let's start with how I created the beautiful fairy! :)  I stamped her onto a piece of white cardstock using my Tim Holtz Stamp Platform (1707e) with Versamark Ink. Using my Black Detail Embossing Powder, I heat embossed the image.  To cut out the image, I used the matching Ocean Reflections Die Set and my Big Shot machine.


I also used this die to cut out a "shadow" from some gray carstock.

 Next, I grabbed my Pearlescent Watercolors and gently watercolored the image.  I wanted to add something "extra" to the fairy, so I grabbed a piece of Vellum that was sitting on my desk and die cut out another fairy image.  


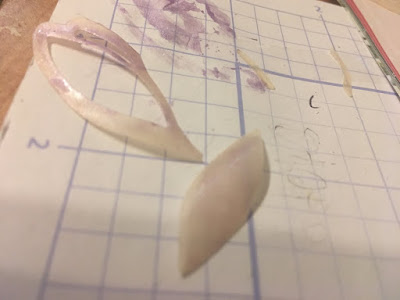
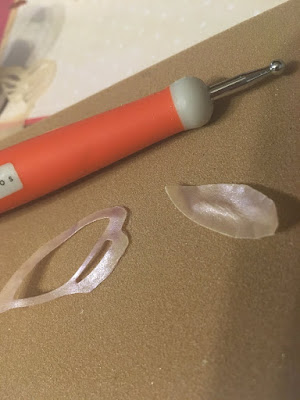
At first I was going to add the full die cut to the card, but I could quite get it to "look" right to me. Then it came to me....a fairy needs WINGS!  Using some small shears, I carefully cut out the wing part of the die cut vellum.  I used the Pearlescent watercolors to add a bit of sheen to the wings and then grabbed my Tonic Floral Crafters Set (380) and gently curved the pieces to bow out like wings. 


I used the Nuvo Deluxe Adhesive to adhere the wings to my fairy!  So cute!


Up next....the background!


Using my Big Shot and an embossing folder, I embossed a piece of 4"x5.25"gold cardstock to add some texture to the background.  I applied 2 pieces of 1/2" Tear-ific Tape across the bottom half of the piece of cardstock (about 1/2 way) and applied the brand new Pink Fizz Glitter!  I just love this brand new color! It's so bright and fresh.  I also added a border of 1/2" Tear-ific Tape around the outside edges of a piece of white cardstock that was just slightly larger than my gold background piece. To that adhesive, I added the Lana Pink Embossing Powder and heat set. It just added a slight pink shimmer and dimension to the card. 

I didn't take a photo of it (somehow I forgot!), but I also die cut a circle of white cardstock to put behind my fairy. I rolled the edges in Versamark Ink and embossed with Copper Peddler Embossing Powder (I'm obsessed with copper these days....you will see it over the course of the next month! LOL)


P.S. - It looks like a need a manicure and a HUGE bottle of cuticle oil, STAT!


I adhered all of my layers using the 1/2" Tear-ific Tape. Once everything was securely fastened together, I grabbed a few of my fave Nuvo Crystal Drop colors - Raspberry Pink and Sweet Lilac and added even more lovely dimension.  I also added a few paper flowers from my stash. 


Voila!  Beautiful fairy fun! :) 


I hope you enjoy this card tutorial. Be sure to tune in on January 14 for our NEW February Reveal!  You aren't going to want to miss it! :)


See ya soon!


Jess