Showing posts with label Embossing Folder. Show all posts

Wednesday, 1 August 2018

Bookmark Fun with Rinea

Hello friends!


My first tutorial for Rinea this month is making BOOKMARKS!!!   I actually ended up making 3 different versions!!! We partnered with Joy Clair this month and I know the entire Design Team has come up with some amazing projects!


I used the following Supplies to create these bookmarks:

- Joy Clair Coffee Love Stamp Set

- Embossing Powder (assorted colors)

- Versamark Ink

- Coffee Cup Shaped Dies

- Embossing Folder

- scissors

- assorted cardstock


Let's get creating! 

Bookmark #1 - Traditional Style


The first bookmark is a pretty standard one. It's 6inches long and about 2.5 inches wide. I used the Glossy Mocha/Gold foiled paper to create the base layer along with the backing layer for the sentiment!  I stamped the super cute "Life Happens" sentiment with Versamark Ink and heat embossed with a brown embossing powder. I also stamped the coffee cup onto a light pink cardstock and fussy cut it out. From the Princess Variety Pack, I chose the pretty Glossy Lavender Light Purple/Gold .I used a chevron embossing folder to add some fun texture to the Foiled Paper. It really holds it's shape beautifully!  Simply add your layers together with adhesive of choice and add a fun ribbon!  I had this fun tinsel ribbon and used it for flare!


Bookmark #2 - Corner Bookmark
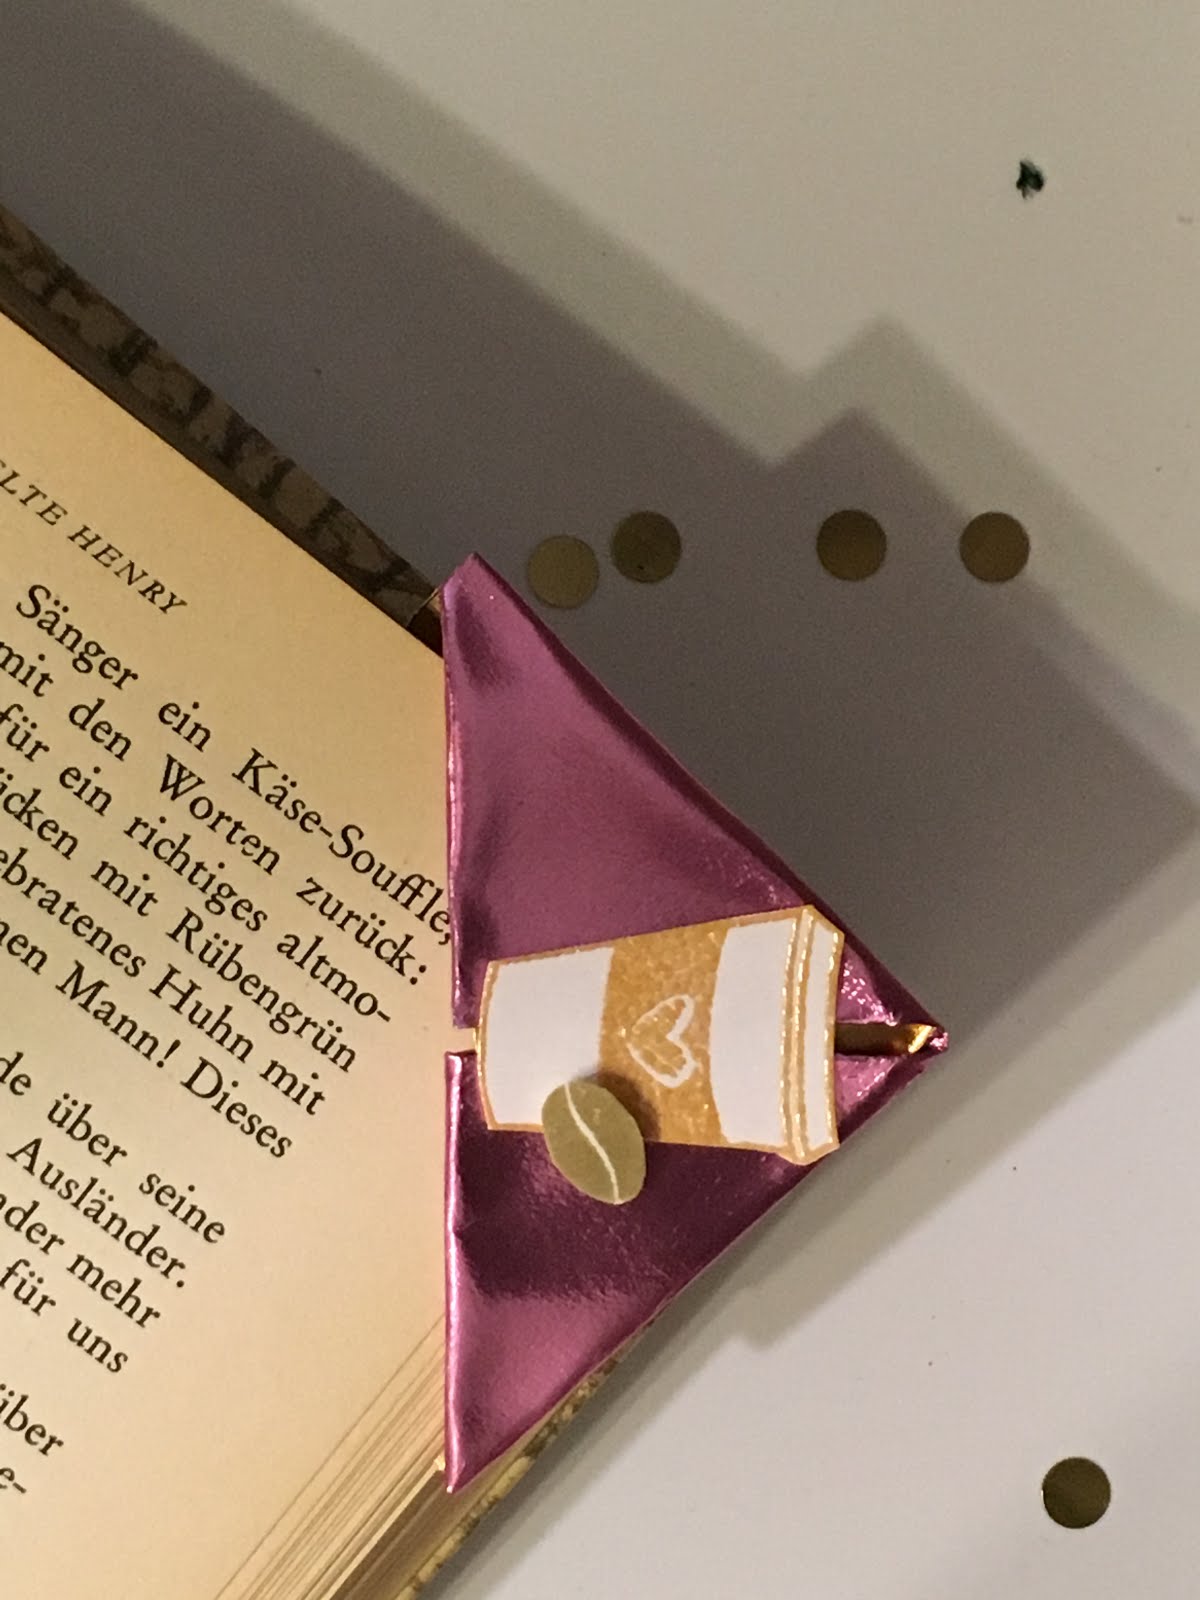

This bookmark comes together so quickly and easily - you could make some for "back to school" teacher gifts!!!  I used the Glossy Blush Pink/Gold from the Princess Variety pack to make this bookmark. I cut a 6" square of the foiled paper, then started foilding!  Fold the paper in half, bottom corner to top corner. Next, fold the bottom-left corner up to the top corner. Repeat with the right corner. Turn over, then fold the bottom corner – top layer only – up to the top corner. Unfold your last fold and fold back up, in the other direction, into the pocket.  Clear as mud?


Haha - it's really pretty easy!! The foiled paper holds the shape and bends very easily. I decorated this cute bookmark with the small coffee cup stamp from the Joy Clair Set. I embossed it with a butterscotch embossing pwoder and added the little coffee bean for decoration!  I did fussy cut the coffee cup.


Bookmark #3 - Coffee Cup


I loved this one the best I think!  I used a large coffee cup die to cut a piece of cardstock and a piece of the Glossy Copper/Gold Foiled Paper. I embossed the foiled paper using a fun embossing folder, then glued the 2 layers together. I stamped the sentiment with Versamark ink and heat embossed with a mocha embossing powder. The cute coffee beans were stamped randomly aroudn the sentiment and it was matted onto a piece of the Glossy Mocha/Gold foiled paper.  I also decorated the larger coffee cup stamp from the Joy Clair set with a mini cup and some scrap silver foiled paper. A little bit of ribbon topped with bookmark for flare!


I hope you enjoy these cute bookmarks! You will really love this Joy Clair stamp set as well - it's very versatile and I know I will make a lot of cards with it!


See you again soon!


 photo MHKDesigns_FreshByJess_Signature.png

Friday, 2 February 2018

SparkleNSprinkle - Foxy Missing you

Hello friends!


I have another sweet SparkleNSprinkle Card to share with you today, once again featuring the "Hello Foxy" Stamp Set!  Remember how I used foxes last time? Well, I used another little guy to create this card.

SNS Supply List

Mirror Cardstock - Chrome Silver 9452e
Aqua Flow 2-Pack Water Brush 889n
Checkers Super Thick Embossing Powder EP466
Nuvo Crystal Drops - Ivory Seashell 675N
Tonic Dies - Mixed Edge Ovals 1456e
Tonic Studios Idyllics Die & Embossing Folder Set - Filigree Affections 1516e

Let's get crafting!

I started by watercoloring my stamped image. I stamped the fox with Versamark Ink and heat embossed with Black Detail Embossing Powder. I used the Nuvo Aqua Flow Pens to water color. I love to create my own palette using my clear blocks! I simply color a little bit of the pen onto the block and then use an regular Aqua Flow Water Brush to paint and blend!  I find I get better control and blending of colors this way.


Once my fox was all painted, I added Twinkling Clouds Flocking using Nuvo Deluxe Adhesive to make his white "fur". :)


(here you can see the sparkle on his fur better!)


Let's get talking about that background!  I just fell in love with the English Lace Craft Perfect Paper - it's just sooo pretty! I wanted to show it off , so I just cut a background piece of it and left it pretty much plain!

Next, I decided I wanted to create a sort of "brick wall" for the foxy to be sitting in front of, all forlorn. I used a piece of metallic silver paper I had in my stash, but the Nuvo Chrome Silver Mirror Cardstock would have been perfect for this! I cut a piece and ran it through my Big Shot using a "brick pattern" embossing folder.


Next, I inked the entire surface with Versamark Ink and sprinkled on Checkers Super Thick Embossing Powder (don't mind the old label with the wrong name in the pic ;). I heat set it from beneath while holding it with tweezers. You want to heat set the super thick powders from the bottom to avoid them flying all over the place!  Isn't it pretty?


Next up, I created the oval behind the little fox. I used the same mirror foil paper and die cut one out using the Tonic Studios Mixed Edge Oval Die Set. I also ran it through the Big Shot using the Filigree Affections Embossing Folder.


I adhered it to the background using Tear-ific Tape! :)  All assembly of layers used the always amazing Tear-ific Tape - it's just the BEST!!!

Finally, I stamped my sentiment on a piece of white cardstock and embossed with Copper Peddler Embossing Powder. I really am digging the copper this month!!


This is a standard A2 sized card - so assembly was a snap!  All the layers were adhered with 1/4" Tear-ific Tape. I tied a bit of string around the sentiment and added a metal bow paper clip for some extra wow factor. Finally, Nuvo Crystal Drops in Ivory Seashell were delicately applied to the lace background, corners and "brick" wall.


I sure enjoyed sharing my tutorial with you today and I hope you learned something. I'll be back again soon with more SNS goodness to share!

See you soon!
Jess


Friday, 19 January 2018

SparkleNSprinkle - Hello Foxy

Hello friends!


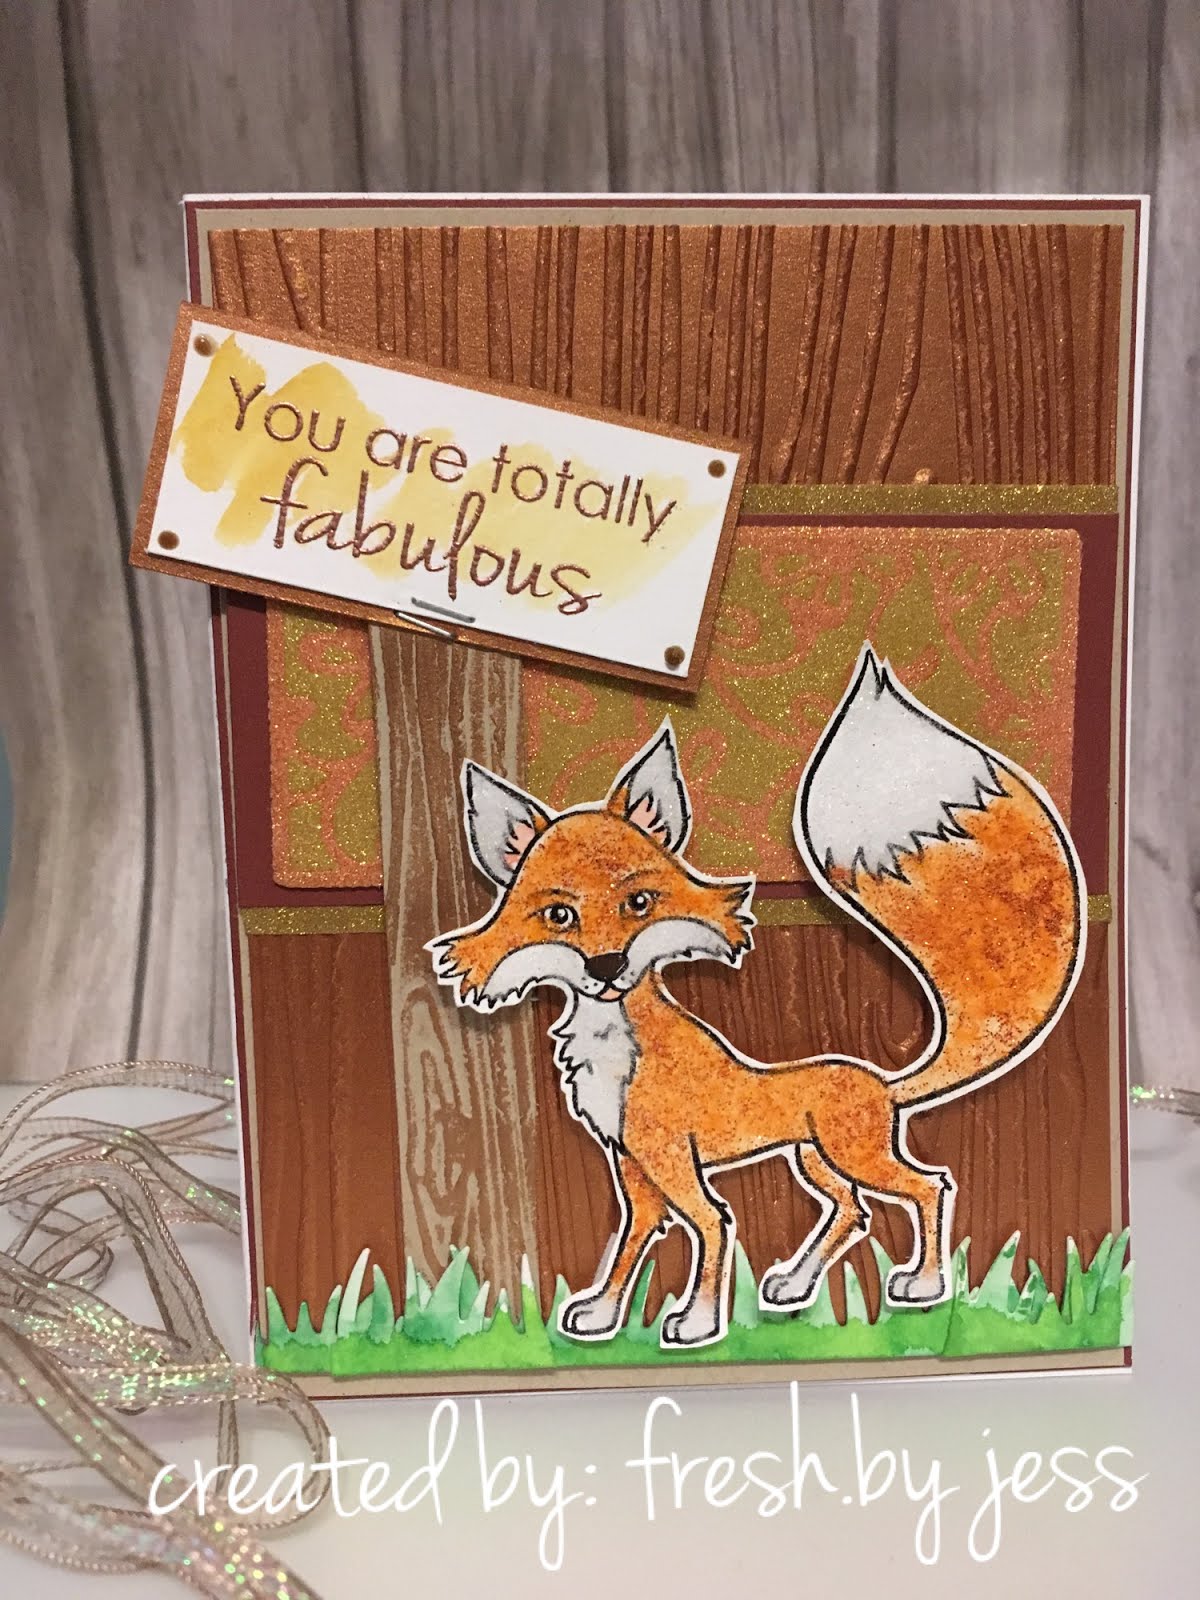
I'm here today to share a brand new card featuring a new Stamp Set from SparkleNSprinkle called "Hello Foxy". It's a really adorable set - I hope you love it too!  This is actually a pretty simple card to recreate - I hope you go out and make one for yourself!  I know you have a "foxy" friend who would love to receive this card, don't you?

SNS Supply List


Ok....let's go!

First Steps

Let's create the framed background glitter piece!  I started by attached a piece of 2.5" Tear-ific Tape to a piece of white cardstock. Pretty simple start, huh? Using the Tonic Studios Delicate Daisy Die, I used my Big Shot to cut through the adhesive back portion of the Tear-ific Tape - NOT ALL THE WAY THROUGH!  We want to create a Glitter Inlay Technique!  You may have to play around with your own diecutting machine to find the right "sandwich layers" to only cut through the top portion.


Using a paper piercing tool, I removed the cut backing areas of the Tear-ific Tape gently to expose the adhesive below. It's super sticky stuff!  Once I had it all removed, I sprinkled on the 24kt Gold Microfine Glitter (oh so soft and suede like!) and burnished it into the adhesive well - being careful not to dislodge the remaining protective backing.  After I removed the excess glitter, I repeated the steps with the remaining backing, this time using Autumn Frost Glitter.


Here you can see the gorgeous background this creates. I just love this technique. I added a mat of metallic copper cardstock behind the panel and another mat of 24kt Gold Edged cardstock. This technique is simple - apply 1/4" Tear-ific Tape around the edge of your paper (right up to the edge!) Remove the backing and sprinkle on your Glitter (I used the 24kt Gold!) and burnish well. Super simple - but super effective!


Creating your Fox


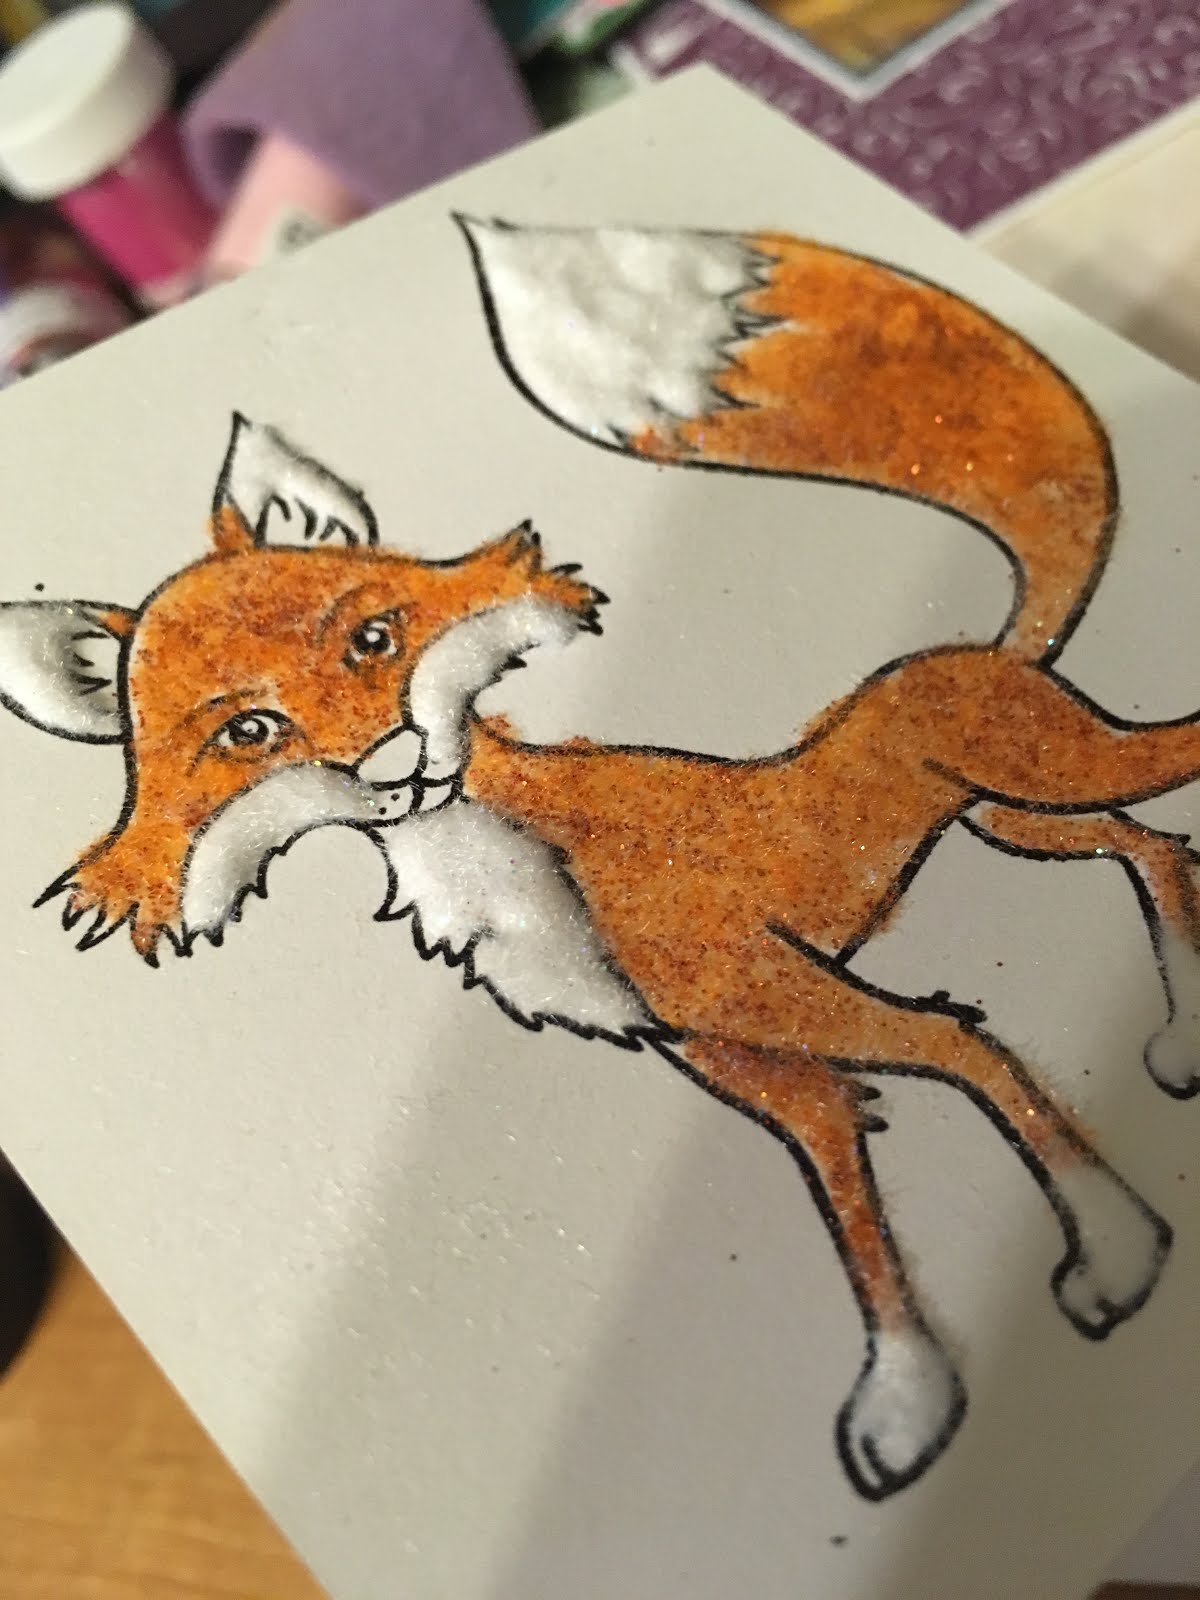
I started my fox my stamping with Versamark Ink onto white cardstock (first rubbing the cardstock with my Anti-Static Bag!) then heat embossing with Black Detail Embossing Powder. Next, I applied my Nuvo Medium Glue Pen all over the fox's body and added Autumn Sparkle SparkleNSoft (aka flocking with glitter added!).  He was looking pretty foxy at this point, but I wanted the white parts to stand out even more, so I added a VERY thick layer of Nuvo Deluxe Adhesive onto the "white" areas, then sprinkled on the Twinkling Clouds SparkleNSoft. I set the little guy aside to dry and went to work on my sign.


The sign came to me as I was creating the background! I had used a woodgrain embossing folder to emboss a piece of Metallic Copper Cardstock - then I thought, "hey, a sign is a perfect way to do the sentiment!". So that's what I did. I grabbed a scrap piece of kraft colored cardstock and embossed with the same folder. Using the Nuvo Embellishment Mousse in Cosmic Brown, I slightly "distressed" the wood of the pole.


I stamped the sentiment in Versamark Ink and heat embossed with Copper Peddler Embossing Powder (I think this is my new favorite color right now!).  Once I realize my little guy would be outside, I needed to add grass!  I used a Lawn Fawn die from my stash and cut some white cardstock. Then I watercolored the grass using the Nuvo Aqua Flow Pens in Spring Meadow and Autumn Woodland (I like to mix my colors on an acrylic block first as a paint palette, then paint with an Aquapainter pen!). I gave the little foxy's ears a wash with the pink color from the Spring Meadow collection and the sign a hint of color with the yellow. His nose was colored with the brown Aqua Flow Pen from the Autumn Collection.  I fussy cut out my fox and popped him up with some 3D foam tape.

All the layers were attached using 1/8" Tear-ific Tape.  Nuvo Crystal Drops in Dark Walnut were added to "nail" the sign to the card (haha) and a decorate mini staple attached the sign to it's pole.


As always, I hope you loved this card. I always have fun creating them.

Until next time,

Jess

Friday, 24 March 2017

SparkleNSprinkle - Irish Blessings #2

Hello friends!


I have another new creation for SparkleNSprinkle today featuring the Irish Blessings stamp set!  This one has a fun, angled fold!

Supply List:

STEP 1: Print off the Digital Paper!
Isn't this gorgeous paper?  I chose to work with the green splattered background and printed off a couple sheets to work with (how cool is that?)


STEP 2: Make your fun folds!

I chose to do a Diagonal Gate Fold for this card.
My cardstock piece measured 5.5" by 8.25".  I used my scoring tool to make score lines at 2 3/4" and 5 1/2". After folding them in, I made score lines to the outside pieces on the diagonal (I should have made a quick video - idea for next time!). It's actually quite simple.


Step 3: Your Accents
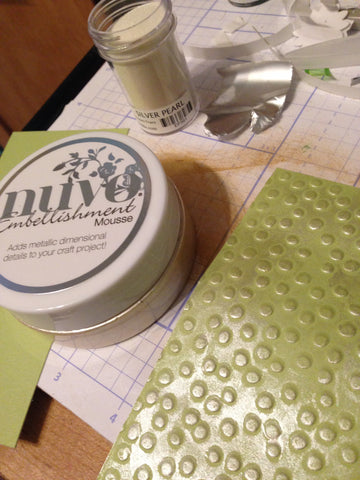
I took a coordinating green cardstock and ran it through an embossing folder to create texture.  Next, I took my Mother of Pearl Embellishment Mousse to accent the embossed texture.


I stamped the adorable clover hat image onto white cardstock with Versamark Ink and Embossed with Black Detail Embossing Powder.  I colored in the image using ShinHan Twin Touch Markers.  I added Aztec Gold Glitter to the buckle of the hat using the Small Nuvo Glue Pen.  I used a scalloped die to cut out the image and a background piece.  I used the Mother of Pearl Embellishment Mousse to accent the outside edges of the image.  The sentiment was stamped with Versamark Ink and embossed with Black Detail Embossing Powder, then fussy cut out. 


After I cut down the printed Digital Paper to fit my panels, I stamped the clovers randomly around using Versamark Ink and embossed with Silver Pearl Embossing Powder! It gave such a nice, subtle background!  I also added a sentiment to the inside panel using the Versamark Ink and Black Detail Embossing Powder.

STEP 4: Adhere your layers!

  
All of the panels were adhered using 1/4" Tear-ific Tape (love, love love this stuff!)  Some green ribbon from my stash was added for some extra touches.


I hope you enjoy this card!  I had a lot of fun making it.  Don't forget to check out all the other amazing items in the SparkleNSprinkle shop!

Until next time, 

Jess

 photo MHKDesigns_FreshByJess_Signature.png