Showing posts with label papercrafts. Show all posts

Wednesday, 25 March 2020

Creative Knockouts Challenge #343 - Anything Goes

Hello crafty friends!

It's time for a new challenge over at Creative Knockouts Challenge #343. Our theme this week is "Anything Goes” and our sponsor is the amazing “Fabrika Fantasy". I actually decided to make two cards because I was having fun!  I'm using the "Fairy-Tale Unicorn" stamp this week. So classic! Everyone needs a cute unicorn stamp, right?

I used the image and resized it a bunch of times to create a background paper and then printed a full sized unicorn for the focal image! So cute!  I wanted fun and cheerful during this time of social distancing. It sure is a crazy world right now, isn't it?


Here is what I created:


I hope to see you at the challenge! :)

Until next time,

Jess

Wednesday, 3 April 2019

Easter Parade with SparkleNSprinkle

Hello crafty peeps!


I have a new card to share with your for SparkleNSprinkle today!  Since Easter is just around the corner, I thought it would be a great time to do some Easter inspiration. Do you send Easter cards?

For this card, I used the Easter Parade stamp set!  It's just too darn cute!

I colored the sweet chick & duck with my ShinHan markers, then fussy cut them out.  To make the little guys extra cute and fuzzy, I added Sun Dazzle Flocking using my Medium Nuvo Glue Pen.  I also heat embossed the rubber boots with a new embossing powder called "Neon" The sentiment was stamped with Versamark Ink right onto the background patterned paper and heat embossed with Black Detail Embossing Powder.  (I just loved this cute sentiment!)


For the eggs, I stamped the outlines in Versafine Clair Nocturne ink, then used a variety of embossing powders to decorate them!  They were simply cut out and arranged on the card front. Tear-ific Tape was used to adhere the whole works together. I love adding faux stitches to things, so I used a journaling pen to add a frame around my scene.  I cut a few hexagons using the tonic die for some background interest and added them behind my feature characters.


Thanks for stopping by today!  See you again really soon!

Jess

Supplies:
Stamps:  

Inks:

Embossing Powders/Glitter/Flocking:

Adhesives:

Dies:


Monday, 1 April 2019

Pretty Hyacinth Blooms with Rinea

Hello friends!  

It's a busy day on my blog today - this post is my first project of the month for Rinea!


Aren't these flowers GORGEOUS?  You will love making them too using the handy 3D Hyacinth Die Set.  It is really easy to do - the instructions are right on the package! Simply cut, roll and glue!!

For these flowers, I used the following colors of Rinea Foiled Paper:


As you can see, you can make different versions of the flowers - from tight blooms to more looser ones!  I added a few handcut leaves to finish off my flowers, then tucked them into a terra cotta pot filled with river stones. So cute!  They are perfect to tuck on a shelf or even on your kitchen table!


Thanks for popping by AGAIN today :) 

Jess

Friday, 22 February 2019

Easter Basket Fun with Rinea

Hello friends!!! 


I have a fun new post today for Rinea - and I hope it inspires some ideas for your Easter decorations! What's Easter without Easter Baskets, right?  You could use these as place cards, hostess gifts, thank you gifts.... and of course, Easter Eggs!!!  Let's get crafty!!!

Rinea Products:
Woodland Variety Pack (NEW)
 - Jade/Gold Glossy Solid Foiled Paper

Other Supplies:
- Basket Die (I used a Stampin' Up! Sizzix Die)
- Big Shot Machine
 - Tear-ific Tape (double sided tape adhesive)
- Nuvo Deluxe Adhesive
- Easter Stamps (I used Stamps of Life & SparkleNSprinkle Stamps)
- Ink color of choice
- Paper Trimmer
- Scissors

Ok!  Now that we have the supplies out of the way, let's get crafting! I think that the supply list is longer than the instructions! haha
Step 1: Die Cut!
Using your Big Shot & Basket dies, choose your fave Starstruck Foiled Paper and cut all the parts.
    
Once you have it all cut out, you are going to fold on the score lines and get ready to add your Tear-ific Tape strips.
  
Step 2 - Assemble!
You are going to want to remove the protective  backing on your Tear-ific Tape and adhere to the base plus the sides. 
  
Pretty simple so far, right? P.S - that was the hardest part!
Step 3 - Stamp your decorations!
I used a couple of my favorite Easter Stamps. The little chicky is from SparkleNSprinkle - I stamped and watercolored her up, then adhered to the front of my Easter Basket. My "chocolate" easter bunny stamp is from the Stamps of Life. Of course I had to decorate her with a Rinea Fuchsia Starstruck Foiled Paper bow :)  To make the "Easter Grass" that goes in the basket, I cut really thin strips of the Emerald Starstruck Paper and used those as my basket stuffer. 


Here is a second basket I made using the BRAND NEW Woodland Variety Pack in a non-Easter theme:
Don't you just love those beautiful colors? I sure do!

Thanks for stopping by!  I hope this post inspired you to make some wonderful Rinea Foiled Paper baskets!
See you next time!
xoxo
Jess

Thursday, 31 May 2018

What's Your Oldest Paper?

Welcome to our June 2018 Papercraft Business Challenge!

Our theme is Anything Goes (w/option: Use Your Oldest Paper - for an extra entry to win the prize).
This is a fun theme!  The rest of the Design Team and I were talking about using old papers and how we tend to hoard our faves....but then somehow they start to look outdated after awhile. Sooo - we decided to add that exact thing as our extra option!

I knew immediately what my oldest papers were - they were these super cute Stampin' Up! Papers (AND matching ribbons even!) from the 2006 Winter mini Catalogue!  I remember ordering them the very first time I was introduced to "stamping" at a club I was invited to!  I ended up hoarding them because I loved the color combo - teal, pink and brown!  SO....I decided to stop hoarding (hahah) and play with them today!!!


Here is what I created:


I truly hope you will join in on this special challenge! Use up that old paper stash!!! :)

See you all next time!

Jess

Friday, 6 April 2018

SparkleNSprinkle - From Christmas to Lanterns

Hello friends!


It's time for our April 2018 New Stamp Reveal over at SparkleNSprinkle!  I'm so excited to share that  in addition to the Sponsorship & Challenge Coordinator Position, I have also taken on a new role for SparkleNSprinkle - Design Team Coordinator! Lots of new challenges to take on and I am just so darn excited!!!

Onto this first Reveal card!  I just LOVED the Christmas Baubles Stamp Set, but couldn't bear to make a Christmas card yet.....soooo, I figured I would go outside the box!  After looking closely at the stamps, I realized I could turn them into lanterns!  Genius! (I sometimes have those moments you know - hahaha!). You would never know by looking at this card that it was made from a Christmas set!  Think outside the box ;)  I was super excited to that the FANTASTIC Demo Donna chose to use my card as the inspiration for our April Video Kit Club!!!

First up....let's talk about the Supply List:


Onto the card!

First things first - let's stamp!  I inked up the baubles with Versamark Ink and randomly stamped them onto my white cardstock. I sprinkled on Black Detail Embossing Powder and heat set. Then I grabbed all my BRAND NEW Nuvo Marker Pens!  You will have to forgive me for not writing down all the exact colors I used! I'm new to the whole "alcohol marker" thing - so I promise in the future to write down the numbers as I use them! I linked you above in the supply list to one of the sets - simply search from there for all 20+ sets! They blended really nicely and I can't wait to share more artwork that I made with them! So much fun - and I love that they come in a 3 pack at a time - I don't have to invest in 300 markers to get some nice blends! WIN WIN!  


Aren't the colors pretty? I simply fussy cut them out to create the "lanterns". :) 

Onto the BACKGROUND!!  This part was easy peasy - I simply grabbed my Nuvo Aquaflow Pens in Yellow & Green (from the Spring and Summer collections) and did a freehand wash over the background. No over thinking - just splash it on! I wanted it to feel like a sunset or lazy summer day style background. I figured I need some sort of "fauna" in the background, so I grabbed an oldie, but goodie - the Wetlands 2 Stamp Set!  As you can see, I stamped 2 of the images with Versamark, then heat embossed with the new (and GORGEOUS) Timber Embossing Powder. So pretty!  (NOTE: I ended up covering this image with my sentiment in the end - ooops! BUT I wanted you to see the gorgeous tones and colors of this new Embossing Powder!).


A layer of 1/2" Tear-ific Tape was added around another piece of white cardstock, and  to this I sprinkled on the Spring Willow Embossing Powder - heat setting of course!! I wanted a bit of a border for my panel. SOOO light and pretty. You will love this powder.


For my Sentiment, I grabbed the BRAND NEW Nuvo Shimmer Powder in Atlantis Burst. These are similar to the Colorburst Powders - but have sooo much sparkle and dimension to them!  I sprinkled some onto my acrylic block and "painted" it on with a painter pen.  So pretty - and look at the ombre effect I was able to create! You are definitely going to want some of these in your stash ASAP!


I actually grabbed my scissors and "doctored" up this stamp set for my sentiment!  I carefully cut apart the "Celebrate" word from the entire sentiment and just used this portion. I love this part about rubber stamps!  I can still use all the words together in the future too! I used the Timber Embossing Powder on the sentiment too :)


All the layers were adhered with Tear-ific Tape of course!  I hand drew in the "lantern rope" using a Nuvo Caligraphy Pen. Nuvo Glitter Drops in Honey Gold and Nuvo Crystal Drops in Morning Dew were used to embellish the card.


I hope you LOVE this card - it was a TON of fun to create!  I can't wait to share the rest of my cards with you this month - stay tuned!! There are some really pretty things to come - and lots more coloring to do!!

See ya soon!

Jess

Thursday, 15 March 2018

Ninabrook Cards - March 2018

Hello friends!


Welcome to my very FIRST post as a Dynamite Design Team Member at ninabrook.com! :)  I'm sooo excited to join their team and share my creations!

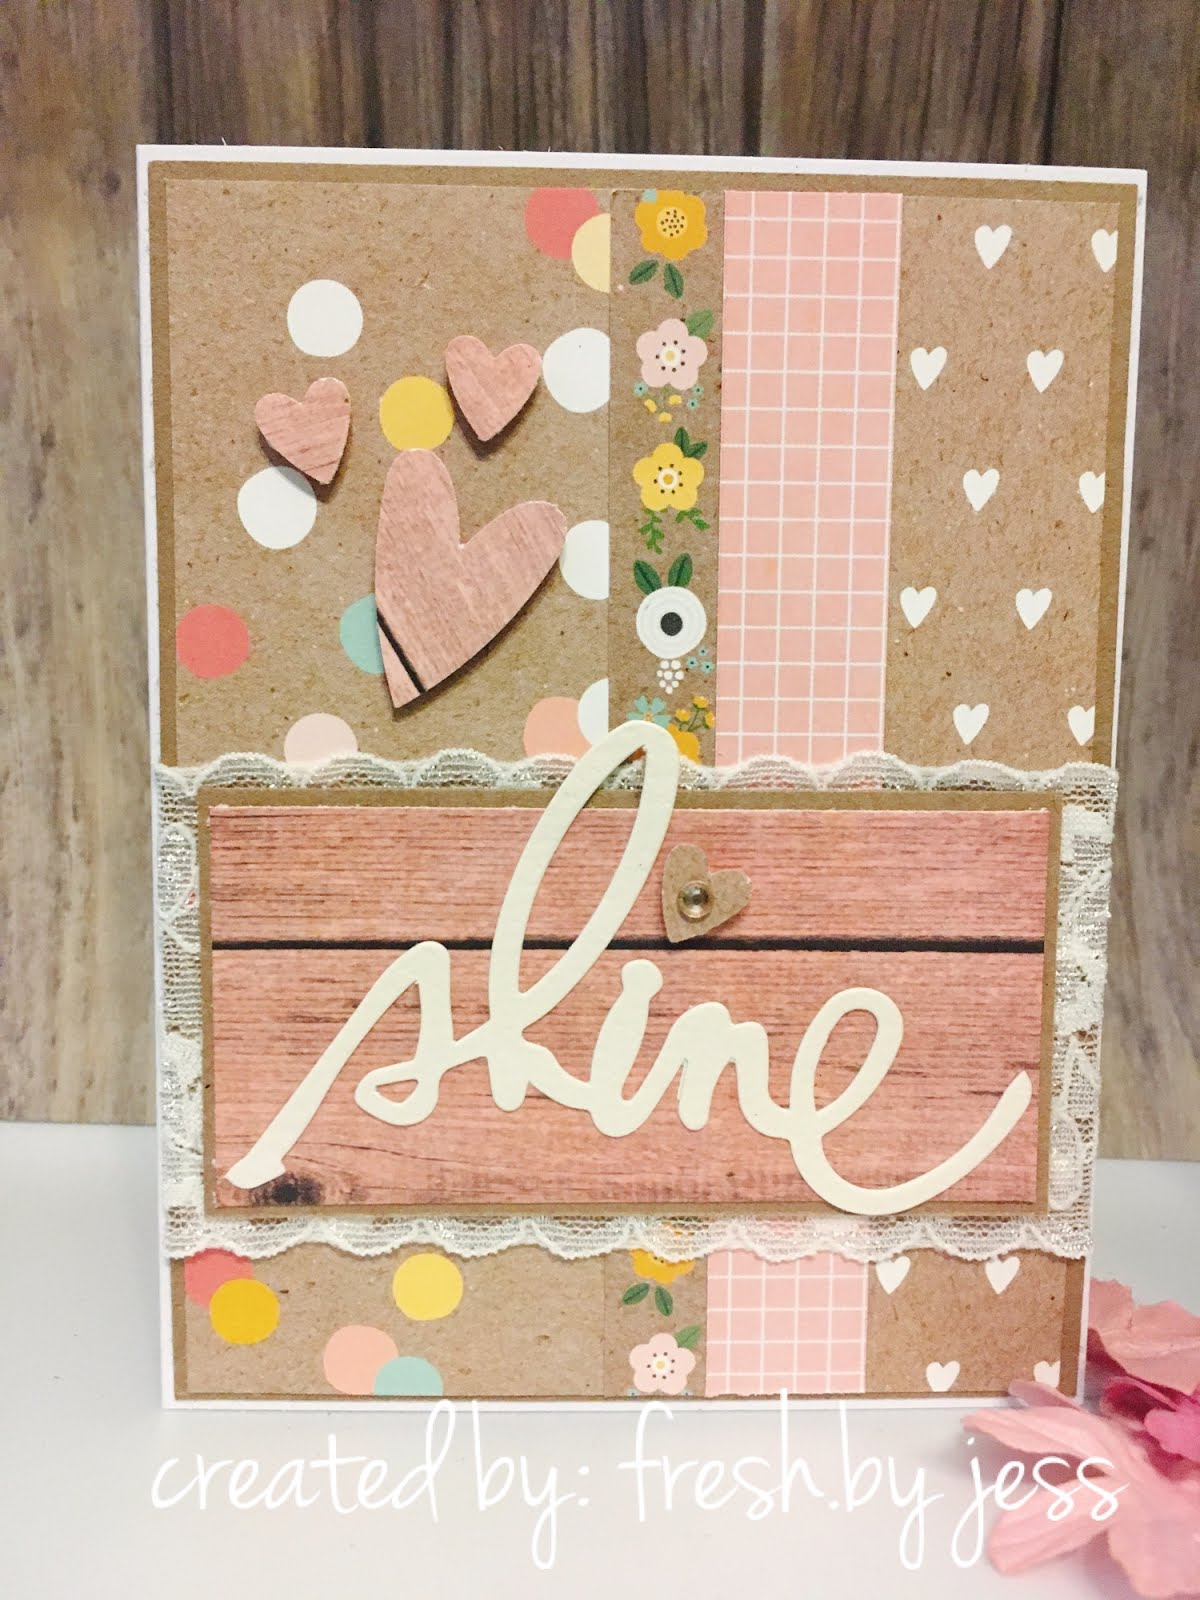
My first shipment of products contained some pretty GORGEOUS things - so I couldn't just stop at one card...I made a collection!  I was blessed to work with the Spring Fling Paper And Embellishment Bundle. Seriously - the Pebbles papers in this collection are simply stunning!  I also found some super cute Pleather Bows and a few die cut words in my collection. How fun!


  Vellum quotes

Dimensional stickers   Image 1

Alrighty....now that you got to see what I was able to play with, onto what I created! I really wanted these products to SHINE by themselves, so I challenged myself to create without adding much else! I did add some Kraft Cardstock, and of course Card Bases & Envelopes.


I did add some lace, gold shimmer trim and gold sequins to a few of the cards, but other than that - I really let the products shine for themselves! :)  I hope you enjoy these cards - I had a blast making them!  It's amazing how creative we can be when we let the products guide us! :)


If you have any questions at all on how I created these cards, please ask away! I love to help!


Enjoy the day - and pick up some cute Ninabrook products while you're at it!


See ya soon!


Jess