Hello friends!!!
I have a fun new post today for Rinea - and I hope it inspires some ideas for your Easter decorations! What's Easter without Easter Baskets, right? You could use these as place cards, hostess gifts, thank you gifts.... and of course, Easter Eggs!!! Let's get crafty!!!
Rinea Products:
Woodland Variety Pack (NEW)
- Jade/Gold Glossy Solid Foiled Paper
Other Supplies:
- Basket Die (I used a Stampin' Up! Sizzix Die)
- Big Shot Machine
- Tear-ific Tape (double sided tape adhesive)
- Nuvo Deluxe Adhesive
- Easter Stamps (I used Stamps of Life & SparkleNSprinkle Stamps)
- Ink color of choice
- Paper Trimmer
- Scissors
Ok! Now that we have the supplies out of the way, let's get crafting! I think that the supply list is longer than the instructions! haha
Step 1: Die Cut!
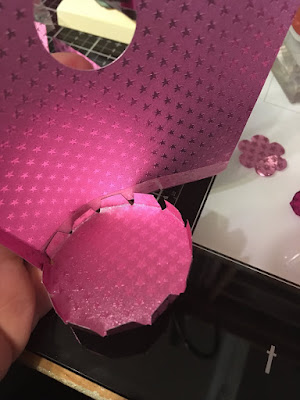
Using your Big Shot & Basket dies, choose your fave Starstruck Foiled Paper and cut all the parts.
Once you have it all cut out, you are going to fold on the score lines and get ready to add your Tear-ific Tape strips.
Step 2 - Assemble!
You are going to want to remove the protective backing on your Tear-ific Tape and adhere to the base plus the sides.
Pretty simple so far, right? P.S - that was the hardest part!
Step 3 - Stamp your decorations!
I used a couple of my favorite Easter Stamps. The little chicky is from SparkleNSprinkle - I stamped and watercolored her up, then adhered to the front of my Easter Basket. My "chocolate" easter bunny stamp is from the Stamps of Life. Of course I had to decorate her with a Rinea Fuchsia Starstruck Foiled Paper bow :) To make the "Easter Grass" that goes in the basket, I cut really thin strips of the Emerald Starstruck Paper and used those as my basket stuffer.
Here is a second basket I made using the BRAND NEW Woodland Variety Pack in a non-Easter theme:
Don't you just love those beautiful colors? I sure do!
Thanks for stopping by! I hope this post inspired you to make some wonderful Rinea Foiled Paper baskets!
See you next time!
xoxo
Jess


No comments:
Post a Comment