Showing posts with label November Reveal. Show all posts

Friday, 23 November 2018

SparkleNSprinkle - Koi Pond Beauty #2

Hello friends!


For my final SparkleNSprinkle November Release, I made a card using BOTH the new release stamps of "A Big Thanks" and the "Koi Pond Beauty". This follows a similar technique as my first card. 

Here is my SNS Supply List:

Step 1 - Create Your Background


You can follow the "smooshing" technique I did HERE. I also did the same technique for the floral portion. The Nuvo Aqua Flow Pens are going to become your best friend for this technique!


Step 2 - Stamp and Color Your Images


Once again I stamped using the Nuvo Hybrid Ink in Black Shadow.  I like to play surgeon with my stamps sometimes and cut them apart into two pieces. For the flower, you can see that I cut the "water" portion off. I can still use them together or separately - easy peasy!  I used the sentiment from "A Big Thanks". I inked it up with Versamark Ink and heat embossed with Madagascar Green Embossing Powder.

Around the edges of the background, I used the second flower to stamp in Versamark Ink and heat set with Clear Detail embossing powder. It added a little extra dimension to the background.


Step 3 - Build Your Scene!


I arranged the Koi,flowers and sentiment onto the card front. For the background, I added a border of 1/2"Tear-ific Tape and added Baby Blue Embossing Powder (heat setting). A few spashes of the Aqua Flow were sprinkled onto the card. 

Step 4 - Sentiment and Finishing Touches

I added "bubbles", using the Nuvo Crystal Drops in Morning Dew.  I also added some drops of Aquatic Mist Glitter Drops.  I added Luau Green Glitter to the flower as well. Everything needs a little sparkle ;)


I hope you enjoyed this card - and thanks for joining us for our November reveal month!

See you again soon!

 photo MHKDesigns_FreshByJess_Signature.png

Friday, 16 November 2018

SparkleNSprinkle - A Big Thanks

Hello crafty friends!


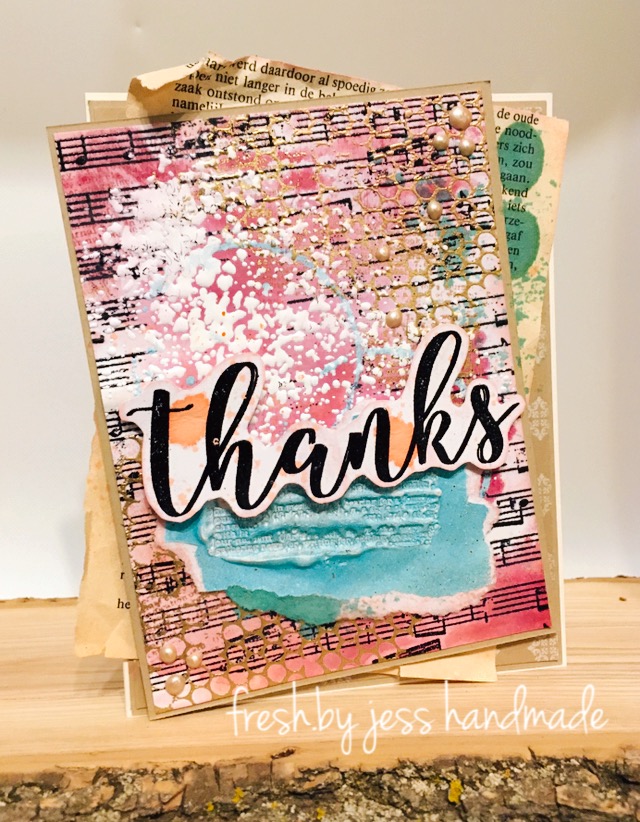
I really stepped out of my comfort zone on this card and did more of a mixed media feel! This is my second card for SparkleNSprinkle November Reveal!!  There are a lot of layers on this card along with tons of embossing powder and a couple extra stamp sets!  SOOO...let's get inky!

First up, here is my SNS Supply List:


Let's get crafting!


Step 1 - Layers of Embossing Powder and Creating the Background

So to start with, I stamped the Music Background stamp with Versamark Ink and heat embossed with Black Detail. I wanted it to be distressed, so I purposely didn't ink it evenly. 


 I continued on with my theme of "Ink Smooshing" and created the backgournd colors using Nuvo Aqua Flow Pens, my Tonic Glass Mat and some water spritzes! I just love all the different backgrounds you can create with this technique!


Step 2 - Add More Embossing Powder and STAMP 

The next few steps I used were fairly random (haha). I used the Journal Mixed Media stamp and Versamark Ink to add some random ink spots. I added both Gold Detail and Beach Cruiser Embossing Powders and heat set.


I just kept adding layers until it looked how I wanted!  I also grabbed the Nuvo Hybrid Diamond Inks and did direct to paper inking along with stamping randomly over the background.  Some Super Thick White Embossing Powder was sprinkled on and heat set from under the panel.  


I wanted a little something special, so I took a piece of white cardstock, inked up with Versamark Ink, sprinkled on Beach Cruiser Embossing Powder and heat set. I repeated this process in the same spot until I had about 4 layers of embossing powder. Working quickly, I used my Journal Mixed Media Stamp (which was inked up with Versamark) and stamped into the warm embossing powder, creating this really cool wax seal effect!  I distress it a bit and added it to my background.


Phew! That was a lot of background steps! (haha).

Step 3 - Sentiment and Put It Together

I stamped the sentiment with Versamark Ink and heat set with Black Detail Embossing Powder. I dripped a bit of Aqua Flow Ink onto it to distress, then fussy cut it out. I adhered it to my background with some Foam Squares.  I used a piece of patterned paper from the Kaisercraft Memory Lane Paperpack and added it to my card base background.


I had a piece of vintage German book paper in my stash, so I distressed it with the Hybrid Inks and Nuvo Aqua Flow Pens, then adhered to the card base with Tear-ific Tape. (oh how I took a ton of photos for this card! LOL)


All the layers were adhered with Tear-ific Tape and I added some Caramel Cream Crystal Drops to finish the card.


I had a ton of fun playing with Embossing Powders on this card - and stamps!!  Now go and have fun creating!

See you soon!

 photo MHKDesigns_FreshByJess_Signature.png

Friday, 9 November 2018

SparkleNSprinkle - Koi Pond


Hello friends!


It's time for our November Release, and one of the stamp sets I was excited to work with is the Koi Pond Beauty Set!  It's a true beauty and right on trend too! Koi fish seem to be popping up everywhere!

Here is my SNS Supply List:

This was a simple card to make - I really loved how my background turned out! Here's how I created it:

Step 1 - Create Your Background


I used a "smooshing "technique to do it!  I simply dropped "drops" of Nuvo Aqua Flow Watercolor Pens onto my Glass Mat, spritzed with water and then placed my paper overtop, letting the paper soak up the ink!  You will never get the same pattern twice and I love how all of the colors mash together to create beautiful new colors!  Once it was dry, I sprinkled on some of the Super Thick White Embossing Powder, heat setting from the bottom until it melts.


Step 2 - Stamp and Color Your Images


I stamped the Koi onto some white cardstock using the Nuvo Hybrid Black Shadow Ink and colored them in with Nuvo Aqua Flow Pens. Once they were dry, I fussy cut them out and covered them with Versamark Ink. Then I sprinkled on Clear Detail Embossing Powder and heat set. This created an amazing finish and shine on the koi!

Step 3 - Build Your Scene!


I arranged the Koi into a circular pattern and then attached them to the card front with Foam Squares.

Step 4 - Sentiment and Finishing Touches

The sentiment was stamped with Versamark Ink and heat embossed with White Detail Embossing Powder. I used a turquoise cardstock to mount the background and the sentiment, adhering everything with 1/4" Tear-ific Tape. Finally, to emulate "bubbles", I used the Nuvo Crystal Drops in Morning Dew. 


I hope you enjoyed this card - it was my fave from the entire new release!!!

I've entered this card in the following challenges:
Classic Design Team Open Challenge #11

2 Crafty Critter Crazies Challenge #20

World Wide Open Design Team Challenge #10

See you again next week!

 photo MHKDesigns_FreshByJess_Signature.png

Tuesday, 14 November 2017

SparkleNSprinkle - November 2017 Reveal

Welcome to the November
Sparkle N Sprinkle New Reveal Blog Hop! 


We are pleased to reveal the following new stamp sets this month.

The sets are:


Cat's Meow 870
(Digital Version: DIGI870B)


You are definitely going to want both the digi version as well as the rubber version because when you purchase the digital versions, there are lots of extras that aren't available otherwise.  These extras can include additional images, additional sentiments, digi papers (in some cases), and a cut file.

The new sets are 20% off until the 20th of the month.  Head on over to the SNS store once you've finished the Blog Hop and start shopping.

SNS is always adding new products and new product lines to the store.  So stop by often to see what's new!


One GRAND PRIZE WINNER will be announced on the 17th of the month.  One of the Designers is our Mystery Host and the winner will be selected from comments left on her blog.  You must leave a comment on each of the Designers' blogs in order to be selected as the winner, as you never know who the Mystery Host will be.  This is checked for compliance.

The GRAND PRIZE WINNER will be announced on the SNS Facebook page and on the SNS Blog and will receive all the rubber stamp sets revealed this month.

The Blog Hop order is:
(Tip: if you have difficulty with a particular link, try clicking on the Designer's blog title to be directed to their Home page.)
Jess - you are here!


We hope you enjoy the New Reveal Blog Hop as much as we enjoy creating new projects for it.  Be sure to visit the SNS Blog for even more inspiration.  Something new is posted most every day.


Did you know that SNS has a You-Tube Channel?  If not, then you are in for a real treat.  Subscribe today to get all the latest tips and techniques!


The Sparkle N Sprinkle Creative Challenge group is on Facebook.  
This is a closed group (just trying to keep out spammers), but we want anyone who to participate to join.  Click on the link and join in on the fun today!

The Creative Challenges run from the 1st - 25th of each month.  A SNS image (either rubber or digi) is required.  If you don't have any yet - no worries - there are some freebies located on the Home page of the SNS website.  Just scroll down the page a bit to see them.

The Creative Challenge Winner and Top Three will be posted on the last day of each month.  The winner will receive a $15 Gift Certificate to go shopping at the SNS store.

Please review all the Challenge Rules before submitting your photo 😀.  We can't wait to see what all you create using SNS images.


~~~~~~~~~~~~~~~~~~~~~~~~~~~~~~~~~~~~~~~~
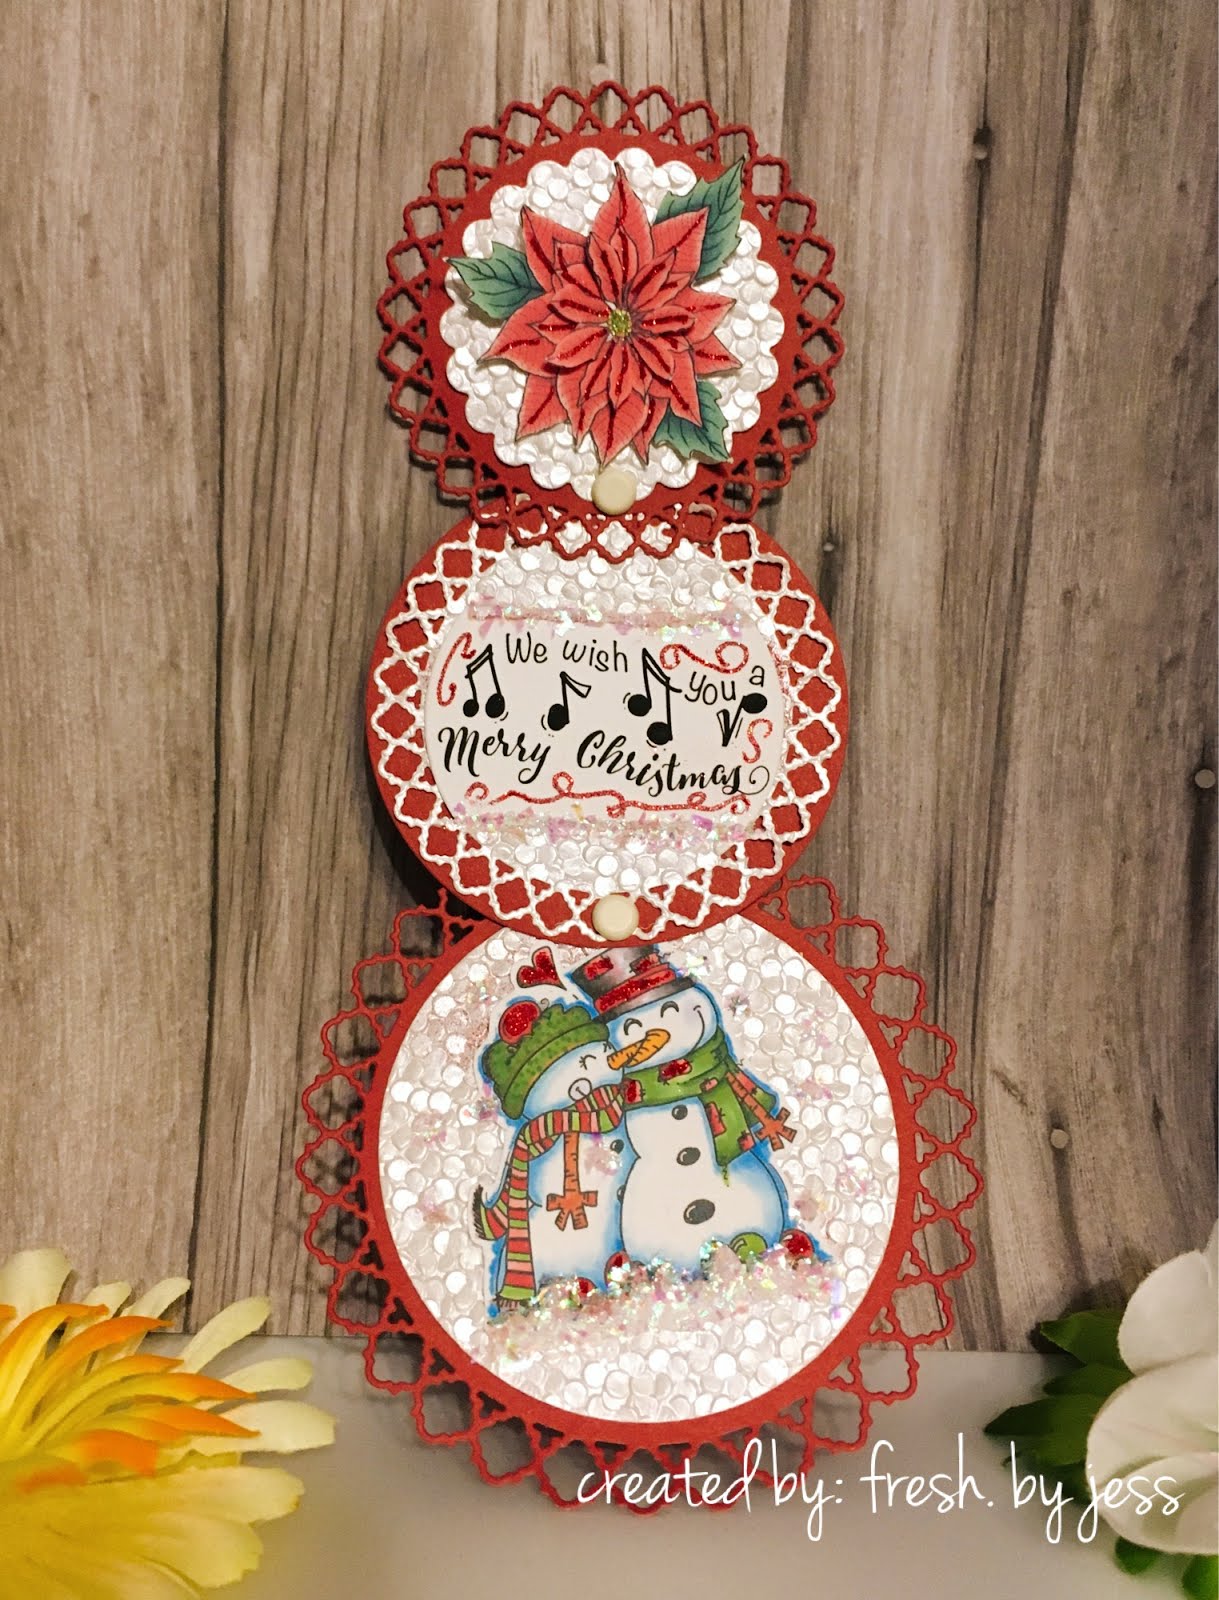
I was so excited to work with the ADORABLE Snowman Couple set!  I wanted to created a really cool, out of the box card....so I came up with this "telescoping" card.  It's actually pretty easy to assemble!  First up, my supplies:


Let's get started!

So, to start with I figured out what size of circles I needed to make this and cut them out using various dies.  I used red cardstock along with the GORGEOUS new Craft Perfect Papers from Tonic Studios!!  I was blessed to work with some of these amazing handmade papers - I used "Hailstorm" for this card.


Next up, I printed off my DIGITAL STAMPS.  I love using a combo of digis and rubber stamps in my crafting. Digital stamps can be awesome when you want to resize something - plus, these are already beautifully colored - so an extra bonus! :)


I fussy cut out my images to fit the circles.  Snowman were going to be on the bottom layer, my sentiment in the middle and finally, I decided to use an older Digital set called "Christmas Poinsettia" for my top layer. 

Once I had all my layers laid out, I adhered them using 1/4" Tear-ific Tape.  I wanted to add "snow" to the bottom and around the snowman couple, so I added some Deluxe Adhesive and put SHAVED ICE glitter.


So pretty and sparkly! :)  

I printed out my Christmas Poinsettia Image and fussy cut it as well. I cut out a second layer of the flower and added it to the top to make it 3 Dimensional.  I wanted to add a bit of shimmer, so using my Sakura Glue Pen, I traced the flower and sprinkled on the Gypsy Red Glitter!  Soo pretty.  I also added some swirls of Gypsy Red Glitter around my sentiment and the hearts by the Snowman Couple.


I also added some Shaved Ice Glitter around the sentiment.  Finally, once all the layers were well dried, I connected them all using brads (yep, I still have TONS of them kicking around my craft room!).  I added a small hole to the top of the bottom piece and figured out how I wanted it to "telescope" together.  Here is a bit better of a close up of how the pieces were attached.


Here is what it looks like all fold up:


I hope you enjoyed this super fun card and I challenge you to head to your craft space and make something similar! IF you do, please come back and share the link with me so that I can see it too!


Here's a sneak peek of more projects to come this month :)


See you next time!


Jess