
Hello crafty friends!

Happy Father's Day to all the "Dad's & Dad Figures" out there! We appreciate everything you do each and every day. What a better time to share with you a fun Father's Day card featuring Rinea!
Project Supply List:
Embossing Folder (brick style)
Cricut "superhero" cut
Nuvo Adhesive Pen - Large
Dark Brown Cardstock
White Card Base
Scissors
Tag punch
Sand Paper, Rubbing Alcohol
Twine
Foam Square
Stamps - dad, My Hero, Happy Father's Day, etc
Let's make Dad a handmade card today!
First, take a piece of 4"x5.25" Ruby/Gold Glossy Rinea foil and run it through your brick style embossing folder. Turn it over so the gold side is showing and locate the center (approximately). I scored an "x" in the middle and cut out from there, creating my "explosion" opening. You are going to want your super hero to poke through! You don't have to open it up completely now - you can customize it once it overlays our superhero! I used sandpaper to lightly sand the bricks - it gave them a nice aged look. Once you are done that, you can set it aside for now.


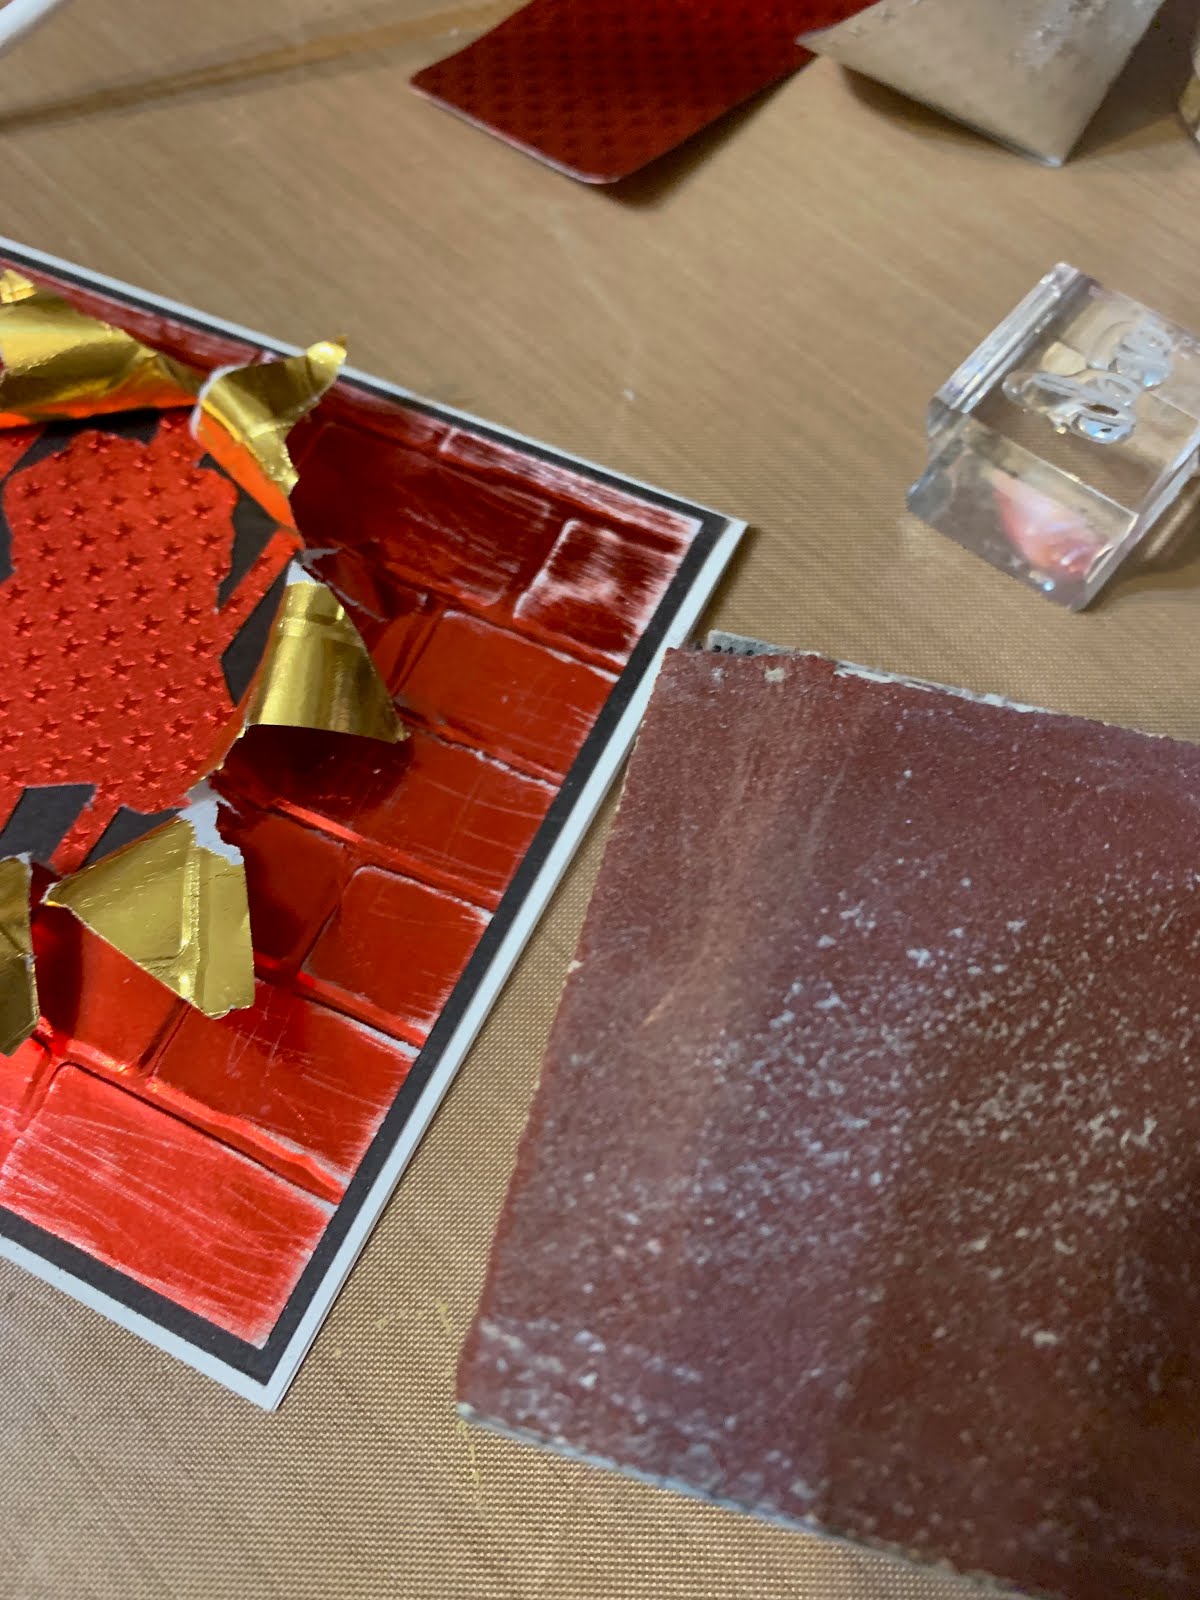
Using a Criuct (or other electronic cutter/die cutting machine), cut your "superhero" image. I used a "super"dad image - but you could definitely use any superhero image you wanted to - a symbol, etc. I used the Ruby/Ruby Starstruck to cut this part out. I just roughly sized it so it would fit in my opening.


TIP: When using a Cricut mat, use one that is not overly tacky as you don't want to rip the layers of foiled paper apart!
Using a smaller tag punch, cut a tag from your Mocha/Gold Glossy foiled paper. Then, stamp your sentiment with Ghost Ink. I used some letters to spell out "Dad' and added a "My Hero" sentiment as well. Once it is dry, gently rub with Rubbing Alcohol and a cloth to remove the "color" part of the foil! Isn't that cool? I wanted it to look sort of rustic, so I didn't remove all the color.


Final step is assembly! Attach your superhero die cut to the dark brown background using the liquid glue pen, then attach your brick Foiled Paper overtop using the same glue. At this point you could tear your opening larger to accommodate your superhero size. Use a dimensional foam square to pop your tag sentiment up and tie a small piece of twine to the tag. Attach the entire panel to you card base and voila!


A perfectly super card for your "Superhero" :)


Thanks for stopping by! See you again soon!
Jessica
No comments:
Post a Comment