Showing posts with label Home Decor. Show all posts

Friday, 16 April 2021

Butterfly Mobile with Rinea Foiled Paper


Hello friends!

Two blog posts in April? What??? Hahah - yep, still just getting into the swing of things! Here with go with another fun Rinea Foiled Paper Project! It’s a beautiful butterfly mobile!


I realized after making it how difficult it was going to be to photograph! 😂 
Here are the products you will need for this project:
Butterfly Punch
Clear Thread or fishing line
Hand sewing needle
Hot Glue
Small wreath form
Assorted greenery and flowers
Ribbon
Seed Beads

Step 1:
Punch out a ton of butterflies!


Step 2:
Using your sewing needle and clear thread, attach two seed beads to the bottom of a piece of thread and tie a double knot. Add your butterflies to the line and knot each butterfly as you go.  Create 4 strands of various lengths and attach to your wreath form.

Step 3:
Add your greenery and flowers to the wreath form using hot glue.


Step 4:
Use two lengths of ribbon and attach at 4 opposite points of the wreath to create your hanger. I hot glued them, then tie a knot at the top, creating a loop to hang


Step 5: (optional)
Using hot glue, add a second butterfly to random pieces to give a 3D look! Hang your mobile and enjoy!


Thanks for taking the time to stop by my blog!  I love to read your comments, thanks for leaving them!
Remember, you can save 10% on your Rinea order when you shop HERE.  I hope you are inspired to use your Rinea Foiled Paper to create something fun.

Have a great day!
Jess

Monday, 2 March 2020

Hello Strawberry Embroidery Hoop DIY with Rinea

Hello friends!
I'm working with Rinea Foiled Paper today and have a fun cool home DIY project to share with you!  The video is a bit longer than normal, but I share a few cool techniques for working with chipboard!  I was super excited to work with the Creative Embellishments chipboard items - in this project, you will see me use the Strawberries.
For this project, you will need the following products along with the chipboard:
- Embroidery Hoop
- Embossing Powder
- Versamark Ink
- Liquid Adhesive & Foam Squares
- Scissors
- Lace

Now lets check out how I created it here:
Here are a few more close ups:


Thanks for stopping by! Did you know you can save 10% on your order if you use my code JESSICAKAISER HERE.

See you again soon,
xoxo
Jess

Friday, 17 January 2020

Valentine's Home Decor DIY

Hello friends!


Valentine's Day is just around the corner! Typically, I don't do a ton of decorating, but I set up a small space in my house for seasonal displays last summer - so of course I needed some new ideas!

After many unsuccessful shopping trips trying to find something I liked, off to Pinterest I went (haha - don't we all?).  My home style isn't necessarily "farmhouse" and really doesn't have an overall theme. I love mid-century, clean lines, Scandinavian design, modern, industrial AND farmhouse - so I mash them up and do what I like. (ok all you interior designers - insert a loud GASP here!).

For my projects today, I decided on some canning jars, wood, fabric and bookstacks. Using pretty basic supplies that I had in my house, I managed to spend literally $2. in materials (I needed a couple pink paints).  The jars are just upcycled from my gigantic canning stash and I always have Kunin Felt on hand to make flowers with.  Books - well, I have been purging my own stash before thrifting for more.  We have a bin of wood odds and ends in our garage - yeah for scraps. And of course, I have a huge fabric stash too.


The jars were simple - paint, let dry and scuff up a bit. I tied some jute twine around them for a more rustic feel.  I had some peel off removable tape hearts, so I added them to one of the jars as a mask. When the paint was dry, I simply peeled off the tape.  The felt flowers are all hand cut and hand crafted. I just used some basic techniques online and got cutting! I've been making them for years, so they come together quite quickly. The flowers were hot glued to the top of the jars. Done! :)


I found an idea on Pinterest to make an XO from wood and an embroidery hoop. Two pieces of scrap wood were screwed together, then rough painted and sanded. Easy peasy! I added a piece of pink fabric to a wooden embroidery hoop and it became my "O".


Book stacks!  These I have been really enjoying making. I took some random hardcover books and painted them. Once dry, I hotglued them together and died some jute. I punched out some labels and distressed them, then glued them on the books.


I tucked my Scentsy warmer in behind the jars - it's the Mason Jar style so it fits right in!

There you have it - my handmade Valentine's suite made to fit my own style and decor.  You can make them too - it actually didn't take very long. The longest part was waiting for the paint to try so I could paint the other side of the books. I have since added a candle and another little chalked sign to the display. I'm sure a candy dish will make it's way in there too. hehe

Thanks for checking it out and I hope you will share your Valentine's Decor with me too.

Chat soon!

xoxo
Jess

Wednesday, 2 October 2019

Pumpkin Fun with Rinea

Hello friends!

Fall leaves, crisp air.....it can only mean one thing....EVERYTHING PUMPKIN!!!   My first  Rinea Project this month is all about the pumpkins!!

Today I'm sharing an adorable handmade Pumpkin Welcome Sign! This was a fun project I tell ya! I'm obsessed with all the fun thing my local Dollar Tree store has, and I recently picked up a wooden pumpkin sign base and metal fall words. This was a perfect time to use them!

Here are the products you will need for this project:
 Haunted Foiled Paper Variety Pack
(I used the followed from the pack)
Marigold Glossy 
Emerald Starstruck

Ghost Ink
Rubbing Alcohol
Adhesive of Choice
Scissors
Jute Twine
Sand Paper
I started by tracing my pumpkin onto a piece of Marigold Glossy Foiled Paper. I trimmed it out and glued it onto my pumpkin cutout with liquid adhesive. I used sandpaper to smooth the edges and add a bit of distressed look.


Next, I lightly traced out where I wanted my pumpkin lines to be - you know, the lines that make a pumpkin a pumpkin! Using a direct to paper method, I swiped my GHOST INK over my markings, light created swooshes and let dry.  I spritzed with rubbing alcohol and wiped off the color with a paper towel - MAGIC!!! LOVE the Ghost Ink!!!


I found some pumpkin leaf templates online, so I traced those onto my Emerald Starstruck Foiled paper and trimmed out. The were arranged and glued one along with my "Welcome" words. I tied some jute twine around the stem and voila!  Easy Peasy!


Love how this project came together!
Thanks for taking the time to stop by my blog!  I love to read your comments -
they are always an encouragement. I would love to see your projects if you create them too!

Have a great day!
Jess

Monday, 2 September 2019

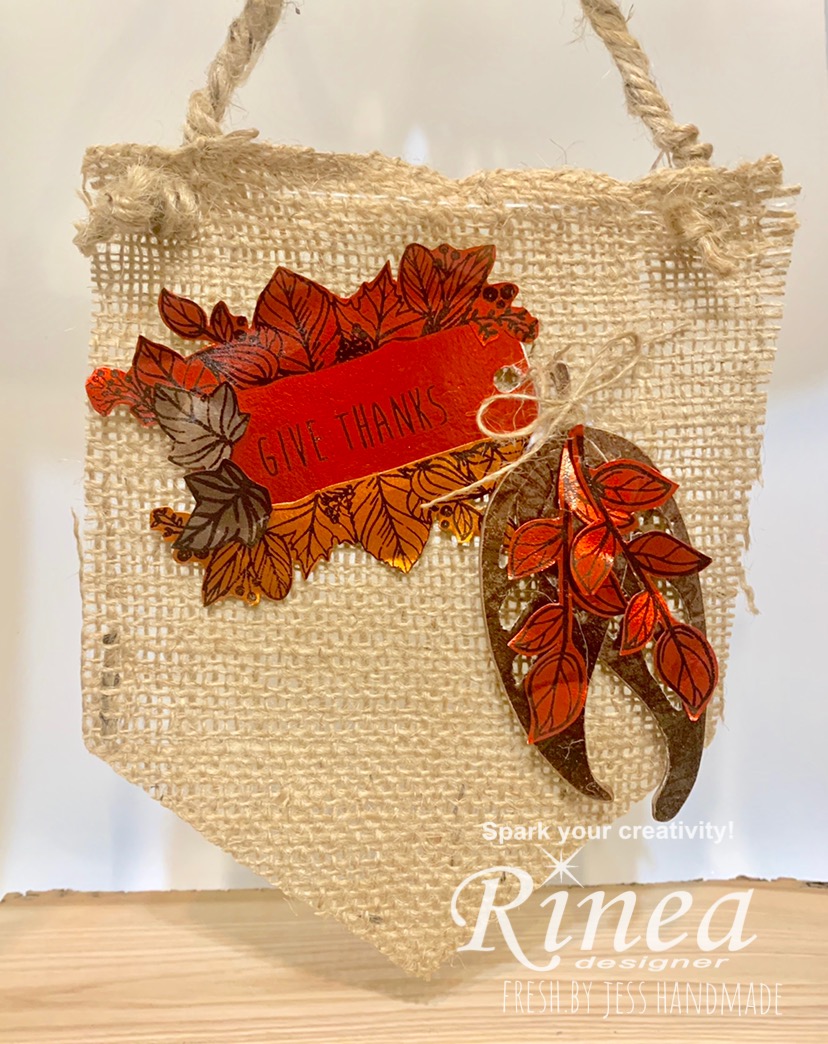
Rinea Fall Burlap Banner

Hello friends!

Happy September!  I have a beautiful Rinea creation to share with you today!  We are having fun this month collaborating with Joy Clair Stamps!  I hope you enjoy all the designers have in store for you.

Here are the products you will need for this project:
(I used these colors from the pack:
Starstruck Marigold Orange
Glossy Ruby/Gold
Glossy Marigold/Gold
Glossy Mocha/Gold)

Joy Clair Fall Greetings Stamp Set

Liquid Adhesive

Burlap
Jute Twine

Stazon Ink

Chipboard Pieces

For this project, I did a few different techniques.  First, using the Glossy Mocha/Gold foiled paper, I covered two leaf/feather style chipboard pieces. I sanded off the edges to mold to the chipboard, then inked the edges with Stazon Ink & did some random stamping with a leaf stamp.


I used a chipboard tag and covered with Glossy Marigold/Gold. Set this aside for another step.


I stamped a few of the different leaf images onto all 3 glossy colors, then fussy cut them out.


I handcut a pennant shape from my burlap fabric (I just picked this up from our local fabric shop).

I used the "Give Thanks" sentiment from the gorgeous stamp set for my tag, using Stazon on stamp it. I used a variety of the fussy cut leaves to decorate the tag.  Once I had all my pieces, I tied some jute twine around the elements, then glued them down to my burlap pennant.


I love how beautifully this turned out!  Sometimes simple is beautiful, don't you think?

Thanks for taking the time to stop by my blog!  I love to read your comments -they are always an encouragement.
Have a great day!
Jess

Saturday, 22 December 2018

Rinea Poinsettia Hoop

Hello friends!


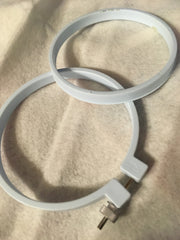
I have a super cute new Rinea project to share with you today!  I used an old embroidery hoop I had kicking around to create this home decor project!  First up, gather the following supplies:

Embroidery Hoop
Poinsettia Dies (I used Spellbinders)
Big Shot (or your fave Die cutting machine)
Felt
Glue (I used Nuvo Deluxe Adhesive)
Scissors
Mini Scrabble Tiles 

Step 1 - Die cutting!


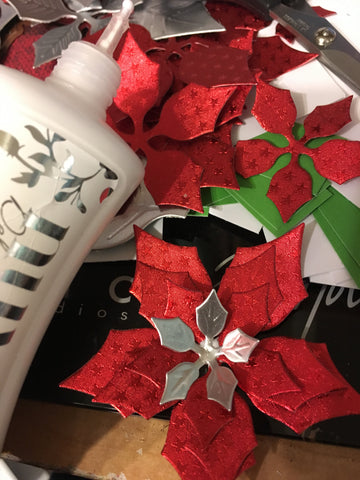
Cut all your pieces!!  As you can see I cut multiple shades and sizes (including both the Glossy and Starstruck papers). I found I could easily and cleanly cut through 4 sheets of foiled paper at a time.

Step 2 - assemble your hoop base

Add your felt to your embroidery hoop and trim.
  

Step 4 - Assemble your flowers!

Pretty simple - glue each layer using Nuvo Deluxed Adhesive. 

 Step 5 - Assemble!

I glued my assembled flowers onto my embroidery hoop - and then embellished. I had these adorable mini-Scrabble Tile stickers in my stash, so I thought they were the perfect touch!

A simple red ribbon finished off this cute home decor project!


So cute, right? I'm sure you have some old embroidery hoops in your stash too!  I think I will make a few more larger ones with regular Scrabble tiles as gifts!

Merry Christmas!


Jess