Wednesday, 28 November 2018

Cheapo Dies - Branches & Gingerbread Men

Hello crafty friends!


For today's card, I am showcasing a Cheapo Dies product! I used the Branches Die.  I thought this one was more geared towards fall cards, but I was determined to create something CHRISTMAS!

Cheapo Dies - Branches


Here is Handmade Card I created for you today:


I had this cute little Lawn Fawn stamp set in my stash that I have not had a chance to use yet, so I thought I would make little gingerbread men like ornaments in the branches!!!  One fell off and broke his little cookie foot off! Hence, the oh, snap! haha - I think it turned out ok!!!


I hope you enjoy this card!  The season is passing quickly - take time to enjoy it!!! Give the gift of handmade this year :)


Jess

Monday, 26 November 2018

Cheeky Studios - November Guest Designer

Hello friends!


I'm so excited to share with you my Guest Design Team Member creation for Cheeky Studio this month!  I shared an unboxing video earlier this month along with a sneak peek over on my Facebook page!  Now today I get to do the grand reveal!!


For this sweet layout, I used the Autumn Beauty Cut Apart Labels and the Autumn Beauty Ephemera. They perfectly fit with my fall themed layout!


scrapbooking layouts

I used the leaves in the ephemera to make a border at the top of the page and gently wrapped some twine around them.  I love the bright and bold colors in the pack!


I did a little "doodle borders" around my photo boxes.The Cut Apart Labels made adorable little title boxes. 


Other supplies: Paper (PhotoPlay Fall Breeze), neutral twine, white cardstock, journaling pen.adhesive and foam squares.

I also was blessed to play with the beautiful Sweet Succulent Cut Apart Circles and Ephemera! With these, I decided to make up a set of cards!   Take a peek:


I hope you head over to the Cheeky Studio site to grab a few things! The quality it top notch and who doesn't love supporting small family businesses? I even have a discount code for you: Guest10


Thanks for stopping by and I hope you are inspired to go and create handmade cards & scrapbooking layouts!!! 

See you again soon!


 photo MHKDesigns_FreshByJess_Signature.png

Friday, 23 November 2018

SparkleNSprinkle - Koi Pond Beauty #2

Hello friends!


For my final SparkleNSprinkle November Release, I made a card using BOTH the new release stamps of "A Big Thanks" and the "Koi Pond Beauty". This follows a similar technique as my first card. 

Here is my SNS Supply List:

Step 1 - Create Your Background


You can follow the "smooshing" technique I did HERE. I also did the same technique for the floral portion. The Nuvo Aqua Flow Pens are going to become your best friend for this technique!


Step 2 - Stamp and Color Your Images


Once again I stamped using the Nuvo Hybrid Ink in Black Shadow.  I like to play surgeon with my stamps sometimes and cut them apart into two pieces. For the flower, you can see that I cut the "water" portion off. I can still use them together or separately - easy peasy!  I used the sentiment from "A Big Thanks". I inked it up with Versamark Ink and heat embossed with Madagascar Green Embossing Powder.

Around the edges of the background, I used the second flower to stamp in Versamark Ink and heat set with Clear Detail embossing powder. It added a little extra dimension to the background.


Step 3 - Build Your Scene!


I arranged the Koi,flowers and sentiment onto the card front. For the background, I added a border of 1/2"Tear-ific Tape and added Baby Blue Embossing Powder (heat setting). A few spashes of the Aqua Flow were sprinkled onto the card. 

Step 4 - Sentiment and Finishing Touches

I added "bubbles", using the Nuvo Crystal Drops in Morning Dew.  I also added some drops of Aquatic Mist Glitter Drops.  I added Luau Green Glitter to the flower as well. Everything needs a little sparkle ;)


I hope you enjoyed this card - and thanks for joining us for our November reveal month!

See you again soon!

 photo MHKDesigns_FreshByJess_Signature.png

Thursday, 22 November 2018

Snow Much Fun with Creative Knockouts!

Hello crafty friends!

It's time for a new challenge over at Creative Knockouts Challenge #273!  Our theme this week is "Snow Much Fun" and our sponsor is the always fun Fabrika Fantasy. I had fun working with the Little Snow Gnomes 1 Digi Stamp Set.


Here is the Handmade Card I created:


I hope to see you at the challenge! :)

Until next time,

Jess

Rinea JOY

Hello crafty friends!


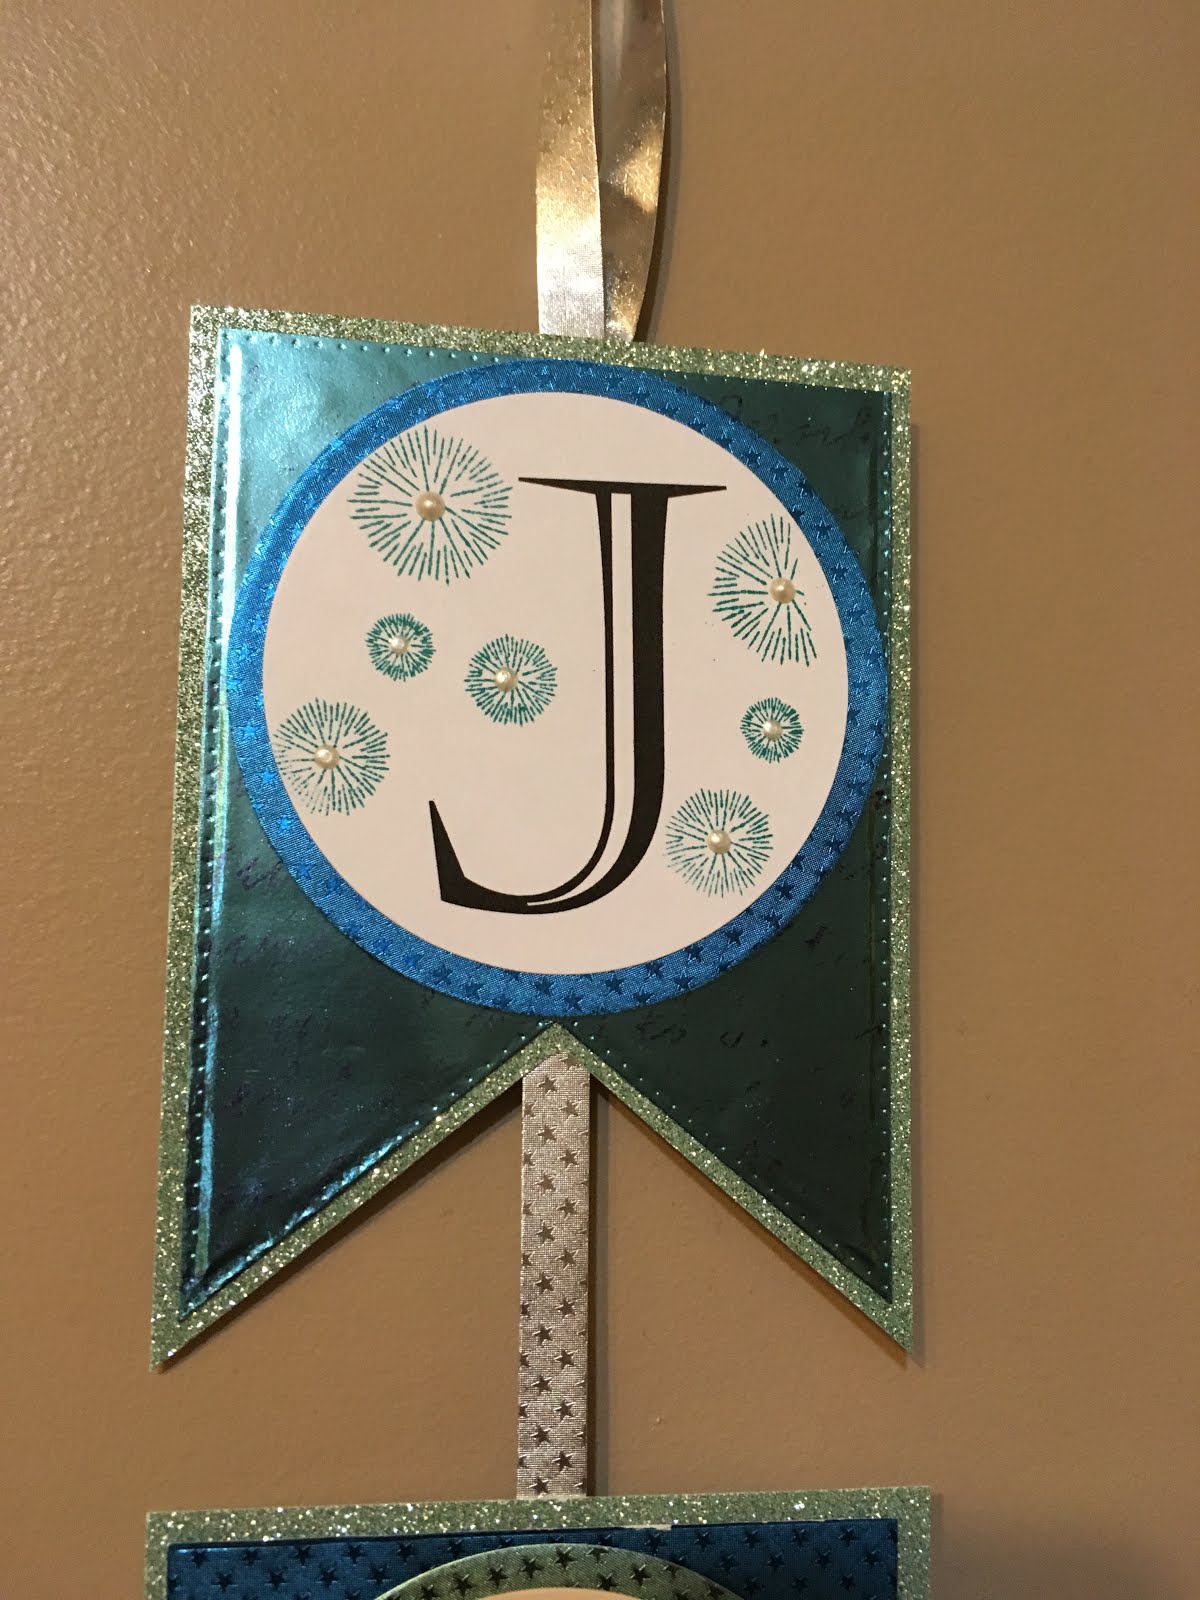
For my second Rinea Project  of the month I created a beautiful vertical JOY Banner! For this project, I used the Frosted Foiled Paper Variety Pack!  It's also an exciting month because we partnered with the amazing Imagine Crafts!!  How fun!  

This is a really cute and simple project - let me show you how to make it!

First, I used the Imagine Gothic Purple Stazon Ink and Oma's Postcard Stamp Set to stamp onto the Glossy Turquoise Light Blue/Gold Foiled Paper. Then, I used a banner die from Tonic Studios to cut out the banner shapes. For the middle banner piece, I used the Starstruck Sapphire Blue. I cut my banner shapes first, then adhered to Glitter Paper and trimmed down.


To make the J-O-Y, I actually just used my Microsoft Word program and used the Castello font at 250pt and printed them off!  Then, I die cut with a circle die from Sizzix. I cut the Glossy Turquoise Light Blue/Gold Foiled Paper and Starstruck Sapphire Blue again, but this time opposite of the banner pieces to contrast.


Using the fantastic Starburst Sentiment Stamp, I inked it up with Emerald City Staz-On Ink and stamped randomly around the letters. I used Nuvo Crystal Drops in Ivory Seashell to accent each starburst.  Foam squares were used to give a bit of dimension to the banner.


I used a skinny strip of Starstruck Silver Foiled Paper to connect the banner pieces and create the hanger.


You could totally swap out the colors with the Jolly Variety Foiled Paper Pack (or any of the other fabulous Variety Packs for that matter) and created any occasion banner with this method!  NOEL, a name for a birthday party, it really could be anything.

I hope you go out and make some banners of your own!  Thanks again to Imagine for the super fun Staz-On Inks!!! I really had fun playing with them. 

Supply List:
Frosted Foiled Paper Variety Pack
- Tim Holtz Stamp Platform
- Sizzix Big Shot & Magnetic Platform
- Rinea Oma's Postcard Stamp Set
- Rinea Starburst Sentiments Stamp Set
- Rinea Clear Acrylic Block
- Tonic Studios Beautiful Bunting Die
- Sizzix Circle Dies
- Glitter Paper
- Foam Squares
- Scissors
- Tear-ific Tape
- Imagine StazOn Inks (Emerald City, Gothic Purple)
- StazOn Ink Remover
- paper trimmer

See you next time!


Jess

 photo MHKDesigns_FreshByJess_Signature.png