Showing posts with label January Reveal. Show all posts

Friday, 20 January 2017

Easter Chicky #2

Hello friends!


I have another Easter card to share with you for SparkleNSprinkle!

Supply List:

Canary Flocking - FL108
Spring Willow Embossing Powder - EP388
Frosted Juniper Embossing Powder - EP406
Versafine Ink - TSVF082
Fairytale Lavender Glitter - G1129
Foam Squares - 01613


To start making this card, I started by stamping the Floral Image around the outside of my cardstock using Versamark Ink. I sprinkled on the Frosted Juniper Embossing Powder and heat set.  I used an Oval Die to cut out the center of the piece to create my "window".


I stamped the adorable Chicky image onto a piece of white cardstock using Versafine Ink.  Using my Glue Pen, I "colored" the chicky with glue and sprinkled on the Canary Flocking - creating a soft, fuzzy chick!  Adorable, right?


Magic Speckle Embossing Powder was added to the eggshell image (again, I used my Glue Pen to add adhesive where I wanted the embossing powder to go - and let it dry slightly so it becomes "tacky").  I didn't have to "stay in the lines" as I was going to cut out the image aftwerwards.  Doesn't it make it look like an actual eggshell?  After all my Flocking and Embossing Powder were added, I fussy cut the images and set them aside.


Next up - coloring my flowers! I stamped my flower arches with Versafine ink and colored them with my Prismacolor Pencils. They were fussy cut out as well. I added a bit of Fairytale Lavender Glitter to the centers using the Nuvo Small Glue Pen.  The sentiment was stamped using Versamark Ink and embossed with Frosted Juniper Spring Willow EP and heat set for some extra embellishment.

Onto the background!  I added a layer of 1/2" Tear-ific Tape around the outside edge of my green cardstock piece. After peeling off the protective backing, I added the Silver Bullion Gilding Flakes.  They are sure fun to work with - just make sure your furnace doesn't kick in while you are using them (my vent is above my desk - you can image what happened! LOL Flakes flying everywhere!).


All the layers were adhered together using 1/2" Tear-ific Tape and I popped the Chicky, sentiment and flowers up with Foam Squares for some dimension.  Finally, I added 4 drops of the Key Lime Jewel Drops to each corner.


I hope you enjoy this card and set about creating some of your own fun Easter Creations!

Until next time,


 photo MHKDesigns_FreshByJess_Signature.png

Saturday, 31 December 2016

SparkleNSprinkle - January 2017 Reveal

Welcome to Sparkle N Sprinkle's January 1, 2017 New Reveal Blog Hop!


We're starting the New Year off with a BANG! We have a huge reveal to share with you - our largest ever!

There are TEN new stamp sets (one is a digi-only set) being released this month! These new sets are 20% off until January 3, 2017. So once you finish the blog hop, head on over to the store and start shopping. 

The sets are:


Right Beside You 812  (digi version DIGI812)
Milton Friendly Giraffe 817  (digi version DIGI817)
Cattleya Orchid Friendship 818  (digi version DIGI818)

Easter Chicky 820  (digi version DIGI820)
Party #1 821  (digi version DIGI821)
Party #2 822  (digi version DIGI822)

Eggs-traordinary Kindness 825  (digi version DIGI825)

Emily Showers of Love 831   (digi version DIGI831)

On Jan 3rd, ONE GRAND PRIZE WINNER will be selected from the comments left on the Designers' blogs listed below. Please leave a comment with each Designer in order to be eligible for the Grand Prize. You never know who the Mystery Designer will be that has the winning comment.


The Grand Prize Winner, which will be announced on the SNS Facebook page and on the SNS Blog, will receive ALL of the new stamp sets released this month (or the digi versions, if preferred).

The Blog Hop order this month is:

Jess (you are here!)

(*Tip: if you have difficulty with a particular link, try clicking on the Designer's blog title to send you to their Home page.)

We hope you enjoy the New Reveal Blog Hop as much as we do. Thanks for joining us and remember to comment on each of the Designers' blogs to be eligible for the Grand Prize. 
Wonder who the Mystery Host will be this month????


The Sparkle N Sprinkle Creative Challenge also begins today. There are lots of prizes and recognition badges. Come check out how you can become a SNS Featured Artist as well. The theme is always Anything Goes using Loose Glitter, Embossing Powder, and/or Flock.


Have you checked out the SNS YouTube Channel featuring Demo Donna? If not, then you are in for a real treat. Subscribe today to get all the latest Demo Donna tips and techniques!


Happy New Year Everyone!


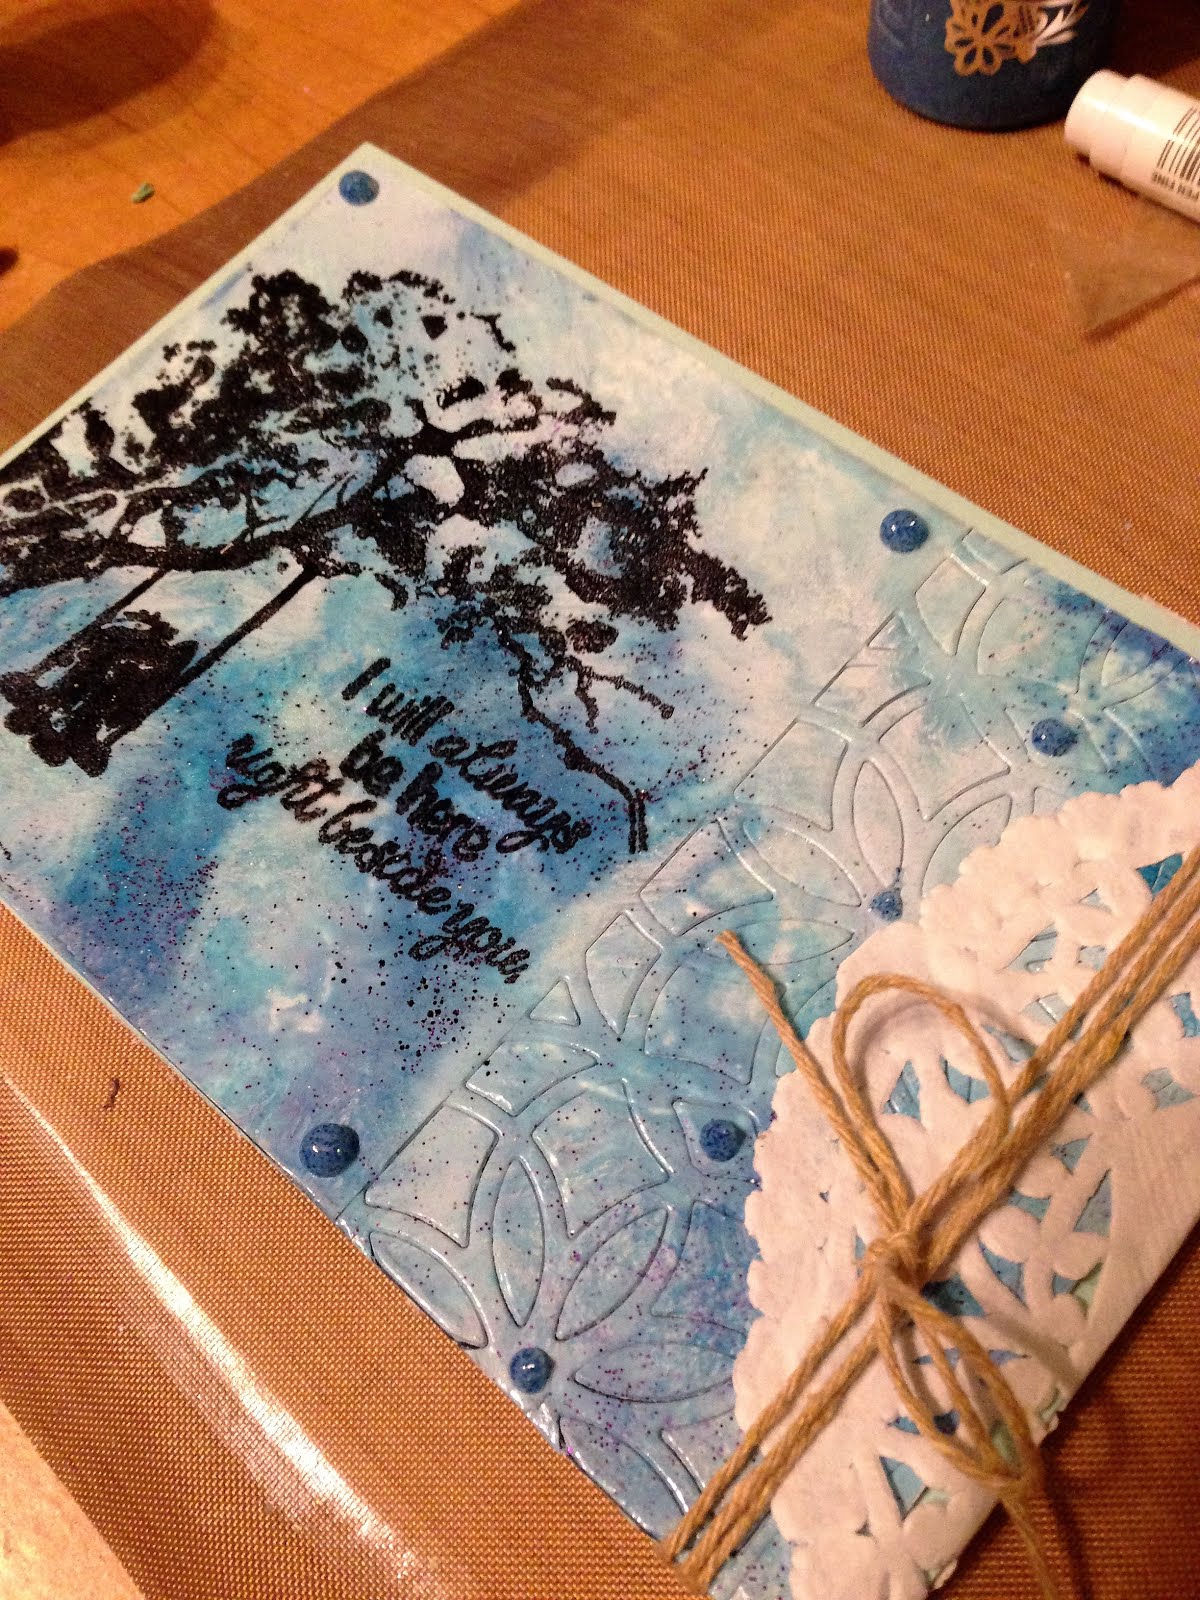
I decided to use the "Right Beside You" Stamp Set for the reveal!  I just love it!


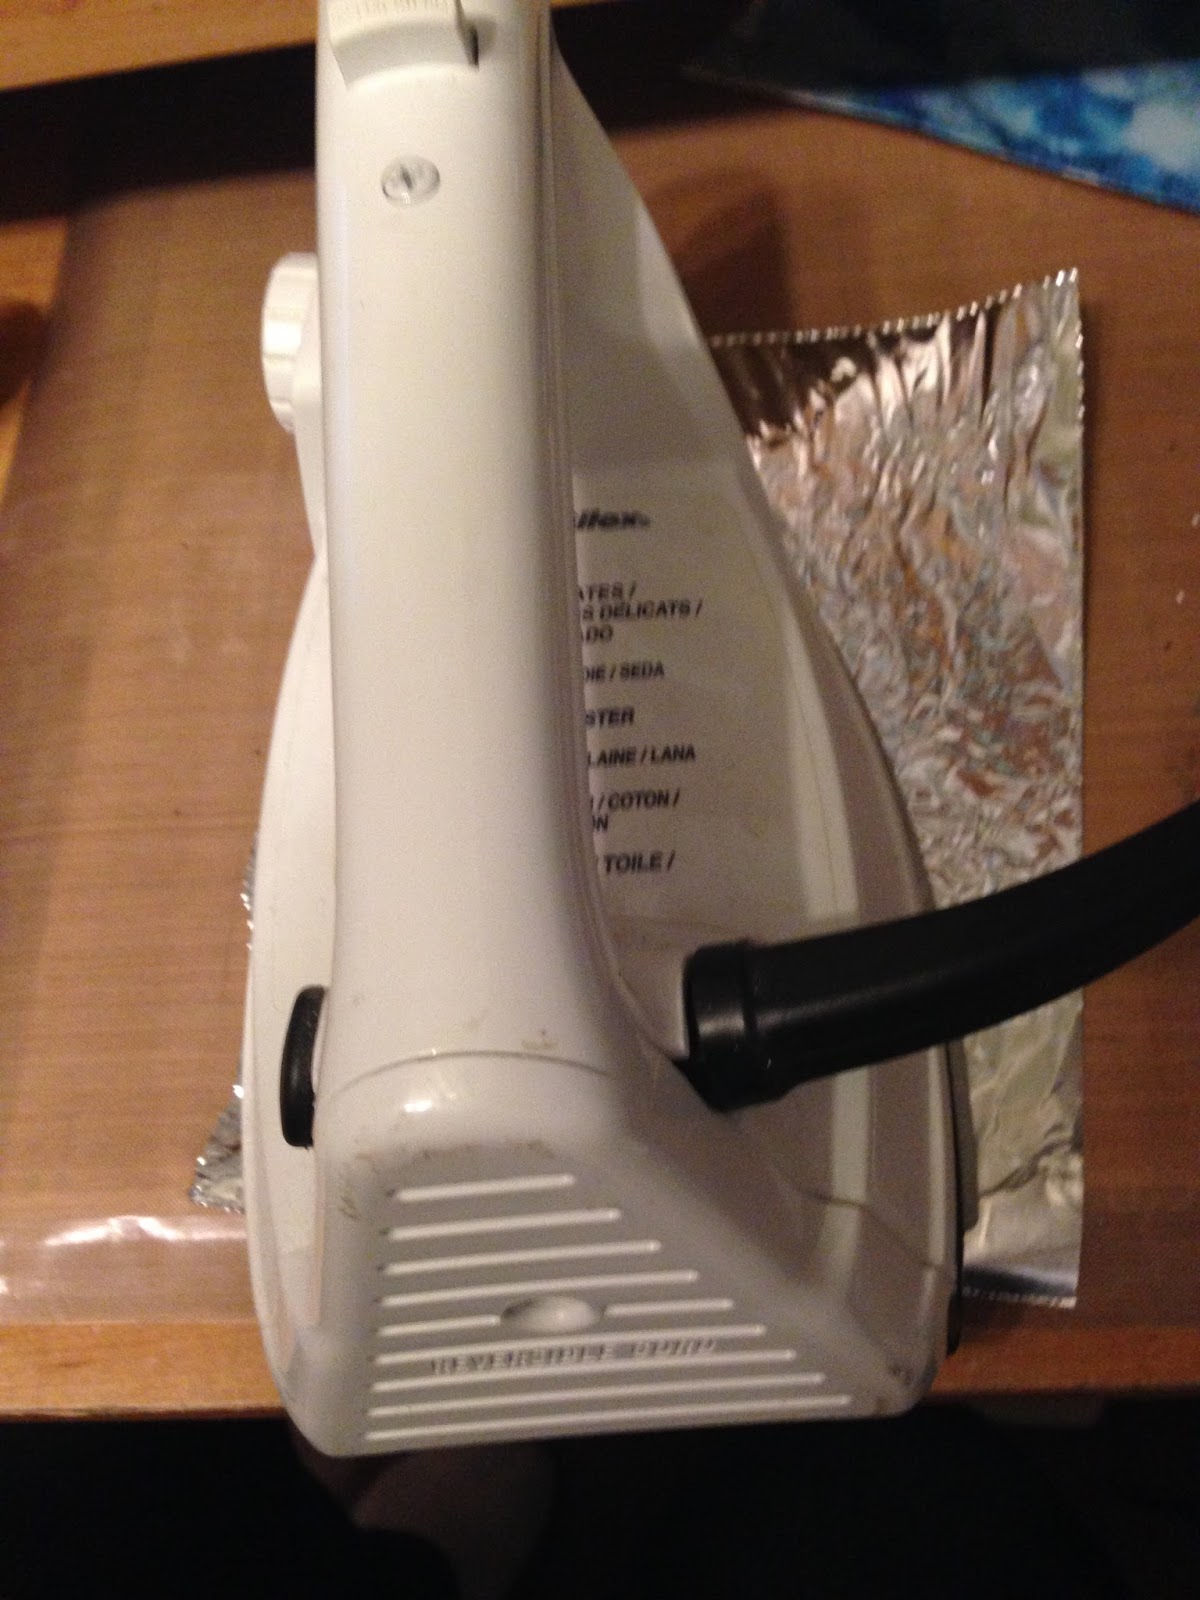
So to start this card, let's talk about how I created the background. I decided to try the Marbled Background technique that Demo Donna used here.  To summarize - you simply sprinkle on your choice of coordinating embossing powders onto your cardstock, cover with non-stick foil and heat with your iron. It creates this cool marble look!


After I finished the background, I simply stamped on my tree and swing images using Versamark Ink and sprinkled on Black Detail Embossing Powder, heat setting carefully.  I used the Clematis Vine Die to add an impression into my background. Originally I was going to use the die to cut a design, but it didn't cut clean through the first pass through my Big Shot and I just LOVED the look of the impression, so I left it!


I added some accents using Nuvo Glitter Drops in Dazzling Blue and let dry.  

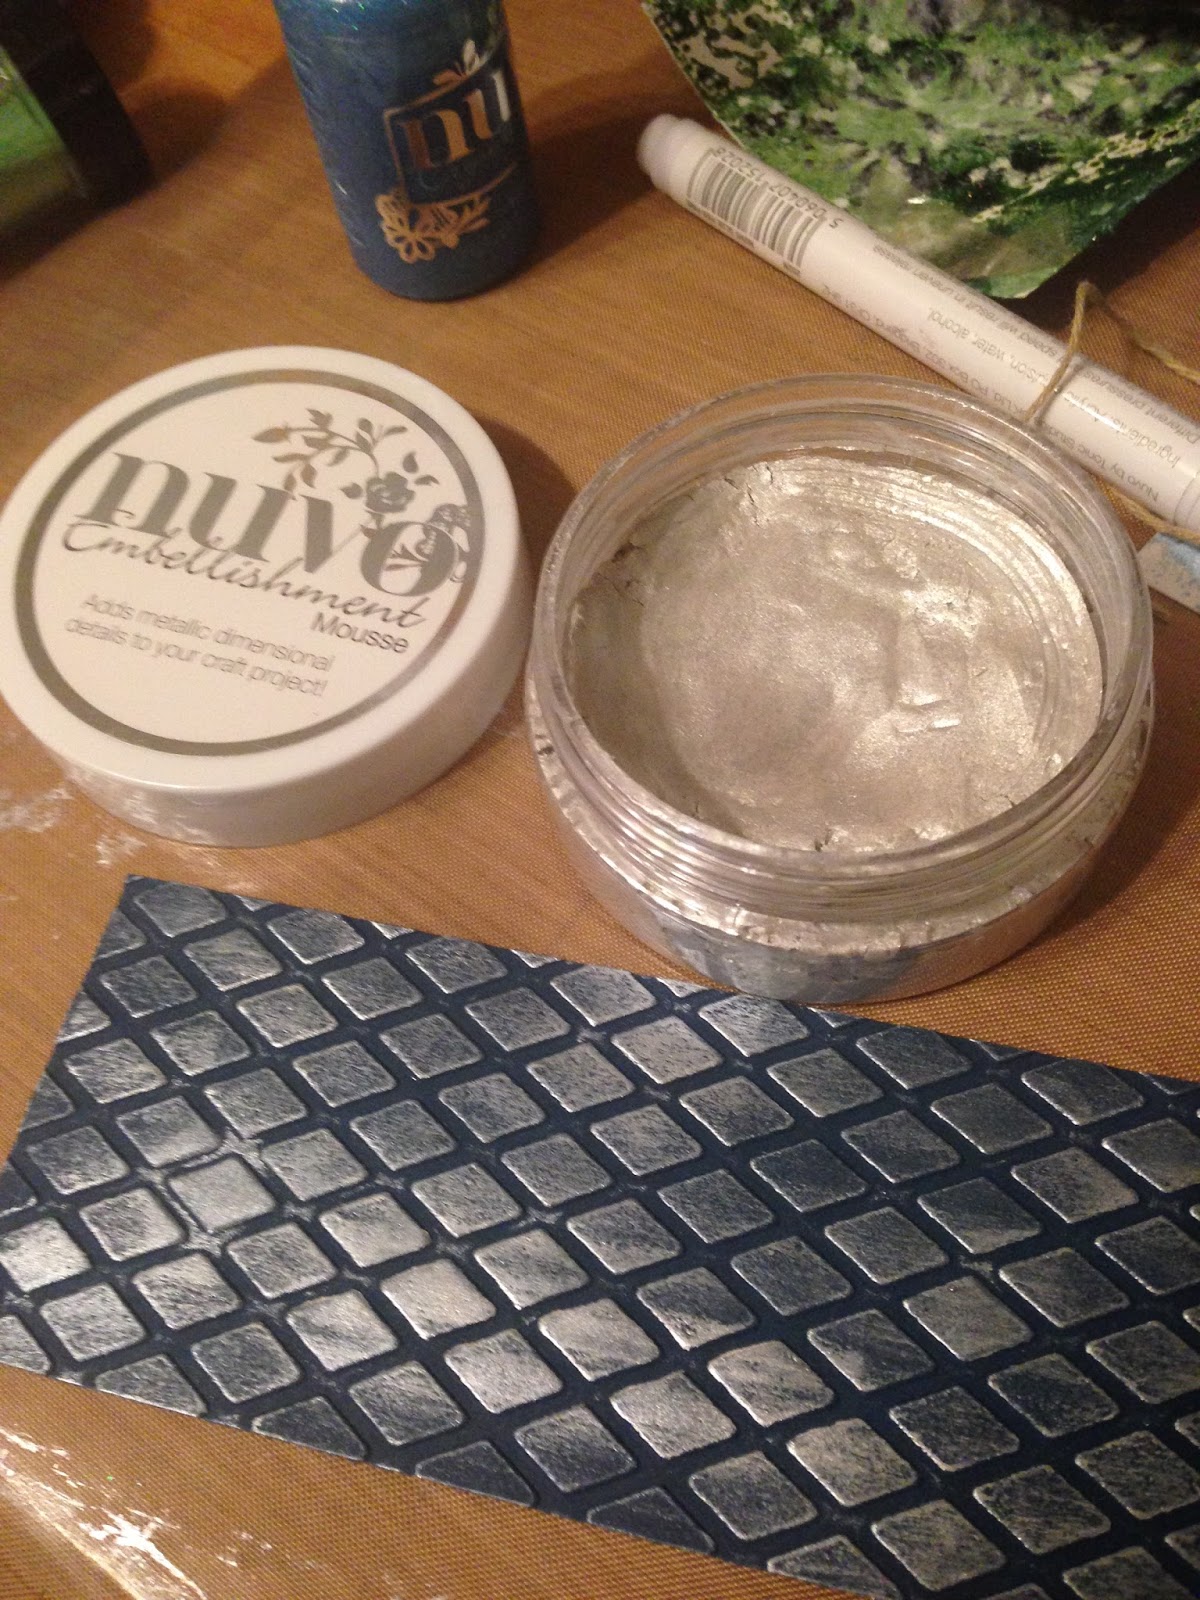
I wanted to add something else to the card, so I used a Diamond Embossing Folder on a dark blue piece of cardstock.  Then, I rubbed on some Nuvo Embellishment Mousse in Pure Platinum.  I just love the look of it!


To assemble the card, I just used Tear-ific Tape to adhere the layers.  I added a doily for something extra along with a piece of bakers twine. 


The next stop on our blog hop is the talented Diane and you can find her blog HERE.

Good luck along the blog hop and cheers to a fabulous New Year!

Jess

Friday, 22 January 2016

SparkleNSprinkle Watercolor Flowers

Good morning!

I'm back on the SparkleNSprinkle Blog this week with another gorgeous card featuring the "Thinking Of You" Stamp Set!

IMG_7793

To start making this card, I made a watercolor panel using the Nuance Magenta Golden Yellow Powder.  I love working with these powders.  You can actually see the technique I used in this month's Video Technique Club by Demo Donna HERE.  I did a bit of an ombre to graduate the color from lighter to darker.  Set aside to let dry completely.

IMG_7765

Next, I took my Memento Black Ink and stamped the flowers twice. If you stamp after you watercolor, the outline will be very crisp and clear.  To accent the leaves, I took my Quicky Glue Pen (an essential for your toolbox!) and applied it to small sections at a time.  Then I added Glistening Emerald SparkleNSoft and burnished well with my finger tool.  I love SparkleNSoft - so soft with just a touch of glitter!

IMG_7791
To accent the center of the leaves, I used the Quicky Glue Pen to add Daisy Microfine Glitter.  My card base was made from the Candlelight Cardstock (amazingly sturdy and has a nice texture to it!).  Of course I used Tear-ific Tape to make sure everything sticks nice and permanently!  I had some scraps of the watercolored paper left, so I used that to make my sentiment!  I took the Happy Birthday sentiment that comes with the Thinking of You stamp set (it's amazingly versatile!) and stamped with Memento Black Ink.  I took a punch I had on hand and punched out the shape, adhering to the card with Foam Squares for added dimension.
IMG_7790

To finish off the card, I added some of my new-found fave, Tan Pull Ribbon, to the top of the card.  This is a must try!  It's so pretty and fun to work with!
I added some surprises to the inside of this card too!  Using my Tear-ific tape, I added a strip of Green Iris Glitter and a strip of Daisy Microfine Glitter! Pretty & fun! :)

IMG_7792

I hope you have enjoyed learning how I made this card.  See you next time!
Jess

Wednesday, 13 January 2016

SparkleNSprinkle - Thinking of You!

Hello again!

I'm back with a quick post showcasing our new Stamp Set "Thinking of You"!  I used a cute Sizzix Die called "Fold-a-Long" (660373) to cut out the card base.  This card gives so much impact, you don't need to add very much "extra" to make it pop!  


I used the die set to cut the inside shape from Glossy White Cardstock (99575).  Next, I stamped with Versamark (VM-001) the flowers from "Thinking of You" Stampset  (769) and embossed with Candlelight Embossing Powder (EP386).  I just love how pretty these flowers are!


To finish the card I added some Pull Ribbon (White/Triple Silver) and stamped "Happy Birthday" using Versamark (VM-0001) and Black Magic Embossing Powder (EP255).

I hope you enjoy this card! Now go out and create something!!

Jess

Friday, 8 January 2016

Flowers For You!


Good morning!

IMG_7776 (2)

I'm back again this week with another fun card for SparkleNSprinkle!
I'm just loving this brand new stamp set - it's so versatile!!!  Lots of great, everyday sentiment and the flowers are just gorgeous!  I also got a chance to play with the Nuance Watercolor Powders - love them!

Supply List:
(click on each to find them in the Shop!)

IMG_7774
MISC:
White Cardstock
Punches

To begin the card, I started by stamping the flowers onto a white cardstock piece and watercoloring with the Nuance Water Colors.  They are so fun to play with and can give extremely vivid results!
  
IMG_7764

Next, I used my Quicky Glue Pen to adhere the Forest Green Embossing powder to the leaves of the flowers, heat setting of course!  I stamped some more of the flowers and fussy cut them out to add a pop of dimension to the card.   To finish off the bouquet, I added some of the beautiful Cream Pull Ribbon.

IMG_7769

To add some excitement to the top of the card, I applied 3 rows of the 1/4" Tear-ific Tape.  In the middle, I adhered some Canary Flocking and to the top & bottom strips, I used Daisy Microfine Glitter.  It's so soft and sparkly!

IMG_7766

I then adhered my cardfront to a layer of the Candlelight cardstock - I'm really lovin' this paper!  It's textured on one side and smooth on the other. I used a punch to create the border on the cardbase.  The "Thank You" sentiment was stamped with Memento Black Ink onto a scrap piece of cardstock that I had watercolored on.  I punched it out and added it to the card front.  To finish off the flowers and add just the right amount of sparkle, I used the Quicky Glue pen once again and added the Tiger Orange Glitter to the centers of the flowers and some Daisy Microfine Glitter to some of the petals.  All layers were adhered with Tear-ific Tape of course!

IMG_7768 IMG_7773

To add a finish to the card, I took one more strip of 1/2" Tear-ific Tape and adhered it on the inside.  I applied the Daisy Microfine glitter and burnished well.  Now, when the lucky recipient opens the card, they will find a pop of fun glitter!

IMG_7775 (2)

Thanks for taking the time today to pop by and see my creation!

Until next time,
Jess

Thursday, 31 December 2015

SparkleNSprinkle - January Reveal!

Welcome to Sparkle N Sprinkle's
 first New Reveal Blog Hop of 2016!


We have FIVE new stamp sets to share with you today.  These new sets are 20% off until Jan 3.  So once you finish the blog hop, head on over to the store and start shopping.  All of the new sets are available on cling mounted rubber or as a digital image.  


The sets are:


Three Tenors 767 (digi version DIGI767)
 Sing On 768 (digi version DIGI768)
  Thinking of You 769 (digi version DIGI769)
 Happily Ever After 770 (digi version DIGI770)
 Poppies 771 (digi version DIGI771)


On Jan 3rd, ONE GRAND PRIZE WINNER will be selected from the comments left on the Designers' blogs listed below. Please leave a comment with each Designer in order to be eligible for the Grand Prize.  You never know who the Mystery Designer will be that has the winning comment. 

The Grand Prize Winner, which will be announced on the SNS Facebook page and on the SNS Blog, will receive ALL of the new stamp sets released this month (or the digi versions, if preferred).


The Blog Hop order this month is:
Jess >>>>>you are here!

(*Tip: if you have difficulty with a particular link, try clicking on the Designer's blog title to send you to their Home page.)


We hope you enjoy the New Reveal Blog Hop as much as we do.  Thanks for joining us and remember to comment on each of the Designers' blogs to be eligible for the Grand Prize.  
 Wonder who the Mystery Host will be this month????


The Sparkle N Sprinkle Creative Challenge also begins today.  There are lots of prizes and recognition badges.  Come check out how you can become a SNS Featured Artist as well.  The theme is always Anything Goes using Loose Glitter, Embossing Powder, and/or Flock.


Have you checked out the SNS YouTube Channel featuring Demo Donna?  If not, then you are in for a real treat.  Subscribe today to get all the latest Demo Donna tips and techniques!


Supply List:  

Aztec Gold Glitter {G1006}
Lemonade Glitter {G1091}
1/2" Tear-ific Tape {SAT04}
2" Tear-ific Tape {SAT12}
Sakura Glue Pen {quicky}
Thinking of You Digi Stamp {DIGI770}
3D Foam Sqaures {01615}

First off, I'm soooo excited to be a Permanent Design Team Member! I can't wait to share with you all year long!


To make this simple, yet gorgeous card, I started by taking the beautiful Thinking of You Flower Bouquet Digi and enlarging it in my Word program.  Next, I added the Happy Birthday sentiment and positioned it where I wanted.  So easy!  I love that the flowers come pre-colored and black&white!  My coloring skills are a work in progress, so I love that I can print it out already gorgeously colored!  How cool is that?  I them printed off my card front and trimmed down to my desired size. 

I then ran my cardstock through my die cutter to make the solid butterfly cutout.  After, I took a piece of 2" Tear-ific Tape and added it behind the cardfront (so the adhesive was facing the front through the cutout.  I took my Lemonade Glitter and sprinkled it over the cutout, burnishing into the exposed adhesive.  To make the super pretty Glitter Ribbon, I followed Demo Donna's technique and used Lemonade Glitter on one side, Aztec Gold on the other!  I tied a loose knot and adhered across the front panel, using a small piece of Tear-ific Tape on the back to secure.


Next, I added a few more strips of 1/2" Tearific Tape and adhered my cardfront to the back cardstock. I took my Quicky Glue Pen and added some sparkle to the bouquet of flowers using Aztec Gold on the centers and Lemonade Glitter on the petals.  I love using the Glue Pen for quick glitter accents!  To add some real pizzazz, I die cut a butterfly and used the Quicky Glue Pen one more time to add Aztec Gold highlights on her wings. I adhered it just over the glittery open butterfly inlaid diecut area using a Foam Square.

To finish off the card, I added a border of 1/2" Tear-ific Tape to my edges of my cardbase and added Aztec Gold Glitter.  Then I added the entire cardfront using Tear-ific Tape!


Digital Stamps are such a great, easy way to make a gorgeous card!


The next stop on our blog hop is Eret and you can find her blog here.

Until next time, 

Jess