Wednesday, 20 December 2017

Creative Knockouts Challenge #225 - Tis the Season

Hello crafty friends!

It's time for a new challenge over at Creative Knockouts Challenge #225!  Our theme this week is "Tis the Season".  SOOO off I went to create another Christmas Card :)

Here is what I created:


This card was really fun to create!  I had borrowed an old Stampin' Up! Christmas Stamp from a friend of mine and had this exact card in mind. I started off by stamping it in Versamark Ink and embossing the image with SparkleNSprinkle's White Detail Embossing Powder. Once it was heat set and cooled, I started my watercolor background. I used the Nuance Watercolor Powders in Aquamarine and Cerulean Blue to create the background. SOO pretty!  Once it was dry, I sprinkled on some SparkleNSprinkle Super Thick White Embossing Powder and heat set from beneath the card to melt. It created a snowfall effect.


To finish off my "snowy" scene, I applied a good thick band of Nuvo Deluxe Adhesive along the bottom of the deer. I sprinkled on the Super Thick White Embossing Powder and heat set. The heat combined the glue & embossing powder into a perfect "snow". It was exactly the effect I was looking for!  I finished off the Greeting Card by stamping the sentiment in Versamark Ink and embossing with Nautical Embossing Powder. Nuvo Glitter Drops in Honey Gold were added to the corners and the sentiment for a hint of sparkle and I tied some gold flecked bakers twine around the card. 


I hope to see you at the challenge! :)

Until next time,

Jess
Tuesday, 19 December 2017

Atlantic Hearts Sketch Challenge #243

Hello friends!


It's time for another great sketch from Atlantic Hearts Sketch Challenge! Here it is:


Here is what I created:


I just grabbed whatever I found on my desk as I was tidying up!  Some die cuts, some bakers twine, a metal clip and some glitter! :) 


I hope you will come and play along with us!

See you next time!

Jess

Monday, 18 December 2017

Stick It Down - December 2017

Hello friends!

Welcome to another month with Stick It Down!  As a member of the card team, I was excited to create with this month's sketch!


I was playing with Rinea foil and Tonic Studios dies this week, so I decided to keep going and create my Handmade Greeting Card with it!

Here is what I created:


Handmade Greeting Card Instructions


I used the Beautiful Bunting Jubilant Jubilee dies to create this super fun Christmas tree! Obviously I inverted the dies to make the tree shape.  The Rinea foil is just too much fun to play with!  I used the Frosted Variety pack to make the tree. I had a piece of random copper craft metal sheet in my stash, so I embossed that with a wood-look embossing folder to make the tree's trunk base.

 I added a bit of faux snow and embossed a cute little white sentiment onto a piece of foil using SparkleNSprinkle's White Detail Embossing Powder. The background was a piece of Frosted Variety Pack foil that was embossed with Stampin' Up!'s Deep Cable Knit Embossing Folder. 

I hope you will come along and play with us this month!

See you "next year"!

Jess

Tuesday, 12 December 2017

Rinea Christmas Cards

Hello crafty friends!


I'm soooo excited to be a Guest Designer for Rinea this month!  I'm back again with my next official project, this time some gorgeous Christmas Cards!

Rinea - Holds its shape

Rinea Foiled Paper is sooo much fun to play with!

"What makes it special is that it is paper lined with colorful foil on both sides which allows it to hold its shape while remaining sturdy. A large variety of double sided shiny colors with the ability to sculpt adds plenty a bling and a whole new dimensions to your crafting projects." - Rinea

I have truly enjoyed playing with this amazing product this month!  It's been a lot of fun.  For this post, I set about creating cards. BUT, I couldn't just stop at one...so I made a couple!

I grabbed the Jolly Assorted Package and decided to go traditional red, gold and green for my cards.  I used a Tim Holtz Calendar Embossing folder and ran it through my Big Shot. I thought this calendar themed background would be perfect.  I also used another embossing folder featuring Christmas Bows & branches.


Look at that incredible detail!  I love how clearly everything shows up.  I wanted to give a slightly distressed feel to the paper, so I lightly sanded the paper.  I then applied some Distress Oxide Ink in Vintage Photo slightly over top of my sanded edges using a sponge. The effect is very subtle, but it was what I wanted!


Next, I die cut some wreaths using a die from Tonic Studios. I actually cut 2 layers in one pass and both showed great detail.  It was a good time saving trick I will save for later if I need to make multiples of an item.  My sentiments were all die cut too!  No stamping required for these cards.


Next up was assembly!  I adhered my die cuts onto the base using Nuvo Deluxe Adhesive Glue and added some patterned paper to the base with double sided tape. I really wanted the foiled images to be the focus of these cards.  A few Crystal drops were added for final touches!


.....and VOILA!  Finished cards!


Just look at the detail you can achieve when embossing this foil paper!  Incredible.


Thank you so much for tuning in!  A huge thank you to Rinea for allowing be to be a Guest Designer - I had a lot fun and I know I will continue to create some more fun things with this beautiful product line.

See you next time.

Jess

Monday, 11 December 2017

MHKDesigns - Designer Inspiration - December 2017

Hello friends!


It's time to share my final MHKDesigns card for the year!  I wanted to reshare one of my faves that I made this past year, which is perfect for you holiday Christmas Card making season!

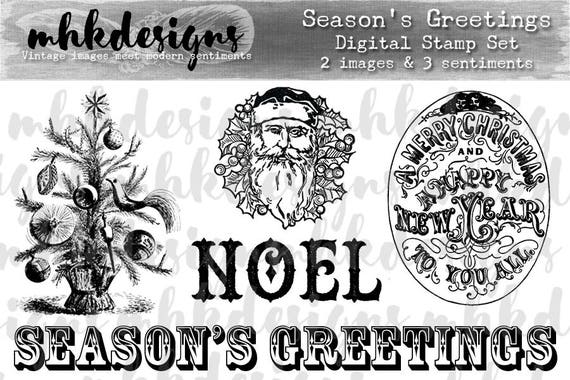
I chose to feature a new release stamp set from the past year called "Season's Greetings" for my monthly creation! I think this is such a nice vintage set to make all your Christmas cards with, don't you?

Season's Greetings Digital Stamp Set

Here is the Christmas Card that I created:


It has such a retro vibe, don't you think?  I just love anything retro!


I hope you love this card as much as I do!  


See you next "year" with more beautiful MHKDesigns creations!


Saturday, 9 December 2017

Rinea Christmas Ornaments

Hello crafty friends!


As I was working my way through my Rinea paper, I really wanted to make some ornaments!  So off to the local dollar store I went in search of foam balls. Oh boy - I found more than foam balls!  I found wreath forms, snowflakes, cones.....a whole assortment of goodies!  As you can see, I already was playing with the cone shape, and the snowflakes will come later. Today, it's ornaments!  For this project, I used the FROSTED VARIETY PACK.  Aren't the colors just gorgeous?

I started by using a small trio flower punch & large flower punch (Stampin' Up!).  I punched out a TON of pieces in all 3 colors & textures- light blue, dark blue and silver & stars!  Then, one by one, I started attaching the flowers to my foam ball using glass head pins. I used a LOT of pins! hehe  I also added a small flower to the center of the larger flower.  As you can see, you can bend and shape the petals to the position you would like them - and then they keep their shape!


I literally just kept pinning until all the white styrofoam was covered.  To add my hanger, I took a piece of ribbon and tied a knot.  Then I used a pin dipped in a little hot glue and pushed it through the ribbon into the ball to hold.  That's it!  So super easy and beautiful!  I couldn't stop there...so I did a smaller version too.  This one primarily used the textured version of the beautiful Rinea Foil. I also just used Glue Dots instead of pins for the smaller ornament.


Here you can see the size differences in the two.


I even got really "techy" and made a little video - but I will post that over on Instagram - head over there to see!  www.instagram.com/freshbyjess


I hope you are getting in the holiday spirit - I sure am with all the Christmas pretties I've been making!  Stay tuned for more Rinea fun all month long!

See ya soon!

Jess

Friday, 8 December 2017

SparkleNSprinkle Botanical Orchid - Light Version

Hello crafty friends!


I'm here today with another SparkleNSprinkle creation, once again featuring the Botanical Orchid Stamp Set.  I call this one the "light" version, as my last card was made on the dark cardstock. Pretty witty, right?

SparkleNSprinkle Supply List:


Alright!  Let's dive into the creation of this card!  The size of this card is approx 5x5 I think! It features both the digital version AND the rubber version of the stamp set. I printed off the colored digi version of the flower (x2!) and the sentiment. I did fussy cut out the image using a pair of Tonic 5" Mini Scissors (these are AWESOME for fussy cutting small areas and trimming ribbon!). I actually trimmed out both flowers and used the second one to "pop-up" the bottom layer of flower!

To accentuate the flower, I used the Quicky Glue Pen to add GLITTER!  I added Citron Green Glitter around the leaves of the flowers. I also added Lemonade Glitter to the yellow areas and Sparkling Snow to the centers. So pretty!


After I matted the sentiment to some brown cardstock, I decided I wanted to accent the word "bloom". I traced the word with the Quicky Glue Pen and sprinkled on Antiquities Embossing Powder and heat set. It made the word just pop a little bit more. 


I set those pieces aside and set to work on my background. I had this really pretty sheet of patterned paper in my stash that I felt went perfect with this card.  I matted it onto some green cardstock using the 1/4" Tear-ific Tape.  I took another piece of green cardstock and ran it through my Big Shot using the Filigree Affections Embossing Folder (such a gorgeous, detailed folder!). On top of that piece, I added a piece of the NEW Patchwork Parchment Craft Perfect Papers.  You just HAVE to pick up some of these gorgeous papers. 

I still felt the card need a little extra "sparkle" - so I grabbed some more Embossing Powder & the rubber stamp set! I used the RUBBER Flower Stamp and stamped randomly all over the edges (top and bottom) of the background with Versamark ink.  Next, I sprinkled on the Candlelight Embossing Powder all over the stamped images and heat set, creating a very subtle accent to the patterned paper. 


I adhered my focal image and sentiment to the background using some foam tape and 1/4" Tear-Ific Tape.


Finally, as the finishing touch, I added the Dark Walnut Crystal Drops to the corners and to the sentiment. I love this rich color! I also added a little piece of twine around the base of the flowers - just a little extra touch.

Don't forget we are having a 2018 Creative Team Call, going on now through Dec 14.  You can read all the details here. 

I hope you enjoy this card!  I would love to hear your comments below!

See you next time,

Jess


Thursday, 7 December 2017

Creative Knockouts - NEW Design Team!

Hello crafty friends!


I'm so excited to announce that I have joined the Creative Knockouts Design Team!  I look forward to sharing some super fun challenges with you for this super creative team. 
I'm jumping right in with Challenge #223 - Winter Wonderland sponsored by Fabrika Fantasy!


I was excited to work the the Little Snow Gnomes 2 Digital Stamp. It's so stinking adorable!

Here is what I created:


After I printed off the digi, I watercolored it using Tonic Aquaflow Pens (Red Apple, Fresh Green, Lemon Zest, Soft Rose, Rustic Oak and Spiced Ginger) and Pearlescent Watercolors. I used some papers from October Afternoon for my backgrounds and accented the hoods of the gnomes with SparkleNSprinkle Sparkling Snow Glitter.  Finally to add an essence of snow, I added Shaved Ice Glitter. 


I hope you enjoyed this card!  I had a lot of fun coloring this fun Fabrika image!  I hope to see you at the challenge! :)

Until next time,

Jess

Wednesday, 6 December 2017

Rinea - Guest Designer

Hello crafty friends!


I'm soooo excited to be a Guest Designer for Rinea this month!  What an honor - and a privilege - to create something for this amazing company!  If you have not ever heard of Rinea, well you must hurry to learn! Let's go!

Rinea - Holds its shape

Rinea Foiled Paper is sooo much fun to play with!

"What makes it special is that it is paper lined with colorful foil on both sides which allows it to hold its shape while remaining sturdy. A large variety of double sided shiny colors with the ability to sculpt adds plenty a bling and a whole new dimensions to your crafting projects." - Rinea

I was so excited when I opened my package! I was sent the Jolly Foiled Paper Variety Pack and the Frosted Foiled Paper Variety Pack to work with. So pretty and the colors were just PERFECT for Christmas creations of all kinds!

To begin, I started playing around with the paper to see how it responded - I used punches, dies and embossing folders. These papers are beyond versatile!  I had some styrofoam shapes on my desk and my mind immediately thought of making a Christmas Tree using a cone!  For this project, I used the Jolly Foiled Papers - you will see another 3D project focusing on the Frosted Papers tomorrow!


Cool, right?  Now how did I create this sweet little tree? Actually, quite easily!  I used a petal punch!  Yes - all the tree branches are petals!  Using the GREEN foiled paper, I punched out a whole ton of leaves!  Then, working from the bottom of my cone, I started layering them on. I used some double sided tape for my adhesive.  I started with the larger petals and finished with some smaller, narrower ones. I love how flexible the foil is, but yet it holds it shape! Very cool.


Next, I die cut some cute banners using the gold foil paper. Using Glue dots, I added my banners around my tree as decorations. I also added a few small circle punched shapes to the tree and finished it off with a flower star punched shape - of course we needed a star on the top of our tree!  Some Glass Head pins were also pushed into the sytrofoam base to decorate. 


I hope you love this little project - I had a lot of fun playing with this exciting product.  I have a few more projects to share with you throughout the month, so stay tuned!

See you next time!
Jess


Monday, 4 December 2017

Atlantic Hearts Sketch Challenge #241

Hello friends!


It's time for another great sketch from Atlantic Hearts Sketch Challenge! Here it is:


Here is what I created:


I made this card using mostly retired products from the Close to My Heart "Hello Lovely" line. I added a gorgeous flower from Prima Flowers.  The sentiment came from the Finding the Words Stamp Set D1646 (retired).  I'm really working on using up my stash, so you will see more projects with older products. 

 I hope you will come and play along with us!

See you next time!

Jess
Friday, 1 December 2017

SparkleNSprinkle - Botanical Orchid

Hello crafty friends!


I'm here with a really cool looking card today that I designed for SparkleNSprinkle! This card features the new release stamp set called "Botanical Orchid". Surprise!  NOT another Christmas Card today! :)  This stamp set is sooo pretty and great for a variety of occasions!  


Dark cards can be so hard to photograph sometimes! So here is another angle:


As you can see, I created this card using a base of BLACK cardstock!  Not your usual choice when coloring, but I keep seeing this technique floating around so I wanted to give it a try!  First, I stamped my Orchid image onto the black cardstock using Versamark Ink and embossed with Gold Detail Embossing Powder. I added a few more flowers to the corners at random and did the same thing - stamp with Versamark and emboss with Gold Detail Embossing Powder. Isn't it amazing how all the light lines show up so well with the DETAIL Embossing powders? SO pretty!  Once I was done coloring, I cut out the panel I wanted.


Next, I really had to put my skills to work as I pulled out my Prismacolor Pencils and started coloring. I guess I should have kept track of each number of the pencils I was using, but I forgot to do that! :)  I know I used lots of purples and blues - I hope that helps!


Once that was completed, I had to decide on my sentiment! I love the "LOVELY YOU" saying and I wanted it to stand out, but not block, my background. I had some of the Hailstorm Craft Perfect paper still on my desk from my previous project, so I die cut a circle of that.  I stamped the "Lovely You" sentiment onto a piece of white cardstock using Versamark Ink and embossed with Antiquities Embossing Powder. I wanted it to be a tad different from th egold embossing on the flowers. I still wanted something else around the sentiment, so I used the "tips" of the flowers to add a border around the sentiment, stamping with Versamark Ink. I used Firefly Embossing Powder to add a very subtle hue. So pretty!


For the background, I wanted to use some of the really neat Craft Perfect Papers - so I chose the Crushed Metal to match the dark panel on the front. White mats were used to contrast the rich starkness of the dark panels and Craft Perfect Panel.  A tiny bit of pull ribbon was added around the front panel to add a bit of contrast and I tied on the sentiment with a thin piece of string. Cute! :)  Of course all my layers were adhered using 1/4" Tear-ific Tape - your craft room staple item! 

Finally, Crystal Drops in Crushed Grape, Violet Galaxy and Sweet Lilac were added for detail.


I hope you enjoyed the techniques I used on this card and I encourage you to go out and try them!  I would love to hear what you think of my creation, so feel free to leave a comment below!

See you really soon!

Jess