Tuesday, 31 May 2016

SparkleNSprinkle - June Reveal


Welcome to Sparkle N Sprinkle's
 June 1 New Reveal Blog Hop!

We have three new stamp sets to share with you today.  These new sets are 20% off until June 3.  So once you finish the blog hop, head on over to the store and start shopping.  All of the new sets are available on cling mounted rubber or as a digital image.  


The sets are:


 Roses 784 (digi version DIGI784)
  Wild Rose 785 (digi version DIGI785)
   Country Flowers 786 (digi version DIGI786)


On June 3rd, ONE GRAND PRIZE WINNER will be selected from the comments left on the Designers' blogs listed below. Please leave a comment with each Designer in order to be eligible for the Grand Prize.  You never know who the Mystery Designer will be that has the winning comment.

The Grand Prize Winner, which will be announced on the SNS Facebook page and on the SNS Blog, will receive ALL of the new stamp sets released this month (or the digi versions, if preferred).


The Blog Hop order this month is:

Chris
Belinda
Anne
Shona
Marie
Jess ----->You are here!
Eret
Diane

(*Tip: if you have difficulty with a particular link, try clicking on the Designer's blog title to send you to their Home page.)


We hope you enjoy the New Reveal Blog Hop as much as we do.  Thanks for joining us and remember to comment on each of the Designers' blogs to be eligible for the Grand Prize.  
 Wonder who the Mystery Host will be this month????


The Sparkle N Sprinkle Creative Challenge also begins today.  There are lots of prizes and recognition badges.  Come check out how you can become a SNS Featured Artist as well.  The theme is always Anything Goes using Loose Glitter, Embossing Powder, and/or Flock.


Have you checked out the SNS YouTube Channel featuring Demo Donna?  If not, then you are in for a real treat.  Subscribe today to get all the latest Demo Donna tips and techniques!


I sure had a lot of fun with this stamp set!


I started by stamping the image from Country Flowers using Memento Ink and watercoloring the flowers. I used the Pearlescent Watercolors and some of the Jade Nuance Watercolor Powder.  I just love how easy these products are to work with!


Next, I made my background using the Lace Technique and sticker paper!  Simply, I removed the adhesive backing on the Sticker Paper and carefully laid down my lace.  I sprinkled on the Ice Embossing Powder, removing the excess.  I then carefully removed the lace and quickly sprinkled on Aqua Marine Glitter.  I lightly tapped to remove the excess glitter, then heat set.  It made a really cool background!  I then added on some Hyacinth Glitter and rubbed it in, accenting that lace design even more.


I die cut out my colored image and matted using a purple background.  I also used a purple background for my lace paper. I took 2 strips of Tear-ific Tape and used Hyacinth Glitter to make a ribbon in the background behind my image.  I stamped the image onto watercolor paper again and painted 2 flowers, fussy cutting them out.  I used the Sakura Glue Pen to add some Hyacinth Glitter to the centers, then popped them up with Foam Squares. 

To finish off the card, I stamped the sentiment using Versamark Ink and used Black Detail Embossing Powder to highlight it. I then took my Pure Platinum Embellishment Mousse, and using my finger, applied as an accent/highlight to my card and sentiment. I just love this stuff!


I'm really happy how this card turned out!  Up next on our blog hop you will find Eret and you can find her blog here.

For more inspiration, don't forget to find me on Facebook :)

Until next time,

Jess
Friday, 27 May 2016

Gone Fishin'...again!

Hello friends!

I have one more card to share with you today over on the SparkleNSprinkle blog!


Here is the complete Supply List:


To start, I took a piece of the Silver Metallic Mirror Cardstock and cut out a large circle. I then ran it through my Big Shot with a diamond patterned Embossing folder to create the fun, textured background.


Next, I used 2 pencil marks to outline where my circle would be so I could center the stamp. I rubbed the paper with the Static Free Bag and then  I stamped the boat image from Gone Fishin in Versamark Ink, sprinkled on the Blackened Bronze Embossing Powder and heat set. 


I adhered my silver panel to the blue background using 1/4" Tear-ific Tape. Now, I had some fun!  I took a sponge and used the Pure Platinum Nuvo Embellishment Mousse and dabbed it around the image and the mirror cardstock.  I set it aside and went to work on my letters!


I lightly sanded the edges of my chipboard letters, then used the Pure Platinum Mousse again to cover them lightly.  After they dried, I pressed them into Versamark Ink, sprinkled on some Blackened Bronze Embossing powder and heat set.  I think they turned out pretty cool!


I adhered the letters to the card using 1/4" Tear-ific Tape.  I just love how this adhesive holds!  To finish the card, I stamped the sentiment using Versamark Ink, embossed with Military Green Embossing Powder and heat set.  I used the Nuvo Crystal Drops Glossy in Dark Walnut to add some accents and set it aside to dry for a couple hours.  Once they were dry, I popped up the sentiment using Foam Squares and added to my card.

I hope you enjoy this card and I will see you very soon for our next reveal!!

Until next time, 


Jess


Tuesday, 24 May 2016

Atlantic Hearts Sketch Challenge #161

Hello friends!

It's time for another great sketch over at Atlantic Hearts Sketch Challenge. Here it is:

Here is what I came up with using the Calypso Paperpack from Close to My Heart:


Be sure to come out and play along!
P.S. Like what you see?  Come and follow me on Facebook - I share a lot more there during the week! :) 

Until next time,

Jess

Saturday, 21 May 2016

MHKDesigns Monthly Challenge - May


Hello friends!


It's time for a brand new monthly challenge over at MHKDesigns Blog!  I hope you will be inspired by our creations and palette this month!

Here is the Design Seed:


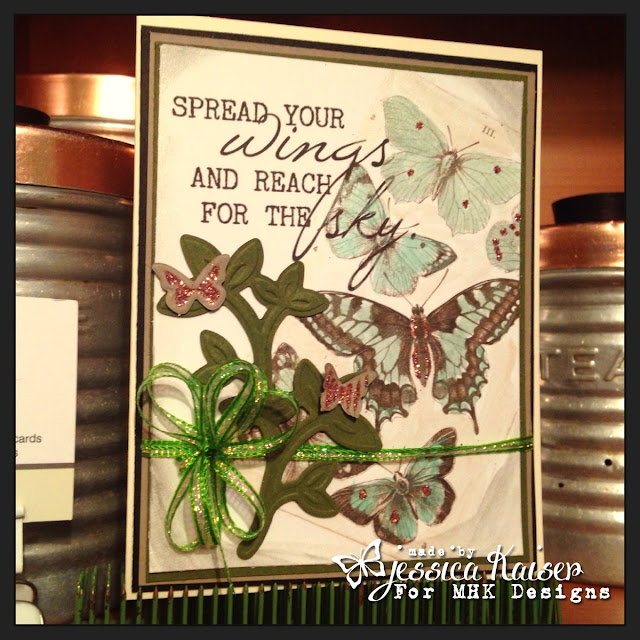
I decided to work with Butterfly Wisdom.  This is what I created:


I used pearlized watercolor paints to color the image, and then used lots of layers to set off the image.  Super sweet and simple :)

I hope to see you all come out and play along! 

Until next time, 

Jess

Friday, 20 May 2016

MHKDesigns - Designer Inspiration May 2016


Hello beautiful friends!


I'm here to share a card on the MHKDesigns Blog that I made using the stampset "Purr-fect".  I actually made it for the release month, but decided to hold off on sharing until now!


I just love this image - it prints off beautifully and all I had to do was watercolor a bit to add effect.  I printed off the Digital Paper - Serene Seaside Papers, Distressed Shells Mint and used that as my background.  I inked up the edges to add dimension and texture.  I simple yellow ribbon tied in a bow finished off the card. 

I hope you enjoy this card and are inspired to go out and create!

Until next time,


Jess

Creative Corner Challenges - Sponsored by Scribbles!

Hello friends!

Welcome to another week at Creative Corner Challenges!

This week, we are sponsored by the super fun 


I chose to work with this ADORABLE Hedgehog Peek-a-boo Stamp!


I printed him out, colored with watercolor pencils and blended with an Aquapainter.  Next, I fussy cut out the image, then covered it with Clear Embossing Powder!  Isn't he cute?


I do hope you will come out and play along with us for a chance to win the Sponsorship Package! :)

Until next time,

Jess


Monday, 16 May 2016

Gone Fishing with Sparkle N Sprinkle!


Hello friends!


I have a new card to share with you today featuring the new stamp from SparkleNSprinkle called "Gone Fishing".

Here is the complete supply list:


First I stared by making the background. I took 2 pieces of 1/4" Tear-ific Tape and adhered them across the bottom of my vanilla panel.  I sprinkled on Military Green Embossing Powder and heat set. I stamped the sentiment from the Gone Fishin Stamp Set on the top of the panel using Versamark Ink, sprinkled on the Military Green Embossing Powder and heat set. 

I cut a piece of vellum the same size as my vanilla panel.  I used the anti-static bag to prevent flyaway embossing powder, then stamped my fishing image using Versamark. I sprinkled on the Military Green Embossing Powder once again, then heat set.  To attach the vellum without adhesive, I simply used brads in each corner. 

I popped up the whole panel with Foam Squares and attached it to a brown layer of cardstock, then adhered to the cardbase using 1/4" Tear-ific Tape


To finish off the card, I added 3 Foam Sqaures, peeled off the backing and sprinkled on some Chameleon Glitter.

I hope you enjoy this card!  I love the silhouettes of the stamp set and the cute sayings!

See you next week with another fun card!

Jess

Friday, 13 May 2016

Just Go Fishing


Hello friends!


I'm back with another fun creation for SparkleNSprinkle, featuring the new Stamp Set called "Just Go Fishing".

I really love these stamps - so versatile and perfect for Father's Day!

Here is my supply list:


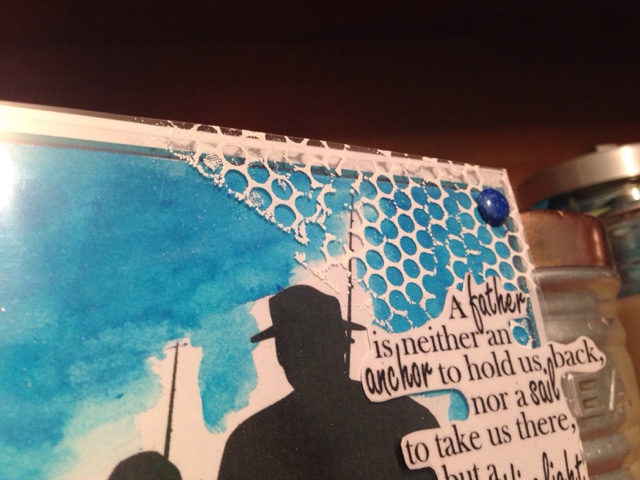
I first started by printing off the Digital Image. I cut it to 3.75X5 inches.  To paint the background, I gently sprinkled on the Ultramarine Blue Watercolor Powder, then took an AquaPainter brush to move the color around.  I think it created such a pretty background!  I adhered all my layers using Tear-ific Tape.


I added 2 more layers of cardstock to add some dimension.  I cut the Embossable Acetate to 5.5X4.25 - to cover the entire card front.  I swiped the entire piece of Acetate with the Anti-Static Bag.  I used Versamark to stamp the hoenycomb image from Journal Mixed Media to the corners.  I think it kind of looks like fishermen's nets!  Then I sprinkled on the White Detail Embossing Powder and heat set carefully (making sure not to melt the acetate!).


To make my brads, I used my Tweezers to hold the brad firmly.  I dipped the top into Versamark Ink, then dipped it into my Ocean Embossing Powder.  I heat set carefully and then quickly (while still warm!) re-dipped it into the embossing powder, heat setting a second time.  I love that you can create any color brad you want using this method!  

I let each brad cool down (be careful - they can get very hot!).  To attach the Acetate layer to my card, I simply punched holes in each corner of my cardfront (including the Acetate) and used the Brad to attach it.  


I fussy cut out my sentiment and then covered the entire piece with Versamark and Clear Detail Embossing Powder.  Once heat set, I attached to my cardfront using Tear-ific Tape.


I hope you enjoyed this card!

Until next time,

Jess