Showing posts with label SparkleNSprinkle. Show all posts

Wednesday, 3 April 2019

Easter Parade with SparkleNSprinkle

Hello crafty peeps!


I have a new card to share with your for SparkleNSprinkle today!  Since Easter is just around the corner, I thought it would be a great time to do some Easter inspiration. Do you send Easter cards?

For this card, I used the Easter Parade stamp set!  It's just too darn cute!

I colored the sweet chick & duck with my ShinHan markers, then fussy cut them out.  To make the little guys extra cute and fuzzy, I added Sun Dazzle Flocking using my Medium Nuvo Glue Pen.  I also heat embossed the rubber boots with a new embossing powder called "Neon" The sentiment was stamped with Versamark Ink right onto the background patterned paper and heat embossed with Black Detail Embossing Powder.  (I just loved this cute sentiment!)


For the eggs, I stamped the outlines in Versafine Clair Nocturne ink, then used a variety of embossing powders to decorate them!  They were simply cut out and arranged on the card front. Tear-ific Tape was used to adhere the whole works together. I love adding faux stitches to things, so I used a journaling pen to add a frame around my scene.  I cut a few hexagons using the tonic die for some background interest and added them behind my feature characters.


Thanks for stopping by today!  See you again really soon!

Jess

Supplies:
Stamps:  

Inks:

Embossing Powders/Glitter/Flocking:

Adhesives:

Dies:


Sunday, 17 March 2019

Easter Parade & Welcome Spring!

Hello crafty friends!


I have a brand new post to share with you today for SparkleNSprinkle!  It features 2 March Release stamp sets - Easter Parade and Welcome Spring!

Here is my SNS Supply List:
Other non-SNS Supplies:
- kraft, yellow and light green cardstock
- journaling pen
- Nuvo Crystal Drops
- ShinHan Markers

If you need a quick and happy spring card, this one is for you! First, I started by stamping my Welcome Spring daffodil image onto the kraft cardstock (approx 4.5x4.5) with Veramark Ink and heat set with Gold Detail Embossing Powder. I used Watercolor Pencils to color the daffodil. 


On a sheet of white cardstock, I stamped the cute little birdie using black ink and colored the ears & feet with ShinHan markers, then covered the body with Dimensional Glue. I sprinkled on the Sun Dazzle Flocking, tapped off the excess and let it dry.  Cute little fuzzy duckling!!
The sentiment was stamped with Versamark Ink and heat set with Black Dtail Embossing Powder. To the cardbase, I covered the edges with 1/2" Tear-ific Tape, then sprinkled on Dandy Dandylion Embossing Powder and heat set to create a border. 


The layers were all attached with 1/2" Tear-ific Tape. Once my birdie was dry, I attached her with some foam squares for dimension. Finally, I used a jouranling pen to create faux stitching around the edges.


Super cute!

Thanks for stopping by!


Jess

Sunday, 24 February 2019

SparkleNSprinkle - Golden Winter Deer

Hello crafty friends!


I have a brand new handmade card to share with you today for SparkleNSprinkle - and instead of a long, boring written tutorial, I made a YouTube Video!  :)  

Here is my SNS Supply List:

Stamps

Glitter/Embossing Powders

Inks:

Adhesives:

Other:

Supplies from my stash:
Nuvo Embellishment Mousse - Indian Gold
Nuvo Craft Perfect Paper - Mirror Gold

Here is my process video - it was actually recorded from a Facebook Live demo...so don't mind some of the chatter while I talked to folks who were watching ;) 


I will be doing more videos like this instead of long blog posts - so I hope you like it!  

Thanks for stopping by and I will see you again soon!

Jess

Sunday, 10 February 2019

SparkleNSprinkle - All About the Tulips

Hello friends!


I have a quick and easy project to share with you today for SparkleNSprinkle!  It's a beautiful mixed media wall art piece!


Supply List:
Stamps:
Brocade Backgrounds 398P4 Rubber Stamp Set

Embossing Powders:

Inks:

Tools:

Embellishments:

Other: 
12x12 Patterned Paper
White Cardstock

This piece actually came together quite quickly. I was just playing around with different inking and sponging techniques and voila!

I started by stamping the Brocade Backgrounds stamp across the left hand side of the page with Versamark Ink and heat embossed with Opaline Embossing Powder.


I used the DIGI stamp set in Microsoft Word to combine the wreath & sentiment. I printed off the wreath as large as I could on a piece of white cardstock. Once I cut the wreath out, I sponged on the lighted shade of ink from the Nuvo Hybrid Rose Garden Inks, then set aside to keep working on my background.


To add a little subtle background, I used the Butterfly Stencil along with the ink set in the 4 corners of my background paper. I really love how beautifully it turned out.


For more mixed media feeling, I sprinkled on both Super Thick Gold Embossing Powder and the brand new Berries & Cream Super Thick Embossing Powder and heat set from underneath until it was all melted. I did this randomly over the page, concentrating on the upper right hand side. I love how it turned out!


Using the Flourishes 2 stamp set, I added a little flair to the corners. I did some more sponging around my edges of the paper and attached a ribbon across the center, then added my fussy cut wreath with foam squares. 


Finally, accents with the Nuvo Glitter Drops were added to embellish the page.  I found a sweet little charm in my stash and added it at the end of the sentiment.  


I hope you enjoy this page!  You could easily turn it into a scrapbook page by added a photo box instead of the sentiment in the middle of the wreath!  I just love how versatile these sets are and how you can easily incorporate both digis & rubber stamps into the same project.

See you again soon!

Jess

Sunday, 20 January 2019

One Wild Ride with SparkleNSprinkle

Hi Crafty Friends!
It's time for another SparkleNSprinkle January Release. Today I'm using "One Wild Ride" add we are making a masculine card. Ready?

Here is the supply list:
SNS Supply List:

I really wanted to have a distressed, masculine feeling....and I think I accomplished it.... so lets see what you think!

I started by stamping my motorcycle with Versamark Ink and embossed with Black Detail Embossing Powder.  I colored it with Aqua Flow Pens. Then I went to town with Super Thick Embossing Powders!  I randomly sprinkled on Fleur de Lis & Blackened Bronze Embossing Powders and heat set from  the underside until it melted. Seaspray Green Embellishment Mousse was rubbed on the edges of the panel for more aging of the paper. I used an edge distresser and gave the edges a good distress. 

I used an embossing folder on a piece of craft metal for the back panel and then I used some sand paper to distress the top.

 
I accented the card with Silver Lining Crystal Drops.  I think that is all a masculine card needs for embellishment, don't you?

Have a great week!
Jess

Sunday, 13 January 2019

Rose Heart with SparkleNSprinkle

Hello crafty friends!
It's time for a January New Release from SparkleNSprinkle!  I am featuring the Rose Heart Rubber Stamp Set!  It's a gorgeous stamp that you can layer with and do two-step stamping.  It's a really versatile set, and perfect for making those special Valentine's Cards! 

First, as always, my SNS Supply List:
-------> To create my background, I did random stamping on a piece of kraft cardstock using the heart stamps and Black Shadow Ink. I really wanted a random pattern.  For one of the hearts, I stamped the second layer with Versamark Ink and heat embossed with Copper Embossing Powder. The panel was cut to a 3.75x5 inch piece. This gave a nice focal point.
 
On a separate piece of cardstock I did the multi-layer stamping with light pink, dark pink and the Black Shadow Ink, then fussy cut out the heart. 
 
Now, I decided to have a bit of fun with my Embossing Powders!  I created my own "custom blend" using Rosa, Lana Pink and finely crushed up Sunkissed Copper Gilding Flakes!! I always have a few empty jars on hand so I can put my "custom creations" in them.  You can also purchase them HERE if you want to grab some for yourself!  I applied strips of 1/2" Tear-ific Tape around the outside edge of my cardbase, then removed the protective backing and sprinkled on my custom blended embossing powder. I made sure to heat set well. Then I added my kraft panel (with Tear-ific Tape of course!), popped up my fussy cut heart and stamped a sentiment using Versamark Ink. I heat embossed the sentiment with Rosa Embossing Powder and adhered it with foam squares. 
 
Embellishments were some simple gold/white twine from my stash along with some of the HAI Supply Flower Cup Sequins (which were adhered with Nuvo Deluxe Adhesive). 
Want to save 10% on your next SNS Purchase? Use code JessDT10 at checkout!  
See you next week!
Jess

Thursday, 3 January 2019

Creative Knockouts #279 - Celebrations with SparkleNSprinkle

Hello friends!

It's time for a new challenge over at Creative Knockouts Challenge #279!  Our theme this week is  "Celebrations" and our sponsor is SparkleNSprinkle.  Since I have many, many, many SparkleNSprinkle Stamps, I decided to pull out an oldie, but goodie!  I used the "Disco Fever" rubber stamp for my card, but you can also find the digital version HERE.


Disco Fever Rubber Stamp set [00-772P6]


Here is what I created:


I stamped the main image using Nuvo Hybrid Black Shadow ink and watercolored with the Nuvo Aqua Flow Pens.


I hope to see you at the challenge! :)  PS- did you know that you can grab 3 free digs on the SNS website?  Go check it out! :) 

Until next time,

Jess

Friday, 28 December 2018

What's Mew?

Hi there!

I have a super sweet handmade card to share with you today for SparkleNSprinkle!  First up, here is my complete SNS Supply List.

Supply List

Let's get crafting!

Step 1 - Stamp & Color Your Focal Images

I stamped the kitty onto a piece of white cardstock and colored with the Nuvo Watercolor Pencils. I wanted to add a little texture to the kitty, so I added some Dark Chocolate Flocking to his tail using the Medium Nuvo Glue Pen.
  

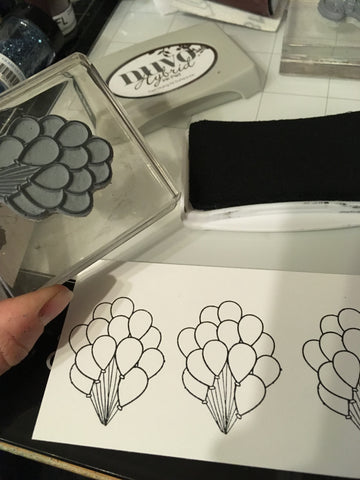
To make my balloons - I actually "doctored up" my rubber stamp by cutting the balloons from the kitty! This way, I can use them together OR separately! I stamped the balloons 3 times, then colored with my Aqua Flow Pens. Once it was all dry, I fussy cut out the kitty and the balloons. 

Step 2 - Create the Background

For the background, I die cut some of the Hailstorm Craft Perfect Paper using a layered die set. I wanted some sparkle around it, so I used the next size up to die cut a piece of sticker paper, then sprinkled on the Priceless Peacock Glitter, burnishing well with my finger tool.  I adhered the layers together using 1/4" Tear-ific Tape. 

Step 3 - Assemble & Embellish

I chose a fun, retro patterned paper for my background, then added my layers. I stamped my sentiment with Versamark ink and embossed with Madagascar Green Embossing Powder, To some of the balloons I added some of the Morning Dew Crystal Drops to make them shiny and add some unexpected texture.

Some of the Caramel Cream Crystal Drops were added to embellish. I tied a bit gold string from the balloons to the kitty! 
I hope you enjoyed this fun kitty card - I can't wait to share with you all the SNS goodness in 2019!
Jess

Friday, 14 December 2018

Violets for You Surprise Card

Hi crafty friends!  Happy Friday!


It's December reveal time at SparkleNSprinkle and today's card features the beautiful new stamp set, Violets for You! Now what do you think the surprise can be?

First, I'll share with you the SNS Supplies I used to create this beautiful handmade card:

Have you been in suspense long enough? Here's the inside....it's a pop up card!

\
I broke down the creation of this card into 3 basic steps. 

Step 1 - Stamp & Color

Stamp the images using Versafine ink, then color using a mix of Nuvo Aqua Flow Pens & Nuvo Marker Pens.  You can make the all shiny and pretty using Shamrock Glitter (on the leaves) and Hyacinth glitter on the blooms. Once you are done with glitter, fussy cut out all your images.  
  

Step 2 - Fold & Score the Base

Take a piece of light brown cardstock, approx 6'x11' and score it at 5.5". Then score on either side of center at 4.5", 5", 6" and 6.5", creating an accordion center. 
  

Step 3 - Assemble and Embellish

On the inside of the card, use Tear-ific Tape to adhere you Violet pots wherever you want them to stand. Stamp your seniment with Versamark and emboss with Venus Violet embossing powder.
For the front, add simple layers using cardstock, the Craft Perfect Hail Storm Paper and the Kaisercraft Memory Land Paper Pack. Finally, embellish with the Violet Galaxy Crystal Drops.

Who would you cheer up with this beautiful card?  Thanks for stopping by today. I hope this card brought some inspiration and happiness into your day!
See you again soon!

Jess

Friday, 7 December 2018

Big Birthday Wish

Hello crafty friends!


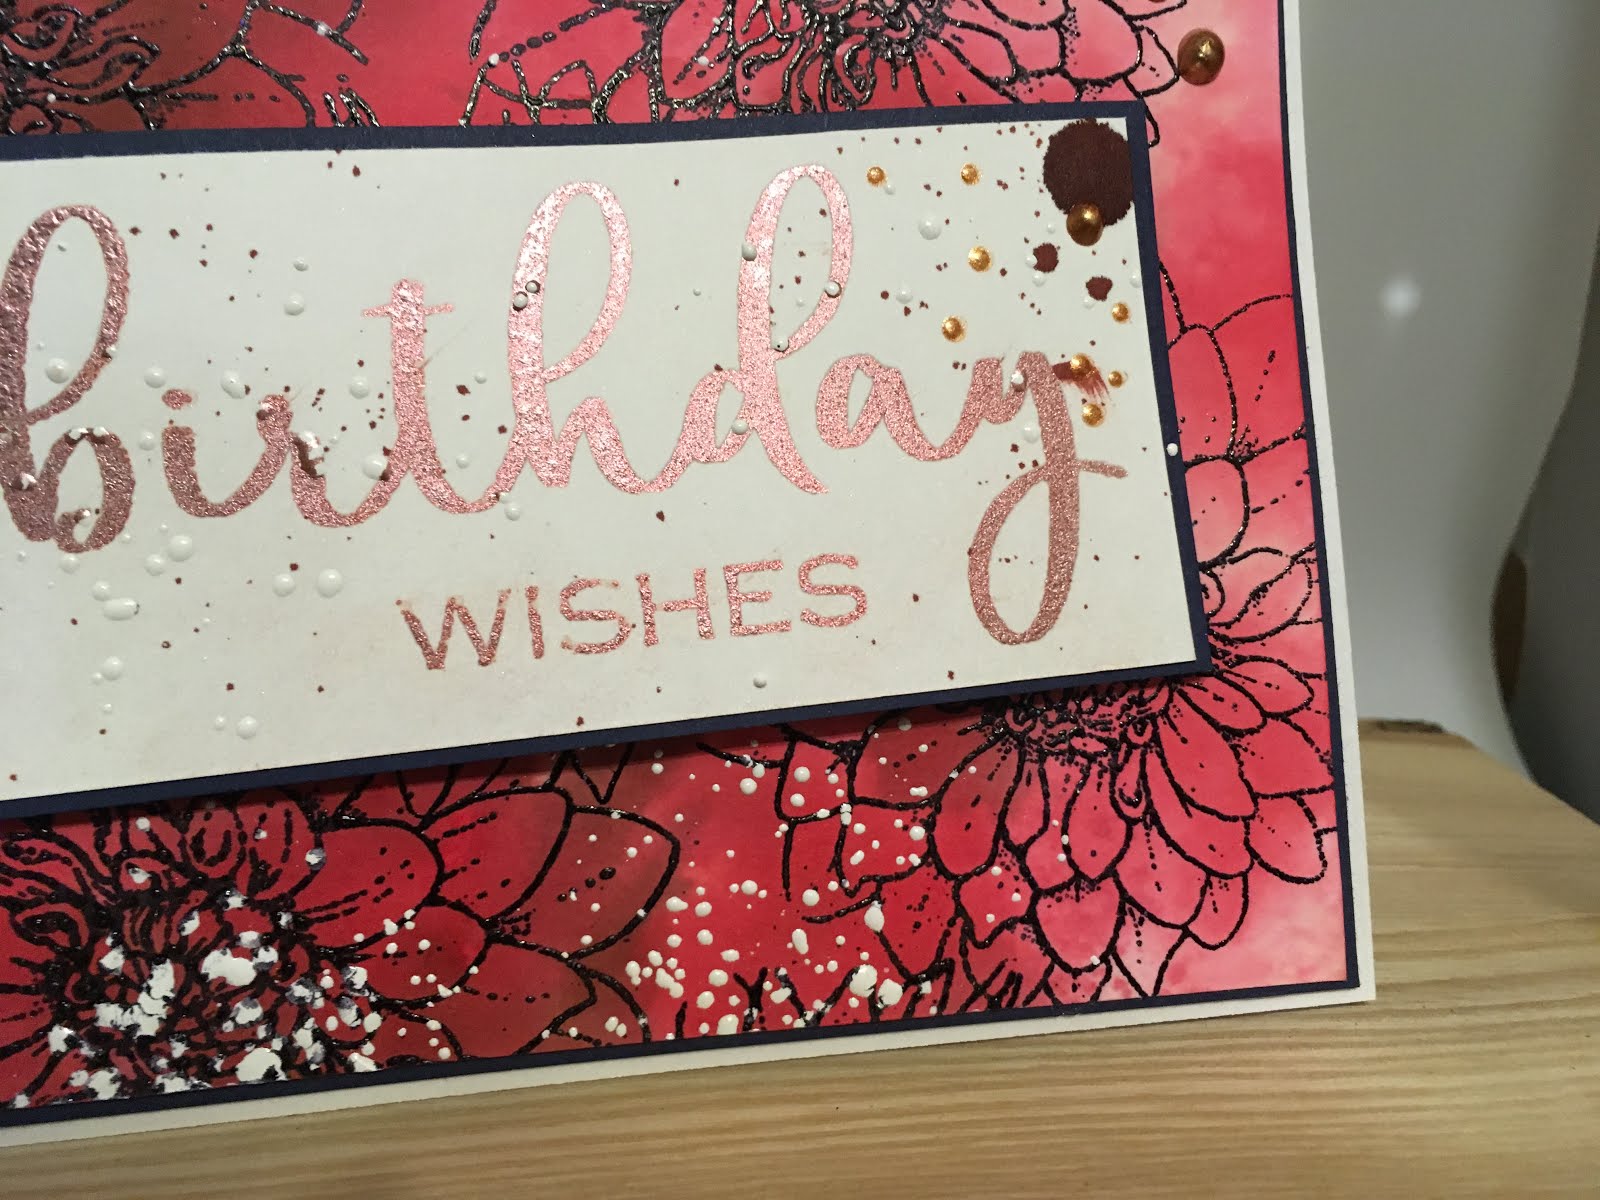
I have a brand new SparkleNSprinkle December reveal card for you today! I decided to mash an old favorite with the new release - that fave is the Dahlia Rubber Stamp Set. I love the big, bold flowers with the beautiful scripted words in the new release "A Big Birthday Wish". I can see a whole bunch of handmade cards being created with this set.  The card I created for you today is a standard A2 (4.25"x5.5") card. 


Supply List:

Big Birthday Wish Rubber Stamp Set #931

Black Detail Embossing Powder EP171

Dahlia Rubber Stamp Set #500

Nuvo Aqua Flow Pens - Assorted Sets

Super Thick White Embossing Powder EP355

Versamark Ink VM001

Nuvo Crystal Drops - Copper Penny 654N

1/4" Tear-ific Tape SAT01

Bronze Rose Embossing Powder 335

I also used black and white cardstock from my stash.

Step 1 - Create the Background

The background was created using the same "ink smooshing" techniques in a few of my past posts, such as this one HERE.  Once I was happy with the colors, I trimmed down the cardstock to size and sprinkled on some Extra Thick White Embossing powder for texture (heat set from the under side). I used black cardstock to mat the background. 


Step 2 - Sentiment

I used Versamark Ink to stamp the sentiment onto a piece of white cardstock and embossed with Bronze Rose Embossing Powder. I love the shimmer to this power - so pretty! It's a cosmic powder, so you can simply wipe any "halo" it leaves off with a swiffer cloth (or something similar). I used the same random sprinkling technique with the Super Thick White Embossing powder on this piece as well.  The sentiment as adhered to a piece of black cardstock with 1/4" Tear-ific Tape. 

I wanted to tie in the sentiment to the background a little bit, so I let a large drop of ink from the Aqua Flow Pen drip into the corner. I think this gave the handmade card an almost "gothic" feel!


 Step 3 - Put it Together and Embellish!

I adhered the sentiment to the card with the 1/4" Tear-ific Tape and added a few drops of Copper Penny Crystal Drops to embellish. I can never be without Crystal Drops on a card these days. I love them!
  

Such a bold card - I really loved how the background stood out on this handmade card. I'm so glad you stopped by today!  I really enjoy reading your comments - so feel free to say hello!  See you really soon.

Jess

Friday, 23 November 2018

SparkleNSprinkle - Koi Pond Beauty #2

Hello friends!


For my final SparkleNSprinkle November Release, I made a card using BOTH the new release stamps of "A Big Thanks" and the "Koi Pond Beauty". This follows a similar technique as my first card. 

Here is my SNS Supply List:

Step 1 - Create Your Background


You can follow the "smooshing" technique I did HERE. I also did the same technique for the floral portion. The Nuvo Aqua Flow Pens are going to become your best friend for this technique!


Step 2 - Stamp and Color Your Images


Once again I stamped using the Nuvo Hybrid Ink in Black Shadow.  I like to play surgeon with my stamps sometimes and cut them apart into two pieces. For the flower, you can see that I cut the "water" portion off. I can still use them together or separately - easy peasy!  I used the sentiment from "A Big Thanks". I inked it up with Versamark Ink and heat embossed with Madagascar Green Embossing Powder.

Around the edges of the background, I used the second flower to stamp in Versamark Ink and heat set with Clear Detail embossing powder. It added a little extra dimension to the background.


Step 3 - Build Your Scene!


I arranged the Koi,flowers and sentiment onto the card front. For the background, I added a border of 1/2"Tear-ific Tape and added Baby Blue Embossing Powder (heat setting). A few spashes of the Aqua Flow were sprinkled onto the card. 

Step 4 - Sentiment and Finishing Touches

I added "bubbles", using the Nuvo Crystal Drops in Morning Dew.  I also added some drops of Aquatic Mist Glitter Drops.  I added Luau Green Glitter to the flower as well. Everything needs a little sparkle ;)


I hope you enjoyed this card - and thanks for joining us for our November reveal month!

See you again soon!

 photo MHKDesigns_FreshByJess_Signature.png