Showing posts with label Embellishment Mousse. Show all posts

Friday, 14 September 2018

SparkleNSprinkle - Great Horned Owl Halloween

Hi Crafty Friends!
I am sooo excited to share this cool mash-up card I made featuring this month's SNS Great Horned Owl Stamp Set!  I actually used the Digital Version of the stamp along with a previous release, When Black Cats Prowl!  Even more fun?  It GLOWS in the dark! :) Perfectly spooky for Halloween!
Here is my SNS Supply List:

This is a great technique that you can use for a variety of backgrounds. I started by printing off my digital images. I simply created the scene I wanted in word. I did flip the bat so they were opposites. That is the best part about digital stamps - you can manipulate them and build a scene!


Once I had it all printed, I punched out a moon shaped piece of cardstock to use as a mask over the owl - I didn't want to cover him up with the Embellishment Mousse!  I then proceeded to simply add my layers of mousse - starting with my Orange Blush around the outside of the mask. I built my layers with a sponge from orange, to Coastal Surf, to Pacific Teal and finally the darkest, Seaspray Green! When I had all the blending where I wanted it, I removed my mask and finished off with the Lemon Sorbet to fill in the "moon" and behind the sentiment.

As I had covered up the bats somewhat with mousse, I wanted them to re-pop a bit, so I used my Sakura Glue Pen to adhere some Black Ice Glitter.

My final touch was the Glow in the Dark Embossing Powder which I added using the Sakura Glue pen. I added it to his eyes, and then made some "stars" in the sky.


Happy cardmaking! :)  See you next time!

 photo MHKDesigns_FreshByJess_Signature.png

Saturday, 30 June 2018

Canada Day Banner

Hello crafty friends!


I'm here with one last fun June post for SparkleNSprinkle!  It's time to celebrate Canada Day in style with some home decor - a fun Banner! I used the adorable Sophie Pup Stamp set one last time.

Here is my full SNS Supply List:

SNS Supply List


If you remember my previous post HERE where I used Sophie earlier in the month, you will see I used a similar technique to color my Sophie!  I love my Nuvo Marker pens!!!  Once she was colored, I fussy cut out my images.
 

Then, I grabbed my Nuvo Smooth Precision Glue Pen and added some Diamond Dust Glitter.  I just wanted a little extra SPARKLE! Who doesn't love sparkle?


Next, I grabbed my Tonic Beautiful Bunting Grand Gala Dies an cut my banner pieces!  So easy!  I used the Fireworks Embossing Folder again too - but you can use the the STENCIL again to create the same technique!  Simply use a stylus to dry emboss from underneath the paper.


I wanted to really emphasize the fireworks, so I reached for my Nuvo Embellishment Mousse in Pure Platinum and just scraped it across the embossed areas using a palette knife. There was no particular plan with this - just a little extra something something! :)


I started to build my banner decorations!  I stamped an image from the Journal Mixed Media stamp set onto some die cut Sticker Paper using Versmark Ink and heat embossed with Red Apple Embossing Powder!  I thought that would add a fun background and some extra interest to the banner. 

Next, I simple adhered my Sophie and Canada Flags to the sticker papers using 1/2" Tear-ific Tape.  Then I adhered them to the banner!  My sentiments actually were made using the Sophie DIGI Set!  I wanted them enlarged so they would really stand out!  I used some thicker twine as my banner anchor.  Once it was done, I decided that I needed a little extra something on it - so I die cut some Tonic Craft Perfect Papers in Hailstorm and added the little bits to the banner!


There you have it  Some super cute Home Decor ideas for your next party!  You could always swap out Sophie for our Baxter Pup Stamp Set to make some cute Fourth of July Banners!


I hope you had fun and will go and make some banners of your own!!

See ya soon!

Jess

Friday, 6 October 2017

SparkleNSprinkle - Birdhouse Friends

Hello friends!

I have another fun card to share with your for SparkleNSprinkle!


Supply List (SparkleNSprinkle):

Other Supplies:
Brown Cardstock, White Cardstock, Blue Cardstock
Embossing Folder
Big Shot Die Cut Machine


I just had so much fun making this card! I started by stamping my Birdhouse image onto a piece of white cardstock and watercoloring it using the always fun Nuvo Aquaflow Watercolor Pens.  After it was dry (which was pretty instantly!) I used the Eastern Oyster Die set to cut out the image. I set that aside and went to work on my background.

First, I used a embossing folder to add some texture to the brown cardstock. I rubbed on the Fresh Copper Embellishment Mousse to really accentuate the embossed areas. It sure leaves it with a beautiful shine.  Next up was some mixed media FUN!  I sprinkled on the Copper Flame Embossing Powder along with some Super Thick Gold Embossing powder randomly  and heat set from underneath the paper!  This was a fun method of applying the embossing powder without any ink or adhesive. 


Using the Eastern Oyster Die set again, I cut out a piece of aqua blue cardstock and a piece of Super Adhesive Sheets. To the Super Adhesive Sheets Die Cut I adhered by focal image to the center, then sprinkled on Dark Chocolate Flocking around the outside edge, burnishing it in well. 

I adhered all my pieces together using 1/4" Tear-ific Tape (this stuff is worth its weight in GOLD!) and then I had one more trick up my sleeve!  I wanted to add a bit more texture, so I added a bit more of the Copper Flame Embossing Powder. While it was still HOT, I quickly stamped the Flower image from the set into the hot embossing powder and it left it's imprint!  A quick tip - ink up your stamp with Versamark Ink before stamping into the hot liquid to avoid it sticking to your stamp.


Finally, once everything was cooled and well adhered, I added some of the Neptune Crystal Drops as finishing touches.


I hope you enjoyed my tutorial and go give some of these techniques and tricks a try!  See you again really soon!

Jess


Monday, 14 August 2017

SparkleNSprinkle - August 2017 Reveal

Welcome to the August
Sparkle N Sprinkle New Reveal Blog Hop! 


We are now revealing our new stamp sets on the 15th of each month.  On the first of the month, a new video kit club will be revealed.


NEW STORE - NEW BLOG - NEW PRODUCT LINES! 

We are continuing to add new product lines, so be on the look out for them.  


We have four new rubber stamp sets, a new digi-only stamp set, a new digital paper pack, plus one huge digi bonus bundle being revealed this month.  

The sets are:

Digital Version: DIGI859BG
Digital Version: DIGI865LS
Digital Version: DIGI866J
Digital Version: DIGI867


DIGI3131M Christmas Spirit Fairy (digi only)

DIGI4007LS Saguaro Desert Landscape Paper Pack

DIGI867-815-3128B Four Seasons Digi Bonus Bundle (combines Autumn Berry Wreath with lots of additional colored images, sentiments, and digi papers) 


You are definitely going to want both the digi version as well as the rubber version because when you purchase the digital versions, there are lots of extras that aren't available otherwise.  These extras can include additional images, additional sentiments, digi papers (in some cases), and a cut file.


The new sets are 20% off until the 20th of the month.  Head on over to the SNS store once you've finished the Blog Hop and start shopping.

One GRAND PRIZE WINNER will be announced on the 17th of the month.  One of the Designers is our Mystery Host and the winner will be selected from comments left on her blog.  You must leave a comment on each of the Designers' blogs in order to be selected as the winner, as you never know who the Mystery Host will be.  This is checked for compliance.

The GRAND PRIZE WINNER will be announced on the SNS Facebook page and on the SNS Blog and will receive all the rubber stamp sets revealed this month.

The Blog Hop order is:
(Tip: if you have difficulty with a particular link, try clicking on the Designer's blog title to be directed to their Home page.)
Jess - you are here! :)


We hope you enjoy the New Reveal Blog Hop as much as we enjoy creating new projects for it.  Be sure to visit the SNS Blog for even more inspiration.  Something new is posted most every day.


Did you know that SNS has a You-Tube Channel?  If not, then you are in for a real treat.  Subscribe today to get all the latest tips and techniques!


The Sparkle N Sprinkle Creative Challenge group is on Facebook.  

This is a closed group (just trying to keep out spammers), but we want anyone who wants to participate to join.  Click on the link and join in on the fun today! 

The Creative Challenges run from the 1st - 25th of each month.  A SNS image (either rubber or digi) is required.  If you don't have any yet - no worries - there are some freebies located on the Home page of the SNS website.  Just scroll down the page a bit to see them. 

The Creative Challenge Winner and Top Three will be posted on the last day of each month.  The winner will receive a $15 Gift Certificate to go shopping at the SNS store. 

Please review all the Challenge Rules before submitting your photo 😀.  We can't wait to see what all you create using SNS images.

~~~~~~~~~~~~~~~~~~~~~~~~~~~~~~~~~~~~~~~~
I chose to work with the Autumn Berry Wreath 867 stamp set.  I just love it!

Here is my supply list:


I started creating this card by making my background. I had a template of circles pre-cut and I used that as my stencil. I added a layer of the Fresh Copper Embellishment Mousse first, moving the stencil each round just a touch. I used a sponge to apply the mousse.


Next, I grabbed mini-mister and added some of the Indian Gold Embellishment Mousse and water to the mister, shaking well to dissolve.  I used this as my shimmer spray!  I used the same stencil and sprayed a few layers of the Gold Mist on. 


Next, I used the Crackle Background Stamp to add texture. I inked it up with Versamark Ink, stamped and embossed with Copper Embossing Powder!  GORGEOUS!


My focal Wreath image was stamped with Versamark Ink, embossed with Copper Embossing Powder and colored using the Aquaflow Pens. I just am in love with these watercolor pens. So easy to work with and blend.  The sentiment was also stamped with Versamark INk and embossed with Copper Embossing Powder. I added some Fresh Copper Embellishment mousse to the edges of my paper pieces to age them a bit and give a fall/vintage feel.


 Finally, accents of Dark Walnut Crystal Drops were added to finish off the card. I used some hemp twine, burlap and brown satin ribbon to accent the card. All the layers were adhered with 1/2" Tear-ific Tape. 

I hope you love this card! I  loved making it. Here is a sneak peek of a few other projects coming this month:


The next stop on the SNS Blog Hop is the tremendously talented ANNE and you can find her blog HERE.


I'm also entering this card in the following challenges:
Little Miss Muffet Challenges #169 
Classic Design Team Open Challenge August

Thanks for stopping by!  See you next time!


Jess

Friday, 30 June 2017

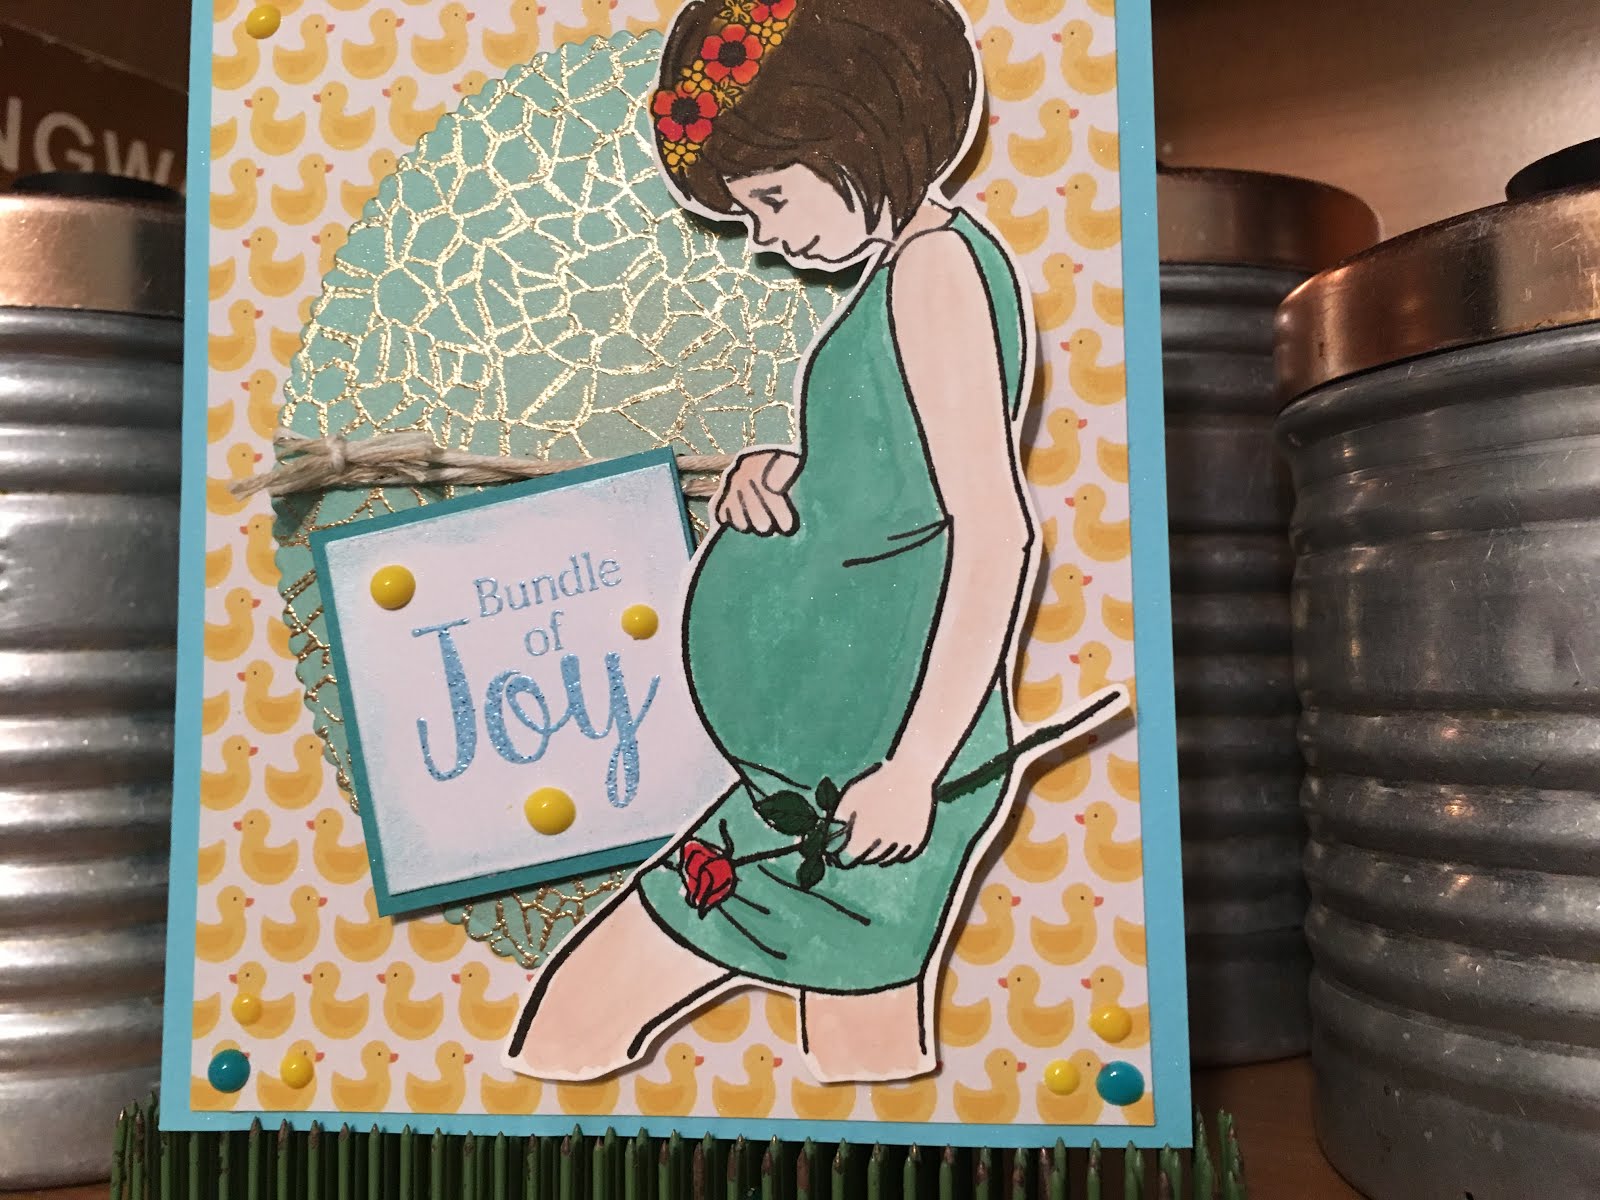
Baby Oh Baby #2


Hello friends!


It's time for another card for SparkleNSprinkle!


Today I used the "Baby, Oh Baby" stamp set again to created a gorgeous baby card.

Here is the supply list:


To start making this card, I stamped the main image onto a piece of white cardstock. I fussy cut out the image. I used the new Aquaflow Watercolor Pens to color the image. They are SOO much fun to use and so easy!  


While that dried, I started working on my background.  I die cut a piece of Aqua Cardstock into a large oval using the Mixed Edge Oval Die set from Tonic.  I just love these essential dies!  I used the Crackle Background Stamp with Versamark Ink onto the oval and embossed with Butterscotch Embossing Powder. SOOO PRETTY!


I used this adorable rubber ducky patterned paper in the background.  All the layers were attached with 1/4" Tear-ific Tape. I stamped the sentiment with Versamark Ink and embossed with Poolside Embossing Powder.  I added a bit of Aquamarine Embellishment Mousse around the edges of the sentiment. 


Finally, I added some Crystal Drops in Dandelion Yellow and Caribbean Ocean. I just love how these drops finish off my cards. 


I hope you enjoy this card!  See you next time,

Jess