Hello friends!
My first tutorial for Rinea this month is making BOOKMARKS!!! I actually ended up making 3 different versions!!! We partnered with Joy Clair this month and I know the entire Design Team has come up with some amazing projects!
I used the following Supplies to create these bookmarks:
- Joy Clair Coffee Love Stamp Set
- Embossing Powder (assorted colors)
- Versamark Ink
- Coffee Cup Shaped Dies
- Embossing Folder
- scissors
- assorted cardstock
Let's get creating!
Bookmark #1 - Traditional Style
The first bookmark is a pretty standard one. It's 6inches long and about 2.5 inches wide. I used the Glossy Mocha/Gold foiled paper to create the base layer along with the backing layer for the sentiment! I stamped the super cute "Life Happens" sentiment with Versamark Ink and heat embossed with a brown embossing powder. I also stamped the coffee cup onto a light pink cardstock and fussy cut it out. From the Princess Variety Pack, I chose the pretty Glossy Lavender Light Purple/Gold .I used a chevron embossing folder to add some fun texture to the Foiled Paper. It really holds it's shape beautifully! Simply add your layers together with adhesive of choice and add a fun ribbon! I had this fun tinsel ribbon and used it for flare!
Bookmark #2 - Corner Bookmark
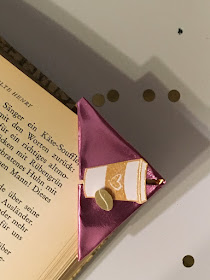
This bookmark comes together so quickly and easily - you could make some for "back to school" teacher gifts!!! I used the Glossy Blush Pink/Gold from the Princess Variety pack to make this bookmark. I cut a 6" square of the foiled paper, then started foilding! Fold the paper in half, bottom corner to top corner. Next, fold the bottom-left corner up to the top corner. Repeat with the right corner. Turn over, then fold the bottom corner – top layer only – up to the top corner. Unfold your last fold and fold back up, in the other direction, into the pocket. Clear as mud?
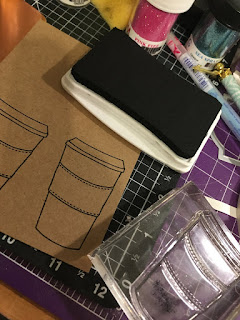
Haha - it's really pretty easy!! The foiled paper holds the shape and bends very easily. I decorated this cute bookmark with the small coffee cup stamp from the Joy Clair Set. I embossed it with a butterscotch embossing pwoder and added the little coffee bean for decoration! I did fussy cut the coffee cup.
Bookmark #3 - Coffee Cup
I loved this one the best I think! I used a large coffee cup die to cut a piece of cardstock and a piece of the Glossy Copper/Gold Foiled Paper. I embossed the foiled paper using a fun embossing folder, then glued the 2 layers together. I stamped the sentiment with Versamark ink and heat embossed with a mocha embossing powder. The cute coffee beans were stamped randomly aroudn the sentiment and it was matted onto a piece of the Glossy Mocha/Gold foiled paper. I also decorated the larger coffee cup stamp from the Joy Clair set with a mini cup and some scrap silver foiled paper. A little bit of ribbon topped with bookmark for flare!
I hope you enjoy these cute bookmarks! You will really love this Joy Clair stamp set as well - it's very versatile and I know I will make a lot of cards with it!
See you again soon!


No comments:
Post a Comment